Showing posts with label embroidery. Show all posts

Thursday, November 10, 2016

Something Pretty : :

Being creative and making art fills me with peace and hope, and certainly so much comfort and love. After the kids are off to school, that is how I move forward, every single day. It's a blessing I will never take for granted, and the same goes for this amazing community that brings us altogether. Peace, hope and love on any day are beautiful feelings, I think we can all agree on that. So today I'm excited to share my finished Garden Dreamer embroidered pillow. It's one of the prettiest things I've ever made and has me so eager for this collection, which I hear should be arriving any day!
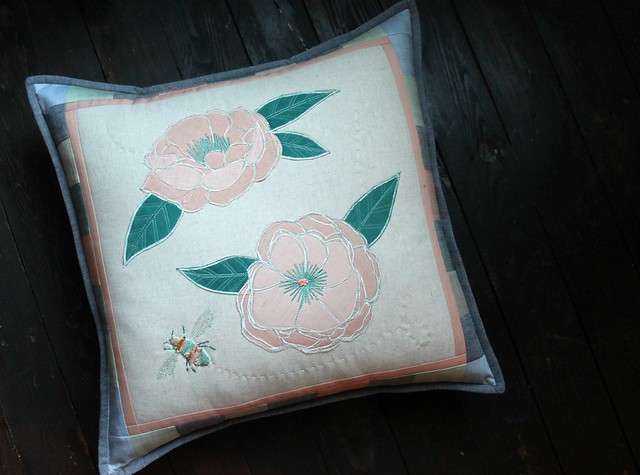
Garden Dreamer Embroidered Pillow

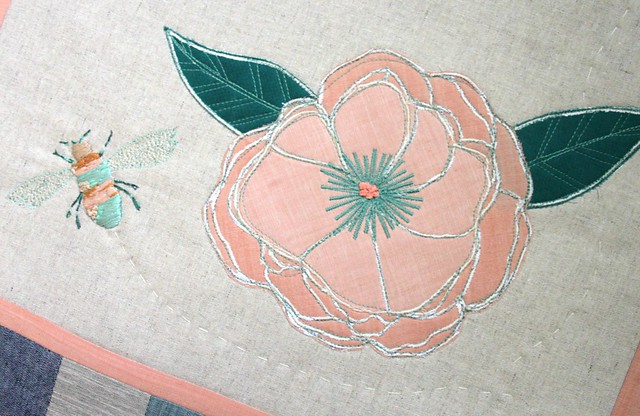
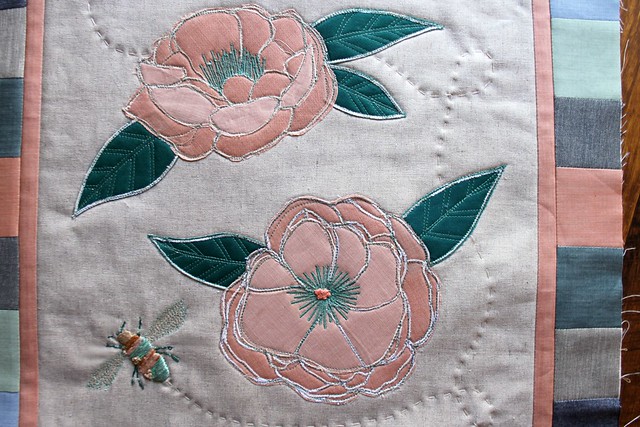
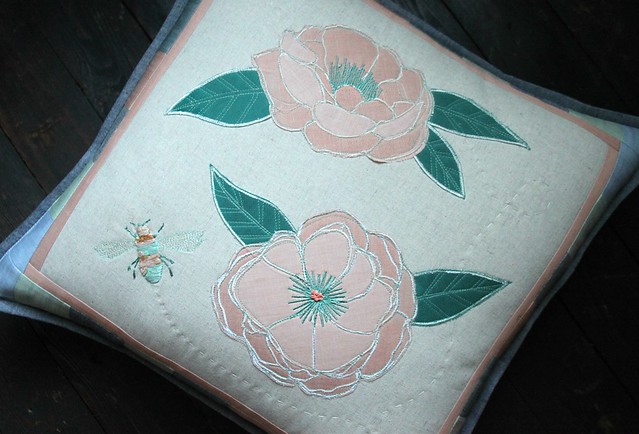
This project began with a blank canvas piece of AGF's new Soft Sand Linen. I enlarged and printed out both the peony sketches and the bumble bee that became two of my new Garden Dreamer prints, Sprinkled Peonies and Bumble Beez. Using a combination of applique and machine & hand embroidery I created a little piece of Garden Dreamer fabric.
Pretty Pillow

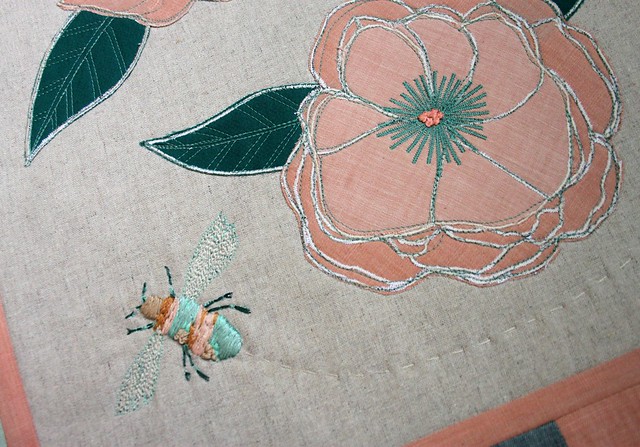
For the peonies I mostly used the sweetly colored Solid Smooth Denim in Nectarine Sunrise, using both the right and wrong side of the fabric. The slight color variation from front to back is just enough contrast to recreate the look and faint coloration of my Sprinkled Peonies in Fresh. For the stitching I used a combination of Aurifil threads and a couple of different stitches. I love the texture and style of this raw edge applique, it's so, so pretty!
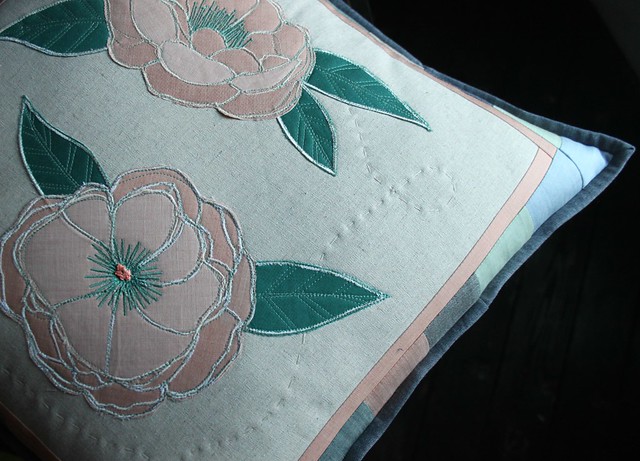
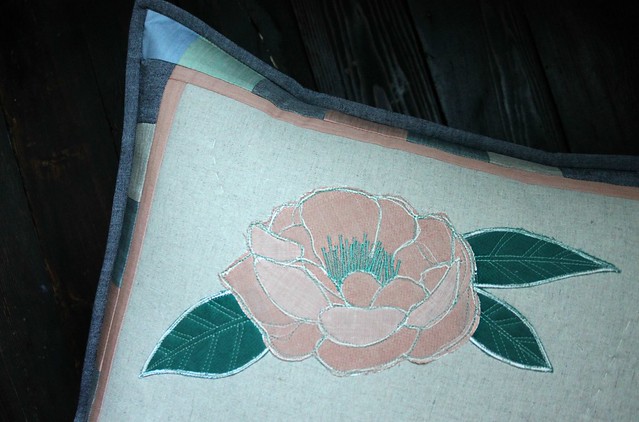
Garden Dreamer Pillow Details

Sprinkled Peony Applique

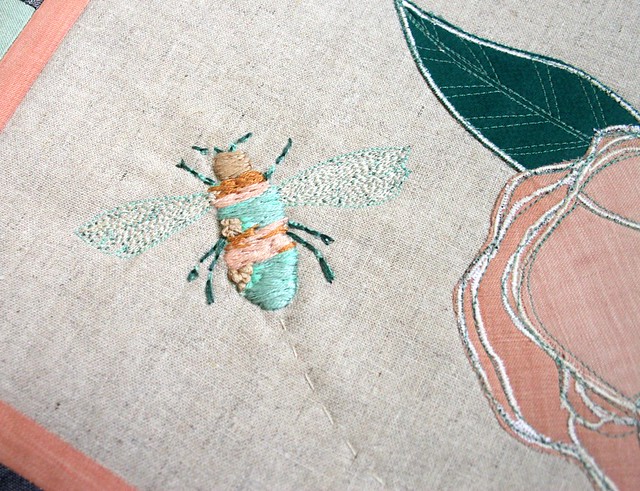
I first stitched out my bee with just my Janome sewing machine and Aurifil 50wt, using the straight stitch to draw it out and the satin stitch set at different widths to fill my bumble bee in with color. Once finished it looked a little too flat so I added a layer of hand stitching with a heavier embroidery floss and it made all the difference! I can't wait to use my Bumble Beez and Bumble Buzz prints for more hand embroidery projects!
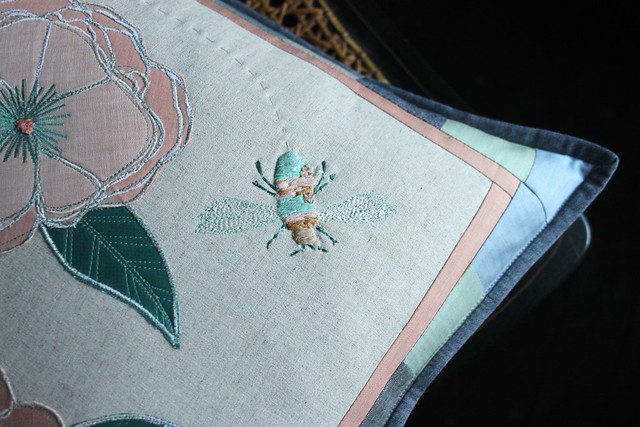
Garden Dreamer Pillow

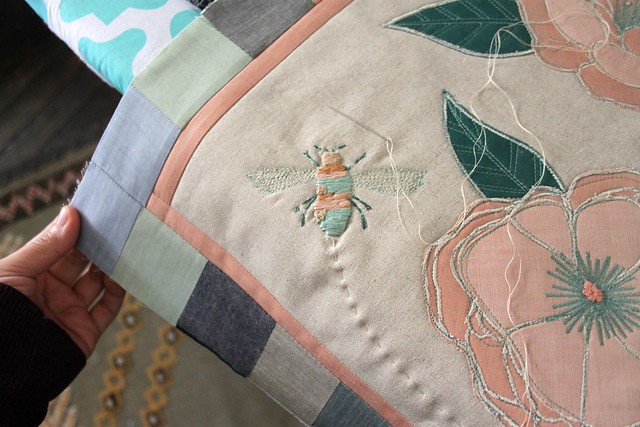
The pillow top was finished with a narrow border of Solid Smooth denim and patchwork, and for the backing and binding I used more of AGF's heavier weight denims.
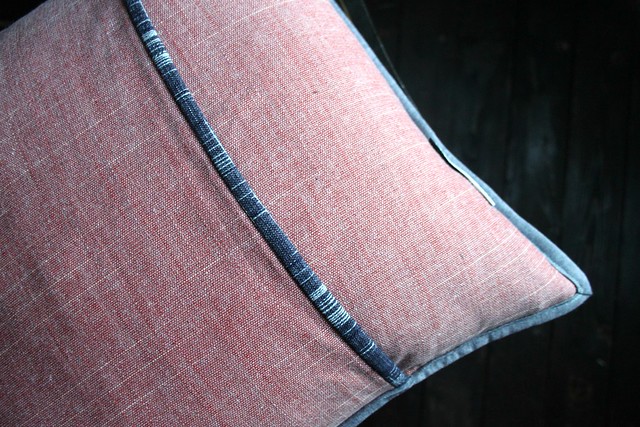
Pretty Pillow

Backed in Denim

I recently started using the logo part of selvage from my fabrics as tags, something I've never added to the things I make. Silly, I know! But I thought I'd share a little peek of how that looks.
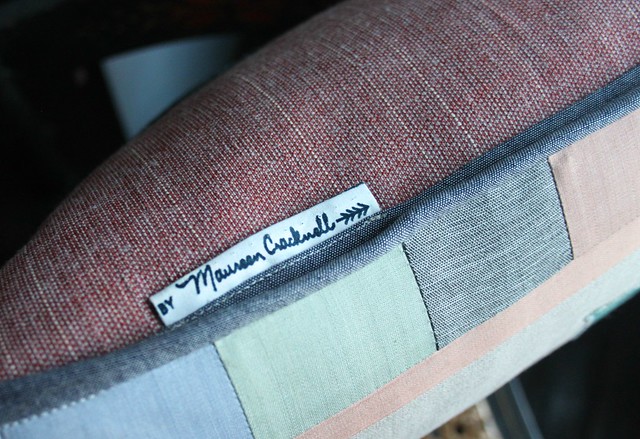
Selvedge Tags

Wishing all of you wonderful, creative people love, hope and peace today and always! ♡ Maureen

Monday, November 7, 2016

Garden Dreamer Stitching : :

It's going to be another week before my Garden Dreamer fabrics arrive and I cannot wait! I have so much planned for this new collection!

Bumble Buzz

Once again my overzealous nature has me already creating Garden Dreamer projects before I have a stitch of fabric in hand!

This time I decided to make my own Garden Dreamer fabric featuring two of my favorite designs, Sprinkled Peonies & Bumble Beez, using a lovely combination of hand & machine embroidery, applique, Aurifil thread, and AGF denim & linen!

Texture LOVE!

I began this project by enlarging my original, scanned bumble bee & peony sketches and printed them out to use as a guide for my applique and stitching. Then using a variety of Aurifil thread weights, raw edge applique, and both machine stitching on my Janome plus hand stitching, I recreated those sketches into fabric form. Art Gallery Linen and Denim made the perfect canvas for this project!

Hand Quilting with Aurifil 50wt

Unfortunately my photos don't show the amazing texture of this project, I love it!

Peony Appique

You can see that I framed my embroidered linen with patchwork in some of my favorite AGF denim colors.

Sprinkled Peonies & Bumble Beez

I plan to finish this into a new pillow this afternoon to share tomorrow, so be sure to stop back!

Happy Monday! ♡ Maureen

-------------------------------------------- 

* p.s. I'm thrilled to share that you can preorder Garden Dreamer at Lady Belle Fabrics here  -----> http://www.ladybellefabric.com/collections/garden-dreamer

Wednesday, October 8, 2014

An Arrow Sketch Pillow : :

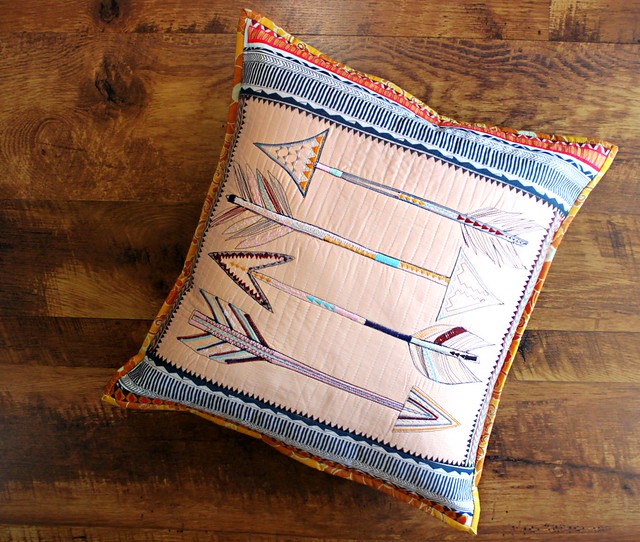
My gosh I'm so behind on sharing my project here! Each day my goal is to at the very least begin one new project for Quilt Market in addition to the etsy orders I'm still making and all the little side projects I have going. Bouncing from one project to the next means I rarely stop to take the proper photos I like to share here, but today I finally took the time. First up is my Sketch Stitching Arrows turned comfy pillow!

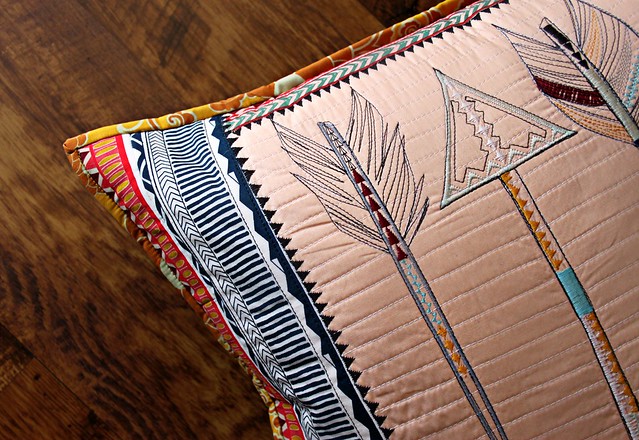
An Arrow Sketch Pillow

This pillow began several weeks ago inspired by my Wild & Free Fletching Chant arrows print, to give myself a head start on creating items for my booth, as well as keeping me occupied during those restless days waiting for my strike offs to arrive!

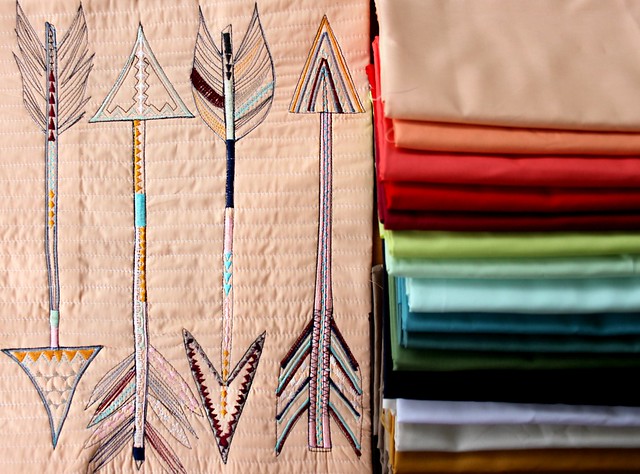
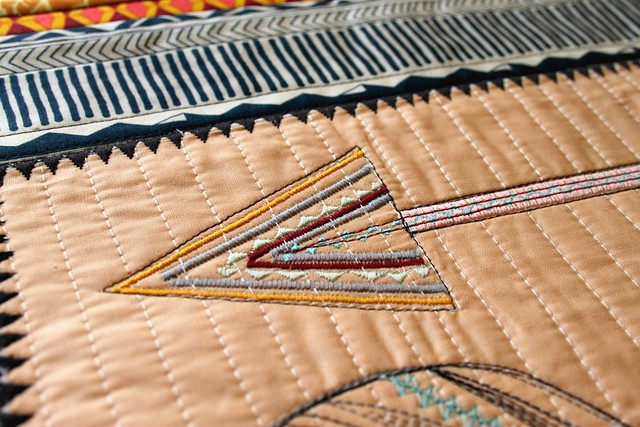
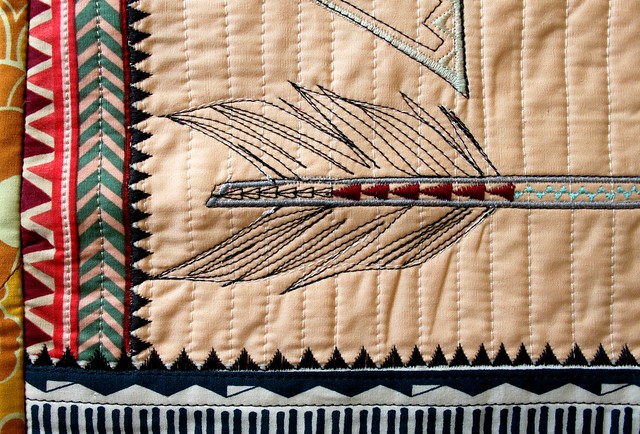
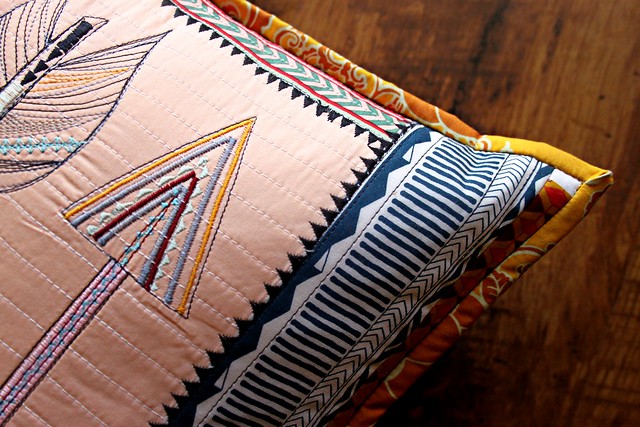
I started by thread sketching a set of arrows onto a quilted piece of Pure Element Peach Sherbet using a colorful selection of Aurifil that matched the solids that coordinate with my collection.

Arrows & P E Solids

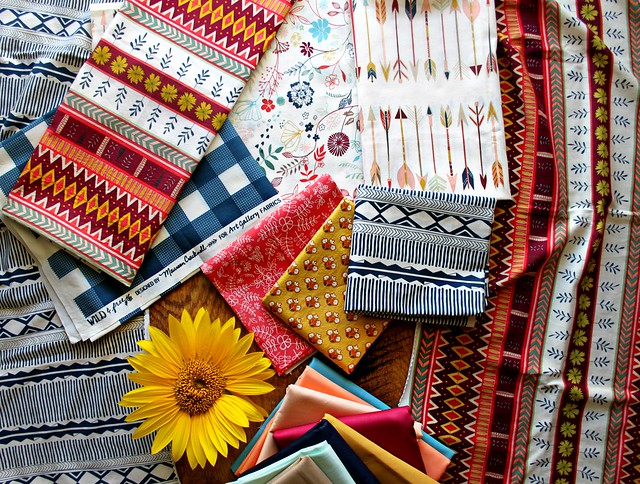
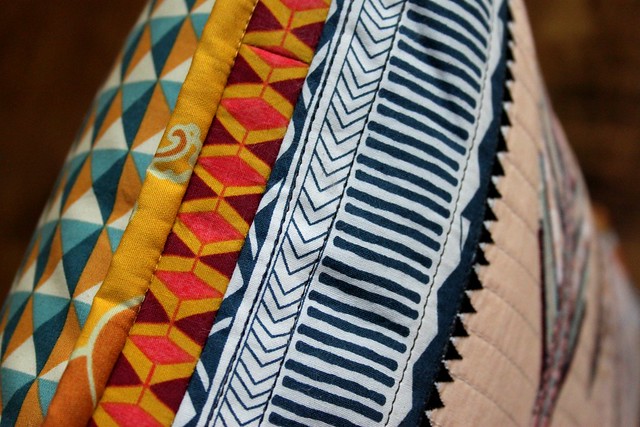
Once my strike offs were delivered, which put simply are just small pieces of test print fabrics used to finalize color, scale, & details before final printing, I got right to work on finishing this pillow with a simple framing using my Sun Tracks and Woven Path prints. It's not likely that I'll receive any fabric yardage to work with before I leave for Quilt Market, so I'm doing my best to really stretch what I have and to make the most out of each print!

Wild & Free Strike Offs!

Arrow with Wild & Free

Fletching with Wild & Free

I really do love the way these two fabrics look together, the warm Autumn color palette combined with the sharp denim geometric print! I can't wait to have enough to make some of the quilts I've been dreaming up!

Framed with Wild & Free

Just as I did when finishing my Feather Sketch Pillow, I used lots of decorative satin stitches and finished with a binding detail using the last of the Dynasty in Saffron binding leftover from my Indie Quilt.

Inspired by Fletching Chant

Wild & Free Inspired

This finish, plus the Feather Pillow, and my Embroidered Luminous Field Pillow makes three pillows that I've photographed and shared here, and I'm hoping to have at least three more to share before Market! I can't believe I leave in less then two weeks!

Be sure to let me know if you'll be stopping by my booth. I'd love to meet you!!    Maureen

Tuesday, October 7, 2014

A Quilted Dreamcatcher : :

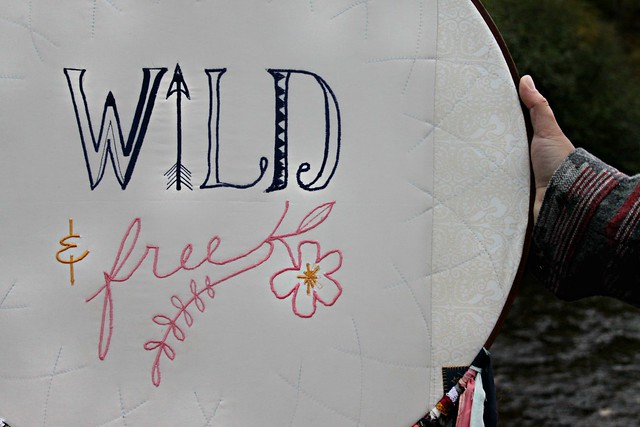
Wild & Free

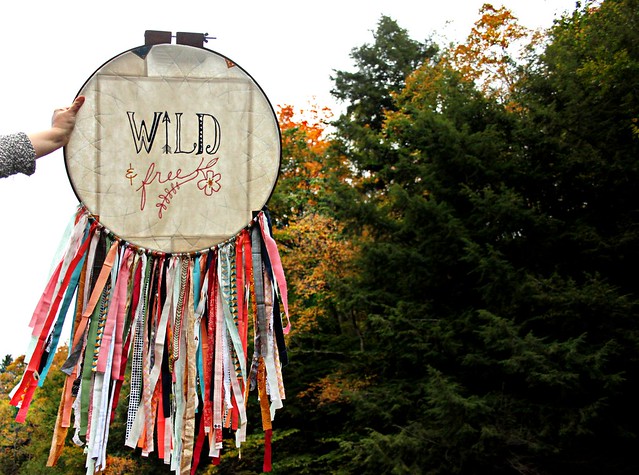
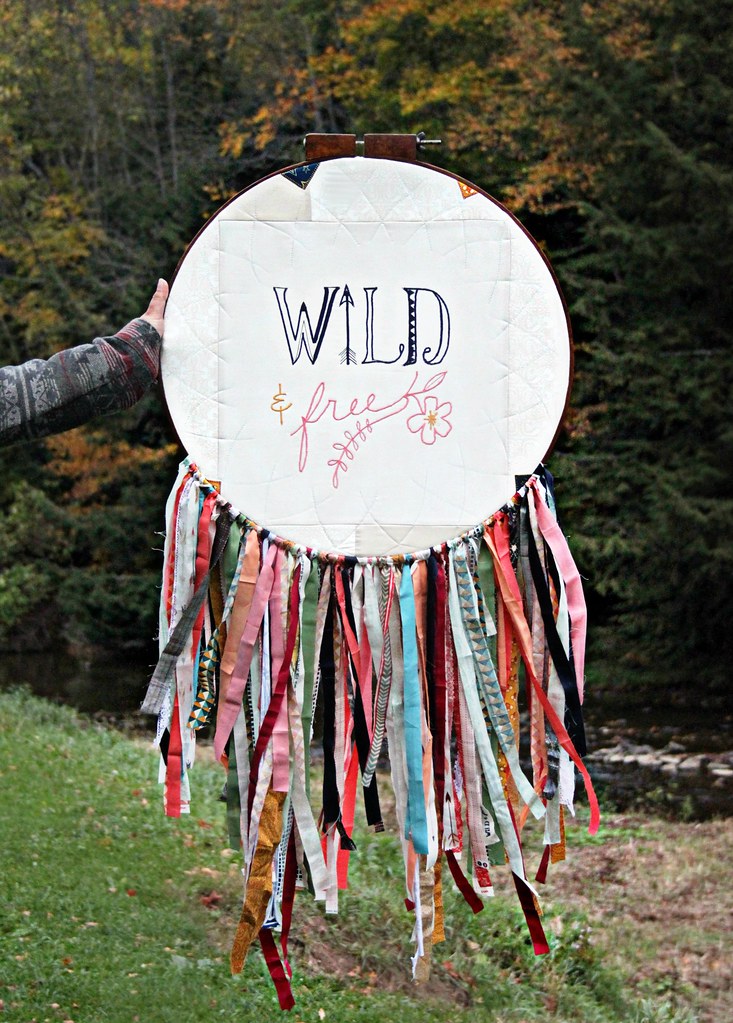
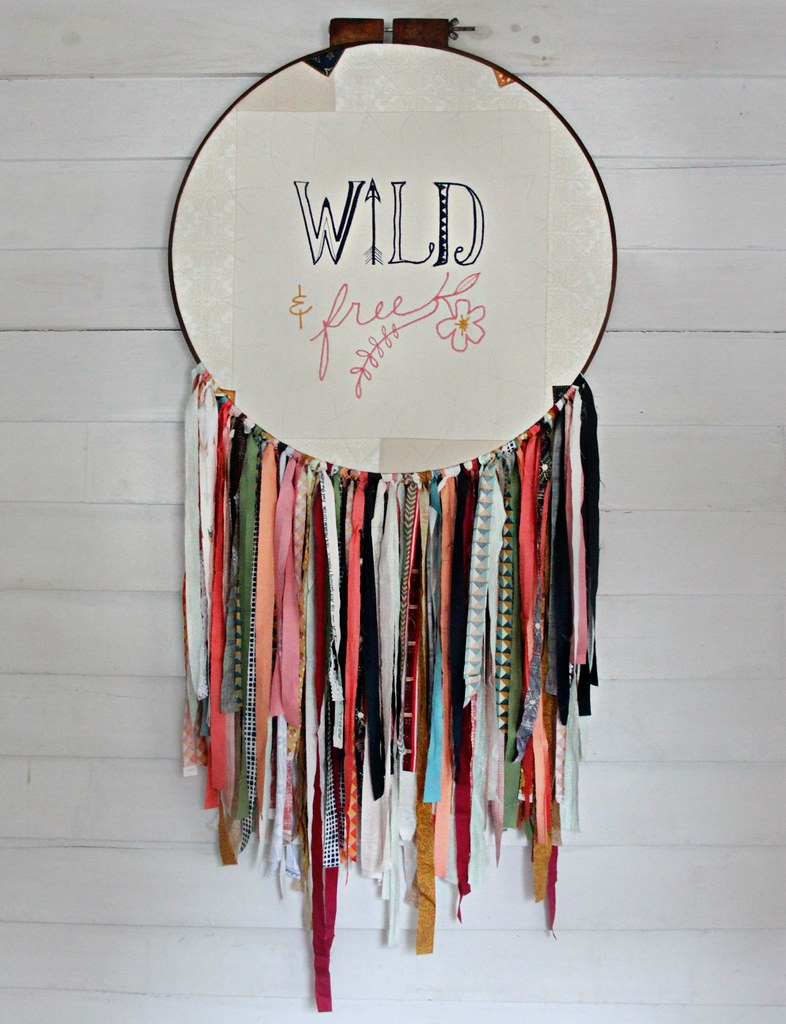
I've always been drawn to the beauty of dreamcatchers. To each meaningful handmade component, from the hoop to each bead embedded in the webbing. Around two years ago, just about the time I started to seriously consider deigning fabric, I found this big beautiful vintage quilting hoop at a local thrift shop and decided that day that it would become a dreamcatcher inspired sign for my very first Quilt Market booth, for my very first fabric collection. That may sound a little crazy, but it's true! And although this first Limited Edition collection of mine is quite different than what I was envisioning back then, I'm so thrilled to see projects like this one materialize, just as I hoped, so many months later!

A Quilted Dreamcatcher

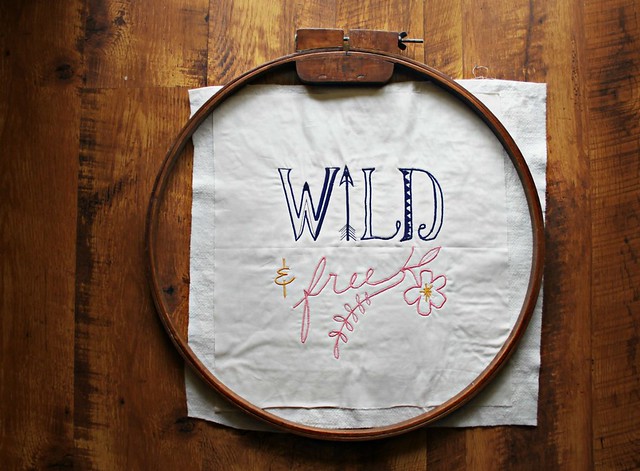
Just as I do for any sketch stitch piece, I began this project by basting a square cut of Creme De La Creme solid fabric to a scrap piece of batting to stabilize my embroidery. Using the satin stitch in multiple widths and stitch lengths & a variety of Wild & Free friendly Autifil 50wt I stitched out my collection logo front and center!

A Quilted Dreamcatcher beginning

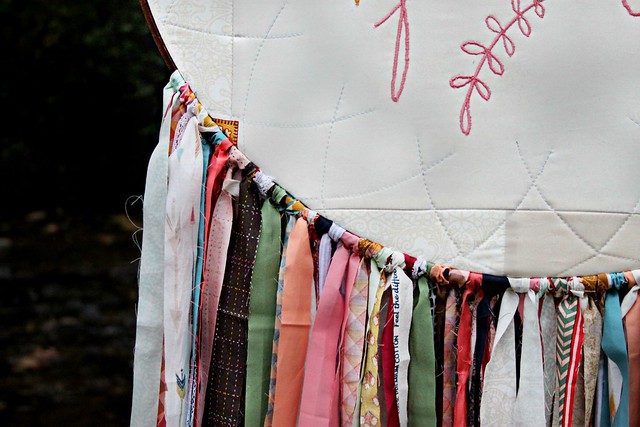
Next came the real fun of adding my quilting to resemble the magical weaving of a dreamcatcher and the many strands of Wild & Free fabric scraps, selvage ends, and other Art Gallery Fabrics that I've used to create all the projects I've been working on for this Quilt Market booth!

Wild & Free embroidery

AGF strands

I'm so excited to have this special sign to bring with me to Houston, and I can't wait to share more of all the things I've been busy creating these past couple of weeks!

A Quilted Dreamcatcher

Thanks for stopping by today!  Maureen

Monday, November 4, 2013

Felt Ornament Making : :

Felt Ornament Making -- Betz White's Peace Dove

Back in early Fall I shared a post called Felty Things, including some of my most favorite felt projects, gushing about how much I love to sew with felt this time of year. My talented friend & fellow felt sewing fan Betz White was reading that day and invited me to create one of the amazing felt ornaments from her brand new, Holiday Stitch-along Ornament Club! I chose to make the Peace Dove Ornament in a pretty Sky Blue wool blend felt and I love how it turned out!

Felt Ornament Making -- Betz White's Peace Dove

I consider myself a bit of a beginner when it comes to embroidery, but with the handy Stitch Glossary Betz provides with each pattern, the Blanket stitch, French knot, Backstitch, & Lazy Daisy stitch needed, were a cinch!

Felt Ornament Making -- Betz White's Peace Dove

It came together quick and in the end I had a beautiful, well made, two-sided ornament that I would love to make a few more of! Haila has even asked to make one for herself to hang on her door, which I think is both a great idea and something she could totally do with a little help from me!

Felt Ornament Making -- Betz White's Peace Dove

It's not to late for you to sign up for Betz's Holiday Stitch-along Ornament Club! This months ornament is scheduled to debut on Betz's blog today. You are welcome to join in any time and will receive patterns for the two already-released ornaments, this Peace Dove and this super, cute Hot Chocolate, along with November's design, and the final ornament on December 2nd!

Felt Ornament Making -- Betz White's Peace Dove

If you're in need of high quality felt for ornament making or for any other felt sewing plan you might have, stop by my etsy anytime this month and use coupon code: FELT20OFF for 20% off any Wool Blend Felt purchase!

Felt Bundle Giveaway!

Happy Monday!  Maureen

Monday, July 15, 2013

Postcards from the Beach : :

This week we're at the beach for our annual family vacation, and we're having such a wonderful time! Nags Head is so gorgeous!! This morning I thought I'd share just a few snapshots from our first days here!

Polaroids at the beach!  #photooftheday #henselvaca2013

We finally made it to Nags Head, NC!! Our home for the next week! #oceanfront #beachhouse #henselvaca2013

Postcards from the Beach

Postcards

Postcards from the Beach

I've taken so many photos already, I've been sharing lots over on Instagram, and I'll be sure to share more here, as well!

Before we left for our long road trip I decided to bring along my floss stash for a new needlework project. It's been way too long since I did anything stitch-y!

Floss

I quickly pieced together two Indie prints with some RK Essex Yard Dyed Linen and a strip of my favorite AGF Pure Element, Empire Yellow.  I've really enjoyed having this relaxed embroidery project to work on here and there, and I'm loving how it's coming together!

Stitchy

I'll be sure to share more later in the week!

More stitchy progress! #indie #patbravo #stitching #henselvaca2013

I'm off to see who's won my most recent Giveaways! Be sure to stop back Wednsday and Friday for two more!!

Maureen 

Friday, August 12, 2011

Quilted Stripes Pillow Tutorial : :

Purple, Grey, and Yellow Strip Pillow

Today I'm going to share a tutorial with you for a simple pillow cover -- My Favorite Colors Stripey Toss Pillow. A project designed to showoff your favorite color combinations that's quick, easy, and turns out super cute! It's a great project for a beginner quilter, if you want a project to practice sewing those perfect straight lines with your machine, and also great if you need to get a little hand quilting practice in.

What you'll need : :
  • 1 - Pillow Insert measuring 12" x 16"
  • 8 - 2.5" x 12.5" strips of quilting weight cotton fabric in your favorite color combination
  • 2 - 9" x 12.5" pieces of fabric for the back of the pillow
  • 1 - piece of cotton batting measuring 14" x 18" 
  • 1 - piece of cotton muslin measuring 14" x 18"
  • Threads and Pearl Cotton floss in coordinating colors
  • Sharp scissors and an embroidery needle
  • Embroidery Hoop or Quilting Hoop
  • Note * Click on any of my images for a larger picture 

Cutting and Piecing the Fabrics : :

1. Choose eight different fabrics with a color scheme of your choice (you can find my inspiration for the Purple, Yellow, and Grey color scheme of my pillow here) 2. Cut the fabrics into eight 2.5" x 12.5" pieces (I recommend using a rotary cutter and mat set for cutting)
purple + yellow + greyFabric Color strips

3. Leaving a 1/4" seam allowance, sew the fabric strips together. Sewn together, each color will measure 2", the entire piece 16.5" 4. On the reverse side, press all seams open. Once finished, give the front side a good press, as well
Sew together, press seams openSeams Pressed Open -- back

After these Cutting and Piecing steps, the pillow top should look like this : :
sewn together, seams pressed open -- front
Layering and Quilting the Pillow Top : :

5. Cut Muslin and Batting to measure 14" x 18" -- Cutting these pieces larger will help when quilting. At a later point the excess will be trimmed away 6. Layer Muslin, Batting, and Pieced Pillow Top
Muslin and BattingLayers -- Muslin, Batting, Pillow Top

7. Prepare for machine quilting. Pin layers together well, adding a few pins running down each of the eight different fabrics that makeup your pillow top 8. Stitch on either side of the seams as shown in the photo below (I used a pale purple and deep purple thread to match my color choices) 9. Once quilted, remove pins
Pin and StitchPin and Stitch

After these Quilting steps, the pillow top should look like this : :
Quilted Pillow Top

10. Using a large ruler or straight edge, trim away excess fabric, batting, and muslin. The pillow top should now measure 12.5" x 16.5"
Square up sides -- backSquare up sides -- front
Adding the Hand Quilted Detail : :

11. Carefully put the quilted pillow top inside the embroidery/quilting hoop, stretching it taught, but not too tight. 12. Cut a length of floss, thread strand onto embroidery needle, knotting one end
Add some StitchingHoop and Floss

13. For a running Stitch : : Insert needle up through the bottom, pull the stitch through until the knot catches, insert down through the front and pull back through. Repeat leaving a little space between each stitch, like shown in the photo below. Try to keep those stitches even.
Running StitchRunning Stitch

After these Hand Quilting steps, the pillow top should look like this : : Pillow Top Finished
Sew pillow together : :

14. Prepare back pieces -- Using the 9" x 12.5" fabric pieces, fold over one of the sides measuring 12.5" just a 1/4", press, fold over again, press. Sew along inner folded edge and along the outer edge, staying close to the fold. This will create the double seam finish. 15. Place pillow top piece RIGHT side up on your work surface. Place both backing pieces RIGHT side down on top of the pillow top piece. Pin and sew along entire perimeter using a 1/4" seam allowance. 16. Zig zag stitch around the entire perimeter, as well
Pin Back Frabric OnZig Zag Finish

17. Trim all four corners
Trim CornerTrim Corner -- done

18. Turn pillow right side out (You can see here that I added my striped fabric running in different directions just for something different). Press well
Back Finished

19. Insert your pillow form and now you have your very own Favorite Colors Stripey Toss Pillow!!!
Purple, Grey, and Yellow Strip Pillow

Wishing a wonderful weekend to all!!! 
Be sure to let me know if you give it a go!