Showing posts with label tutorials. Show all posts

Tuesday, June 5, 2018

A Flower Child Chained Nine Patch Tutorial by the AGF Studio!

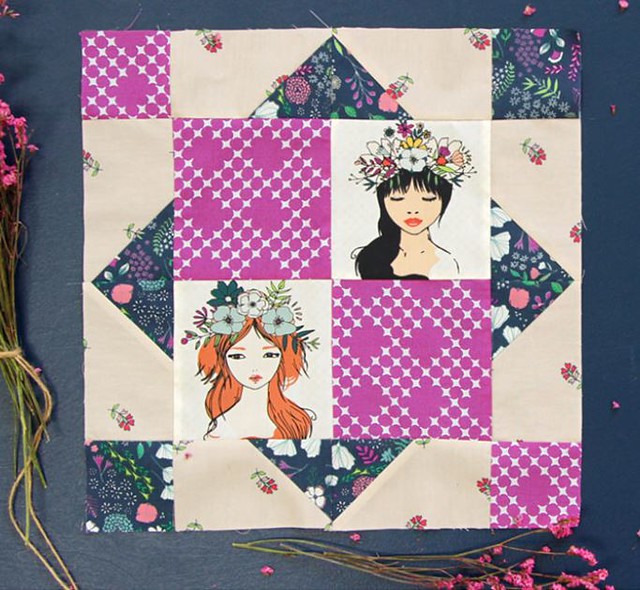
Chained Nine Patch Block in Flower Child

It's no surprise that I'm a huge Art Gallery Fabrics fan! I'm one of their full collection designers and I love this job more than I could ever share. But before becoming a designer for AGF, I was a huge fan of the brand. Their fresh modern fabrics, the beautiful quality of their substrates and their fun marketing style is so special. In my opinion, Art Gallery brings something truly unique to the industry that I'm honored to be apart of. I hope, like me, that you feel that there's something exceptional about what AGF offers!

A peek of my personal AGF studio stash...
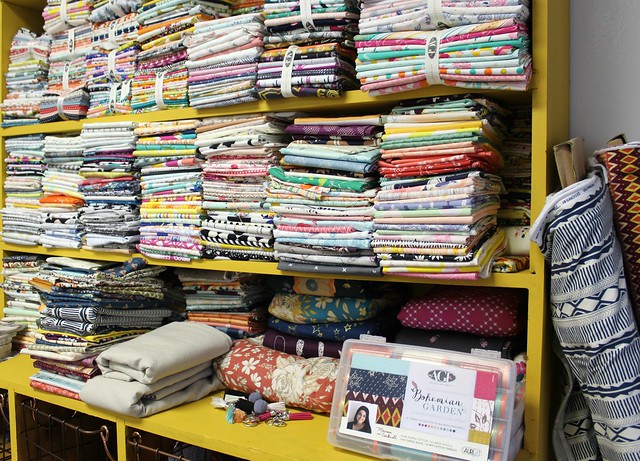
My AGF Stash

What you may not know is that there is a team of women who work for a division of Art Gallery Fabrics know as the AGF Studio. This group of ladies are so, so talented! They're the ones who keep up the AGF Blog and social media accounts, who plan and implement the amazing International Quilt Market booths, who create projects for our collections and Lookbooks, and so much more! Over the years that I've been an AGF designer, I've been able to become friends with many of them and I hope if I share more of their work here, that you will enjoy getting to know them, too!

AGF at Spring International Quilt Market in Portland, Oregon May 2018...
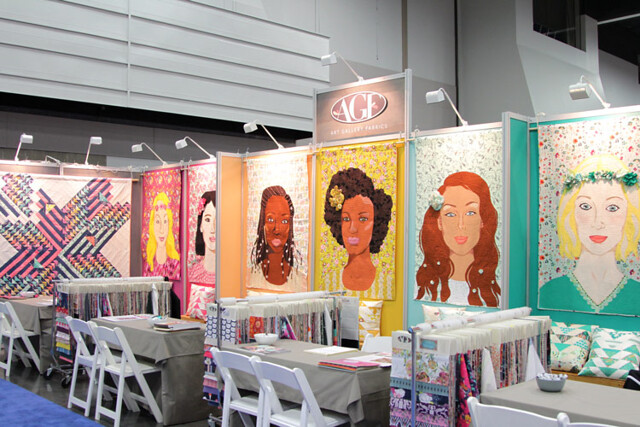
AGF at Spring Quilt Market

Today I want to share with all of you an AGF Studio tutorial for a Chained Nine Patch quilt block featuring prints from my Flower Child collection -- Sisterhood, Sprinkled Petals Sun, Blooming Ground Luscious and Pixie Dust Glow!
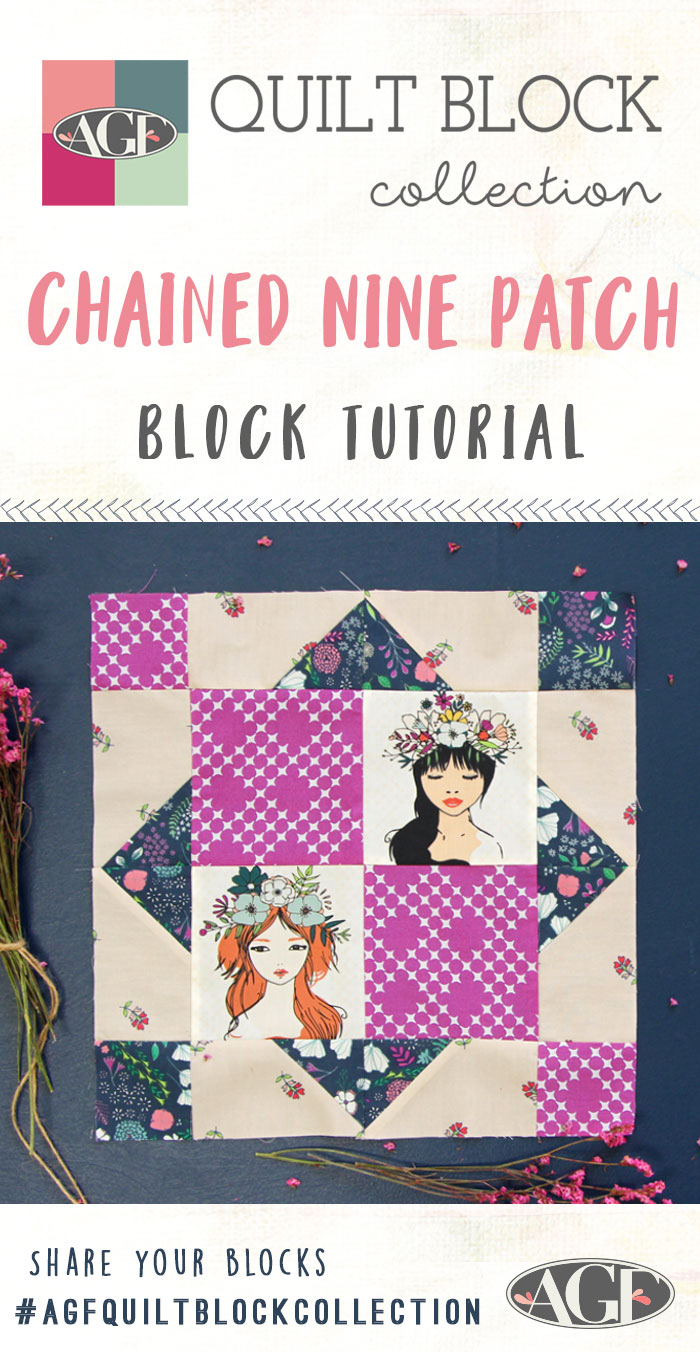
How to make a Chained Nine Patch Block

On Art Gallery Fabrics YouTube channel you can find a huge collection of quilt block video tutorials, called the AGF Quilt Block Collection. Be sure to visit both the AGF Blog post where Meli, a super sweet AGF Studio designer, shares all the details behind this most recent addition to the collection, HERE, as well as the YouTube video for this pretty Flower Child fabrics block!
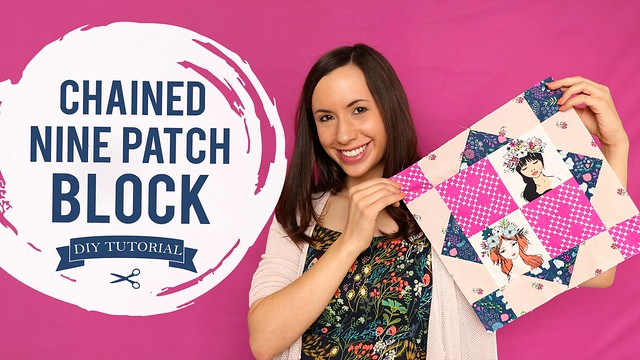
Meli & her Flower Child Quilt Block

If you give this block a go, be sure to add the quilt block collection hashtag #AGFQuiltBlockCollection and my collection hashtag #FlowerChildFabrics when you share! We can't wait to see!
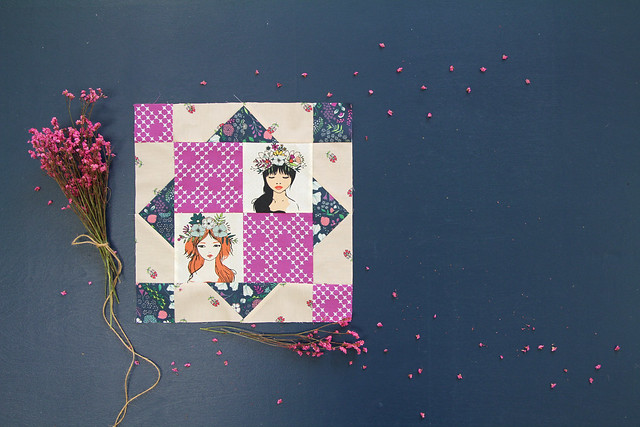
Flower Child Quilt Block

Happy sewing, friends! xo Maureen
Tuesday, February 14, 2017

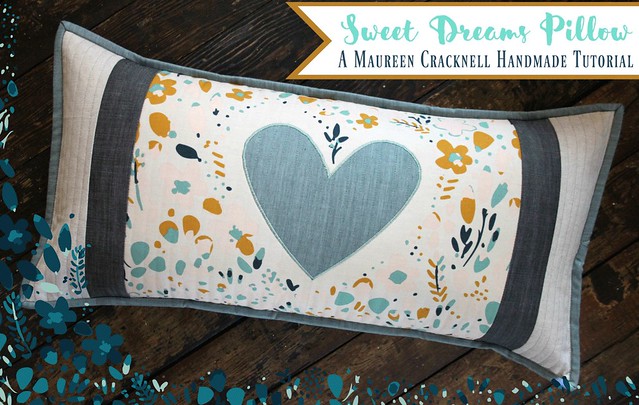
A Sweet Dreams Pillow { Tutorial } : :

Happy Valentine's Day!

Sweet Dreams Pillow Tutorial

Today I'm excited to share that my Sweet Dreams Pillow Tutorial is now live and available for download on Janome's Inspire project page!

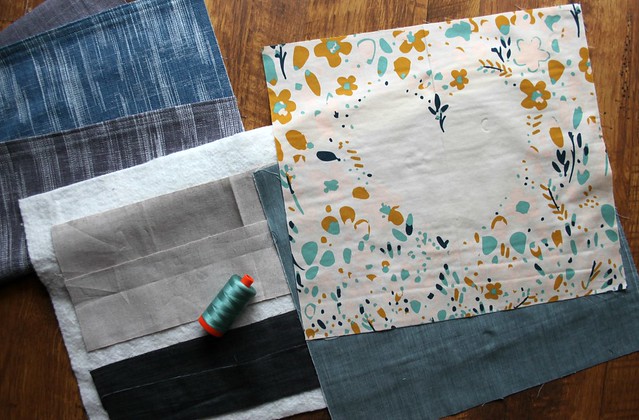
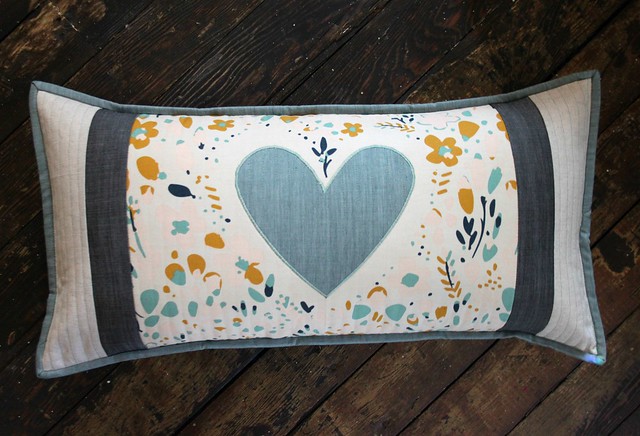
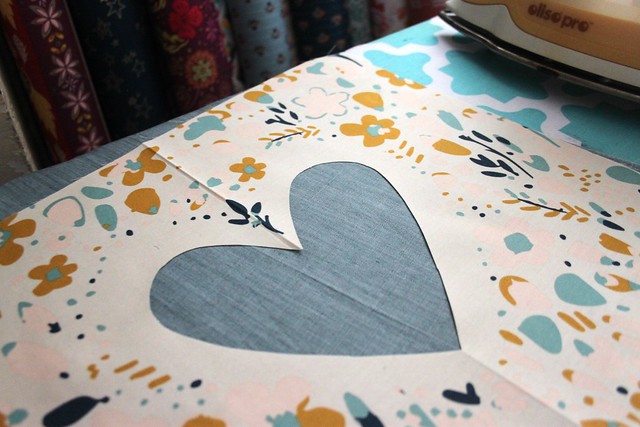
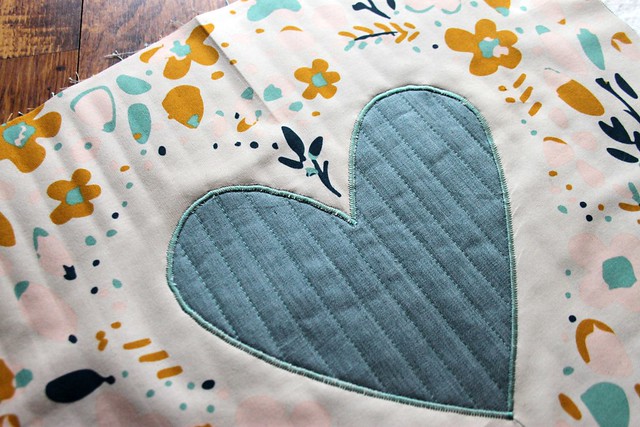
This project tutorial is for my Sweet Dreams Pillow pattern, featuring my Love Garden print from my Garden Dreamer fabric collection with Art Gallery Fabrics and a variety of AGF Denim Studio denims and linen. I used a raw edge reverse applique technique featuring Janome's satin stitch and my Quick Quilt As You Go method to create this beautiful throw pillow that's both fun and easy to make!

Sweet Dreams Pillow Materials


H


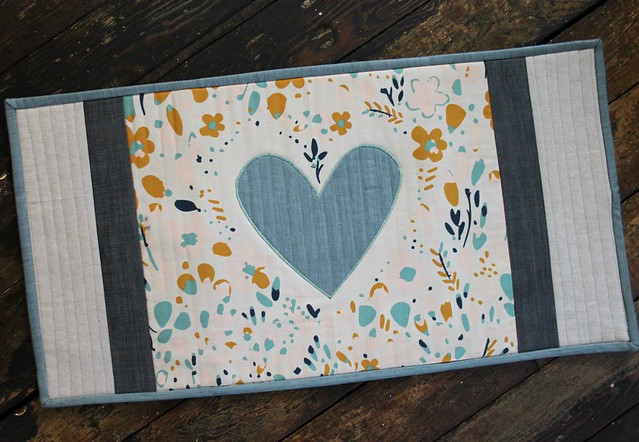
Pillow Binding

I hope you love making this pillow as much as I did!

Pillow Finish

As always, be sure to let me know if you give it a go! Feel free to find & tag me on Instagram if you make & share one of your own, or you're always welcome to share the things you make using my project ideas and/or fabrics on my Facebook page Maureen Cracknell Handmade!
Happy sewing, friends!  ♡ Maureen
Monday, January 23, 2017

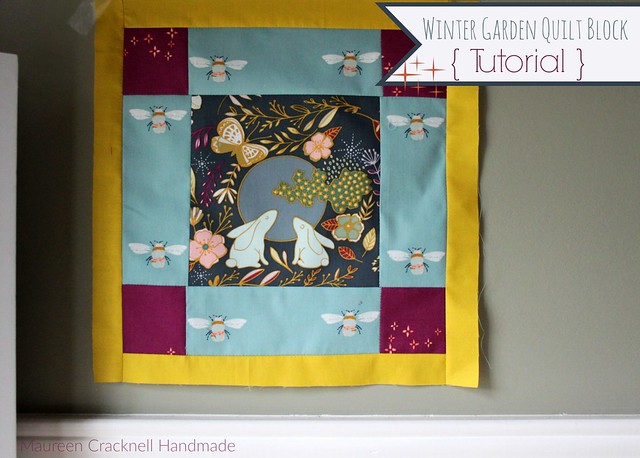
A Winter Garden Quilt Block { Tutorial } : :

Winter Garden Quilt Block Tutorial

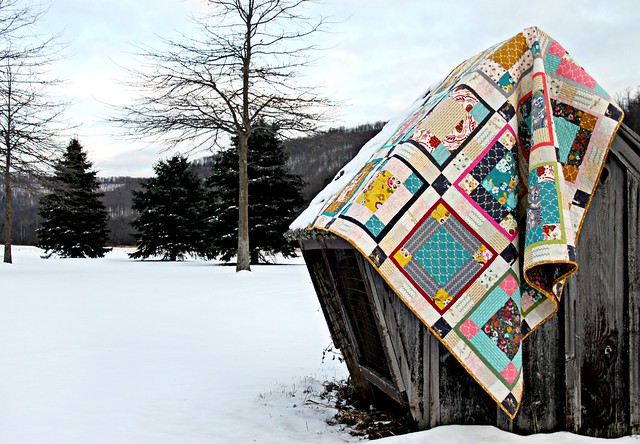
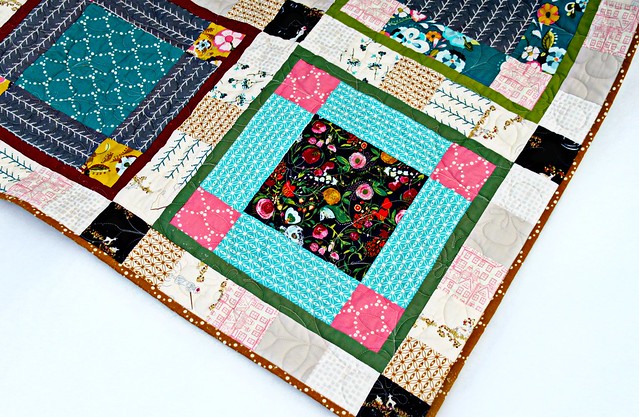
Today I'm excited to share a quick tutorial for my Winter Garden Quilt Block, a quilt I first made using Bari J.'s Emmy Grace collection for AGF that I'm currently remaking using as many of my own fabrics as possible! So many folks have asked me for this pattern over the years and I've always said that I would share one once I found the time to remake this quilt and here it is! First I'm sharing the block measurements and how-to, and once all of my blocks are finished I'll follow up with a tutorial for adding the scrappy sashing. Below is reminder of the finished quilt, it's one of my very favorites!

Winter's Garden Quilt in Emmy Grace

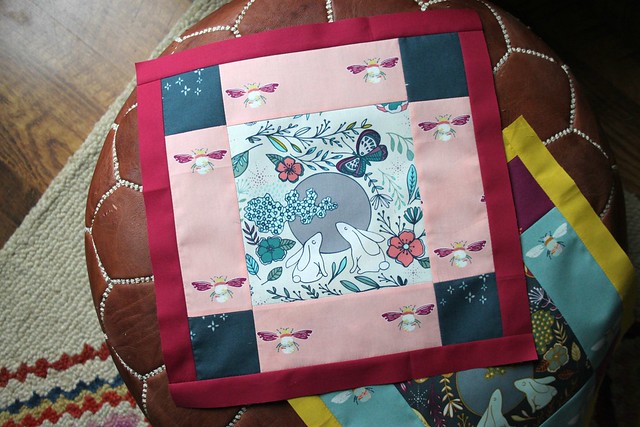
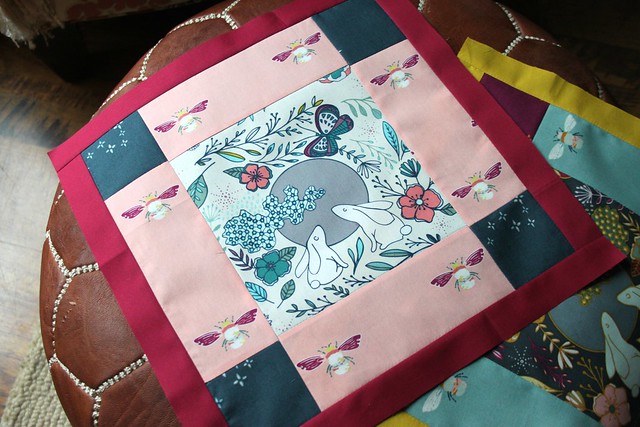
The block pattern begins with a large center square, perfect for showcasing those favorite prints. They're fun to make and sew up quick and I hope you'll join me in making them! If you do, feel free to tag me and to add #wintersagardenquilt and #MCHcollectionquilt or to share your photos with me on my Maureen Cracknell Handmade Facebook page!
MC Collection Quilt Block

One quilt block measures approximately 12.5"square.

You'll need:
  • one piece of fabric measuring 6.5" square for the center fabric of each block (my center fabrics are fussy cut from the focal prints from each of my collections)
  • four pieces of fabric measuring 2.5" x 6.5" to be added to the sides of the center fabric
  • four pieces of fabric measuring 2.5" squares to be add to the four corners
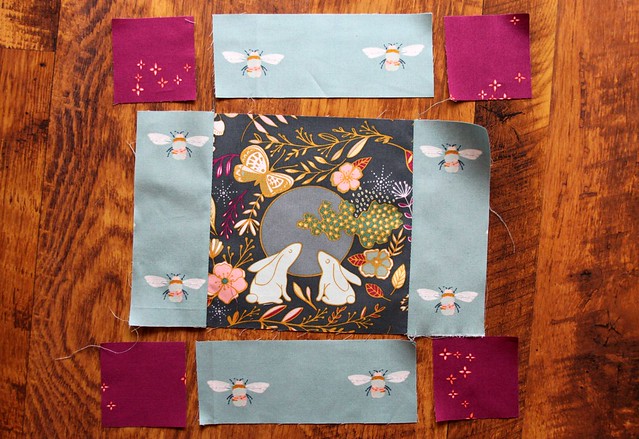
  • two pieces of fabric measuring 1.25" x 11" to be added to the top and bottom of the center
  • two pieces of fabric measuring 1.25" x 12.5 to be added to the sides of the center

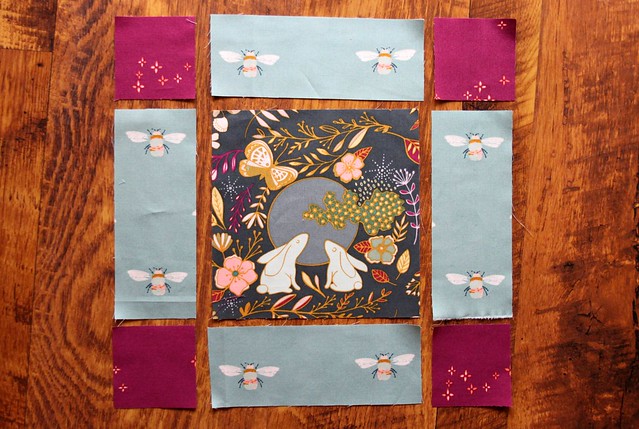
1. Cut your fabrics following the above measurements and lay them out following the image below.

Step 1

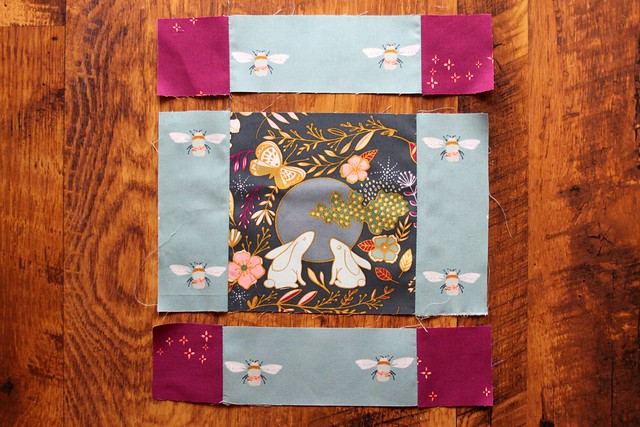
2. First sew the three center fabrics together. Place side fabrics one at a time onto the center square with right sides facing and sew along the 6.5" side using a 1/4" seam allowance. Repeat to add both side fabrics to the center fabric.

Step 2

3. Sew the top and bottom row of fabrics together as shown below using a 1/4" seam allowance.

Step 3

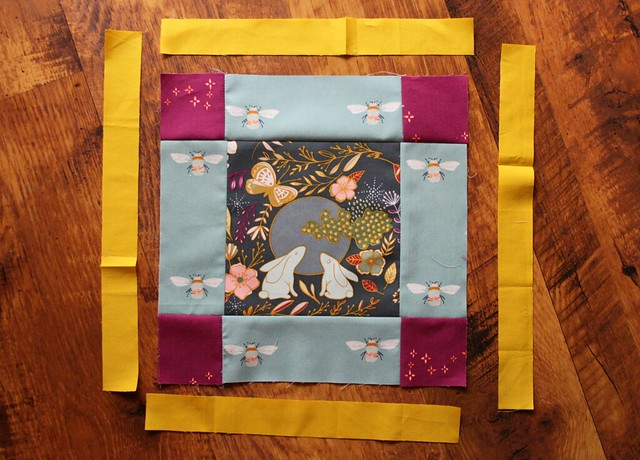
4. Finish the center of the block by sewing the top two rows together and them sew the last row to the top two using 1/4" seams throughout. If necessary, square up the center to measure an 11" square before adding the border fabrics.

Step 4

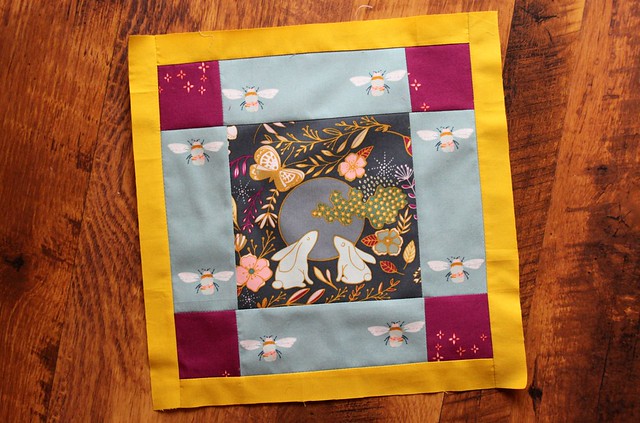
5. Add the border fabrics one at a time beginning with the top and bottom pieces. Sew along the 11" side using a 1/4" seam allowance. Repeat to add both the top and bottom border fabrics and again to add the side border fabrics.

Step 5

It's as simple as that! Feel free to comment with any questions you might have regarding the instructions and if you have any questions about the fabrics I'm using! Each week I'll share my newly finished blocks here on the blog and on my social media pages. If you plan to join in, please do let me know! I look forward to seeing your beautiful work!!

♡ Maureen
Thursday, January 19, 2017

Tutorial Making : :

MC Collection Block

It's been such a busy week! I've been putting the finishing touches on two tutorials that I'll share soon. The first is my Sweet Dreams Pillow, my newest project for Janome sewing machines featuring my Love Garden print from my Garden Dreamer fabric collection with Art Gallery Fabrics and a variety of AGF Denim Studio denims and linen. I used a raw edge reverse applique technique featuring Janome's satin stitch and my Quick Quilt As You Go method to create this beautiful throw pillow that's both fun and easy to make! I'll be sure to let you know once it's uploaded to Janome's project page and I hope you love it as much as I do!

Sweet Dreams Pillow Materials

B

Pillow Finish

If you plan to make this pillow you'll want to pick up a full yard of my Love Garden panel print to be sure you receive a complete heart to use on your pillow. This print comes in two colorways -- Vibrant and Calm. Both would make lovely pillows!

Love Garden

You can find this print available in my sponsor shops Fat Quarter Shop, Llama Fabrics, Lady Belle Fabrics, and Circa 15 Fabric Studio!

The other tutorial I was thinking I'd share early next week, if you're interested, is the MCH Collection Quilt block pattern I'm currently making. It's the remake of my popular Winter's Garden Quilt made using all of my current collections together, and I thought some of you might want to join me in making this one? So please do let me know!

Winter's Garden Quilt in Emmy Grace

I just finished two more blocks today featuring prints from Nightfall & Garden Dreamer together and I think they're my favorite ones yet!

MC Collection Quilt Block

I'm really looking forward to getting back to blogging more regularly, last week it was the weather and the kiddos home, this week it's the flu and the kiddos home, but I will be back tomorrow with an Intrepid Thread giveaway, so be sure to stop back!

♡ Maureen
Wednesday, October 26, 2016

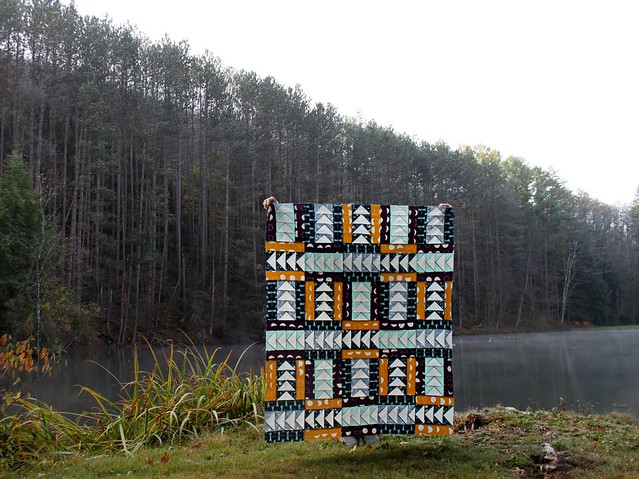
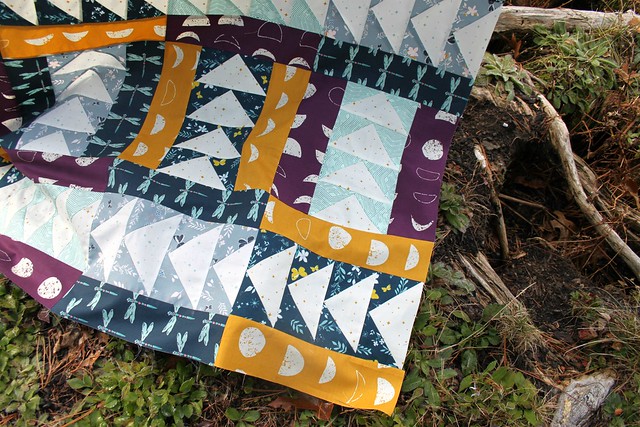
The Nightfall Parade | | A Soaring High Quilt Pattern in Nightfall

Soaring High in Nightfall

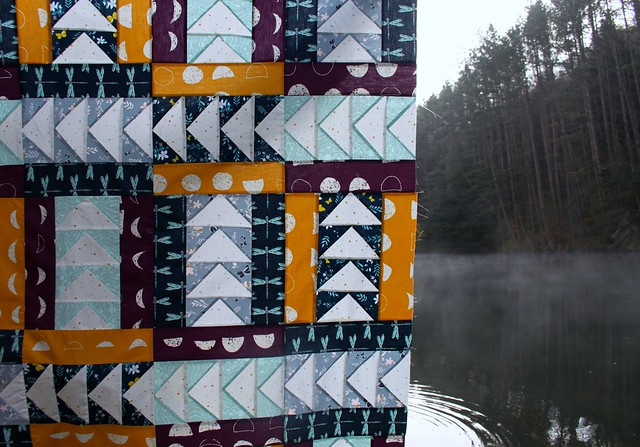
For yesterday's Nightfall Parade project I had every intention of blogging the Easy Tote bags I recently made using my Nightfall canvas, Mystical Woods in Solar. Lately the mornings have been dark, and as I waited to take photos of my finished bags I moved onto my next plan -- a Soaring High quilt in Nightfall! Once I began work on this fun project, I didn't want to stop, and as a result I'm so excited to have a new quilt pattern to share with you all today!
The Nightfall Parade

Soaring High in Nightfall

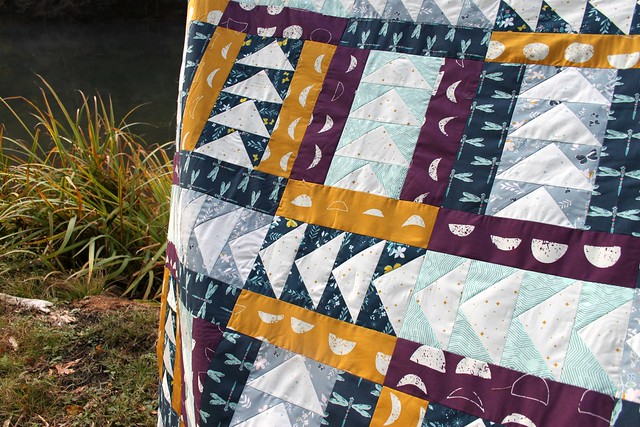
I designed this quilt a few years back to showcase a Skinny LaMinx collection for Cloud9 and have been dying to remake it using one of my own collections now that I'm designing for Art Gallery Fabrics. Nightfall happens to be the perfect match to this modern take on the traditional flying geese block! This pattern is made simple and addictive with my "make four at a time" flying geese method and chain piecing, you're going to love making this quilt!
Let's get started!

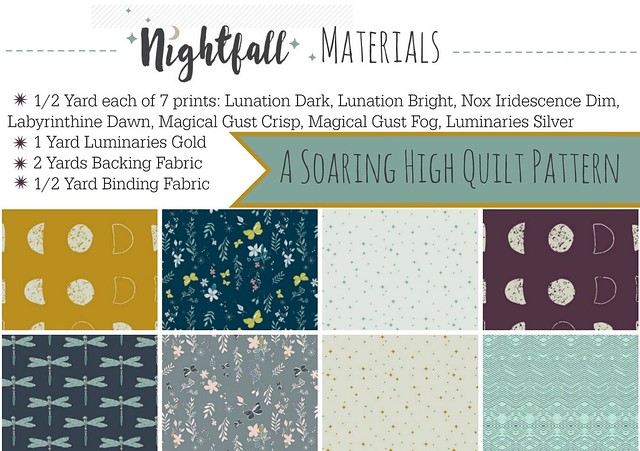
Saoring High Quilt Materials

This quilt is made up of thirty flying geese blocks using some of my favorite Nightfall prints. My son Kaiden picked this particular combo and love how gender neutral it is!

Soaring High Colors

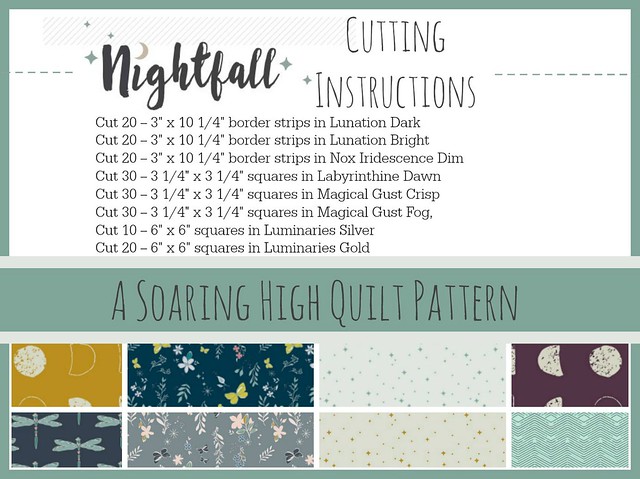
Cutting Instructions

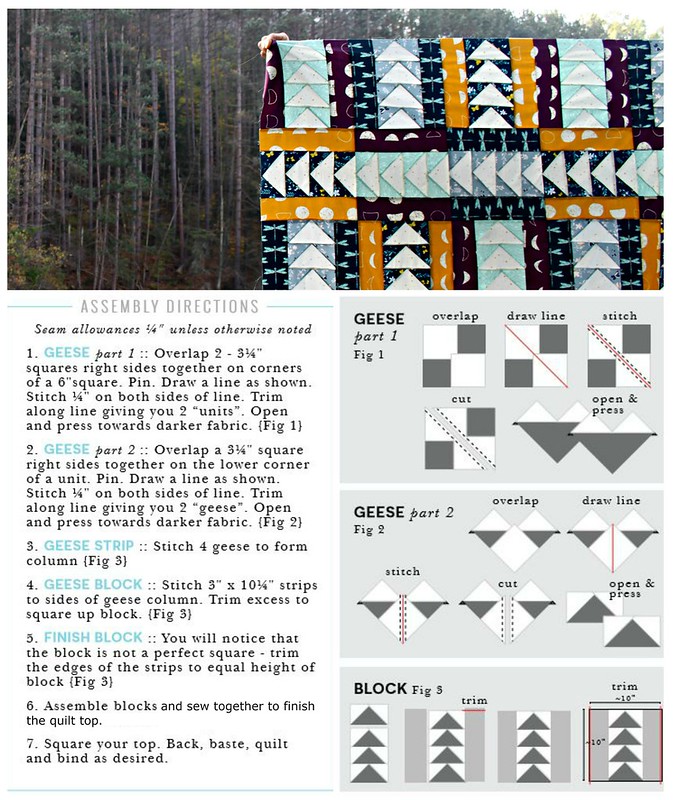
Follow these easy cutting and assembly instructions to piece together your very own Soaring High quilt. I made this quilt top from start to finish in just a little more than a day! It's truly one of the quickest, most enjoyable quilt patterns that I've designed!

Soaring High in Nightfall Quilt Pattern

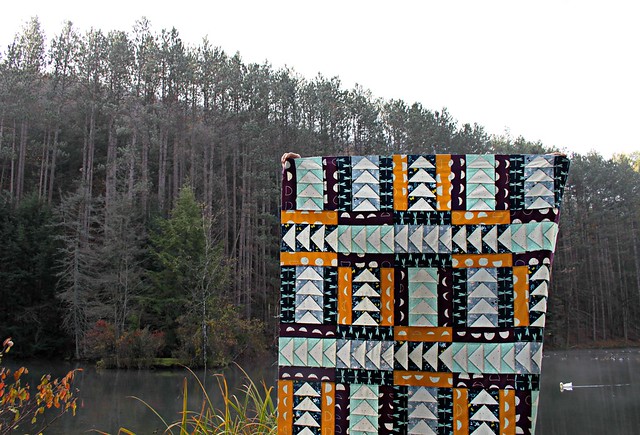
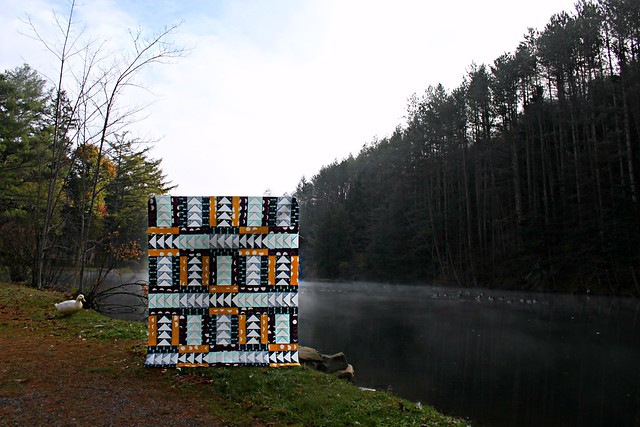
After stitching up those last few final seams that were waiting for me this morning, my husband and I took my newly finished Soaring High quilt top to a nearby pond for some quick photos. The morning mist suspended above the water was stunning, I was lucky to capture such pretty photos to share so soon!

Soaring High in Nightfall

Morning Mist & Nightfall

You can see that I arranged my quilt blocks alternating rows of geese pointing up and geese pointing to the left. When you make your own I encourage you to have fun playing around with other layout options. There really are so many possibilities for this particular block pattern!

Flying Geese in Nightfall

I hope you love this project as much as I do! If you do give it a go at anytime, be sure to share on my Facebook page or on Instagram with the hashtag #NightfallFabrics & #NightfallParade -- I love seeing what you create!

Thanks so much for stopping by today!! ♡ Maureen

-------------------------------------------- 

* You can find the list of online retailers currently carrying Nightfall under my SHOP my Fabrics page -----> https://maureencracknellhandmade.blogspot.com/p/blog-page.html

Tuesday, October 18, 2016

The Nightfall Parade | | A Mini QAYG Log Cabin { Tutorial } : :

The Nightfall Parade

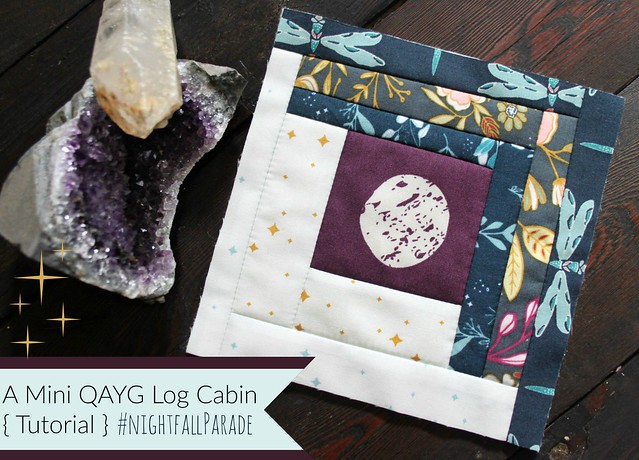
A Mini QAYG Log Cabin Tutorial

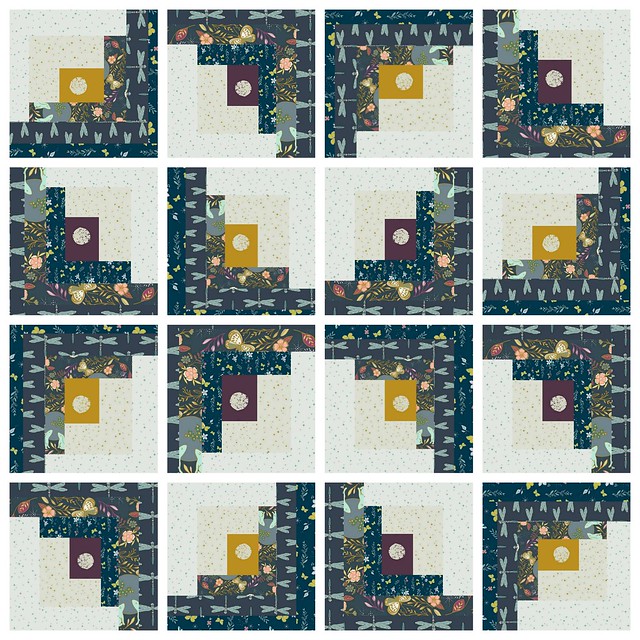
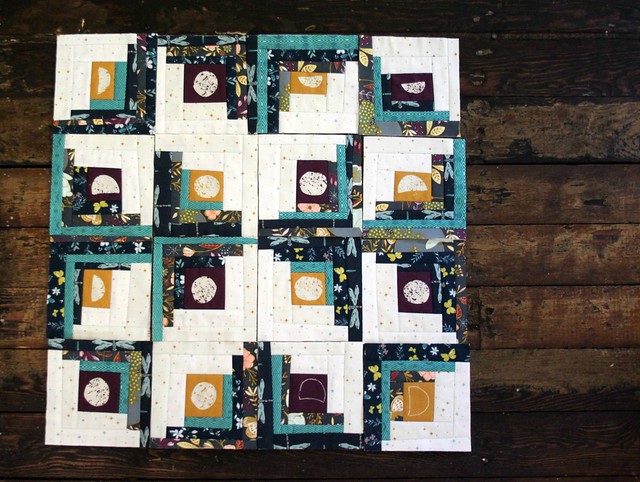
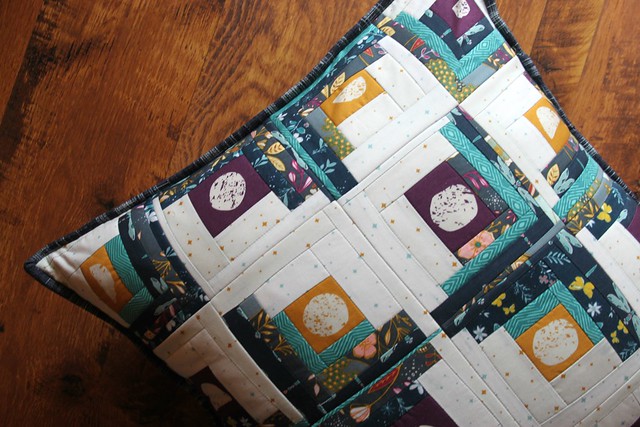
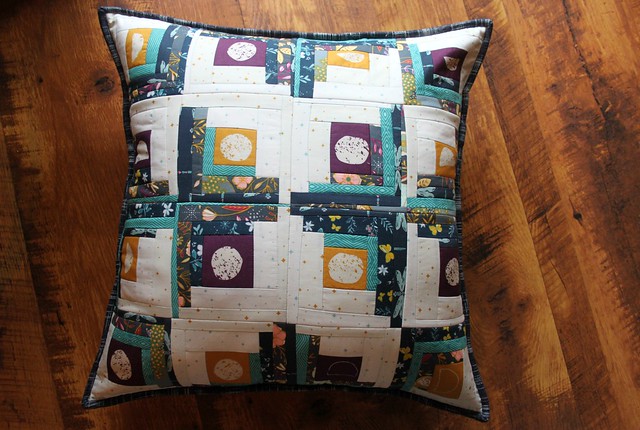
My Mini QAYG Log Cabin tutorial is a Quilt-As-You-Go style quilt block, featuring my Nightfall fabric collection, that you can use to create a beautiful Moon & Stars Floor Pillow!

Fabric and Materials Required : :
  • a variety of four different teal & blue Nightfall prints cut into 1" strips x WOF
  • several 1.5" x WOF strips of both Luminaries in Silver & Gold 
  • Sixteen fussy cut moons { eight from Lunation Light || eight from Lunation Dark } 
  • Sixteen 6" cotton batting squares
  • fabrics for the pillow backing and binding
  • 22" pillow insert
  • rotary cutter/large cutting mat/ruler set
  • sewing pins 
* Notes*
  • Synthetic batting is NOT suggested, only use a 100% cotton batting. It is important to be able to press the batting with a hot iron and steam.
  • Use a Low or standard loft batting. The #1 question I receive about QAYG is folks wanting to know if the seams are bulky. My answer is NOPE, not to a noticeable degree I promise.
  • This style of Log Cabin quilt block can be made into any size! The measurements I'm sharing makes a large floor pillow, but feel free to adjust to any size.

Now, let's get started!! 

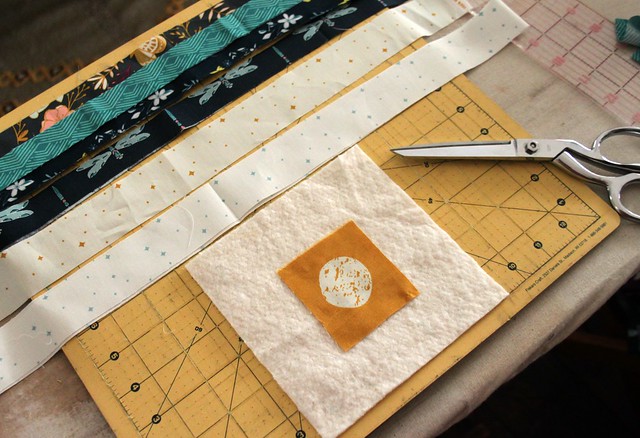
Log Cabin Supplies

Making the Blocks : :

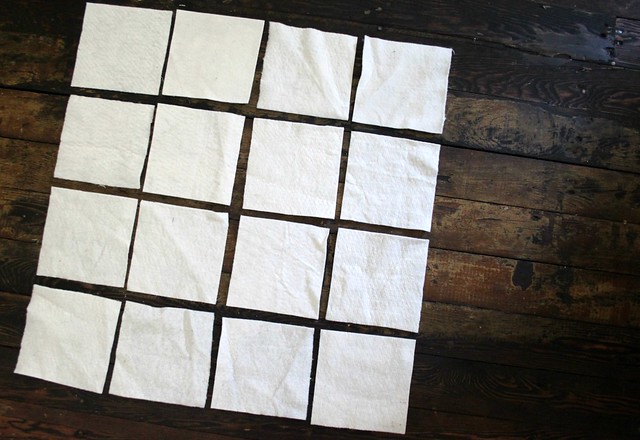
1. Begin by preparing your materials. I cut leftover cotton batting scraps into sixteen 6" batting squares.

Step 1

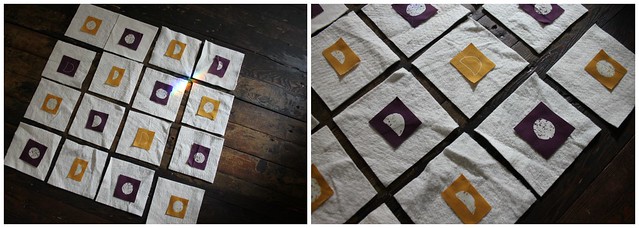
2. Place a single fussy cut moon, alternating colors, in the center of each of the sixteen batting squares.

Step 2

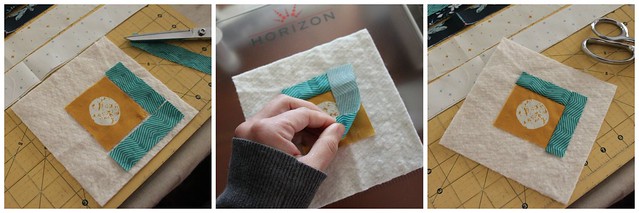
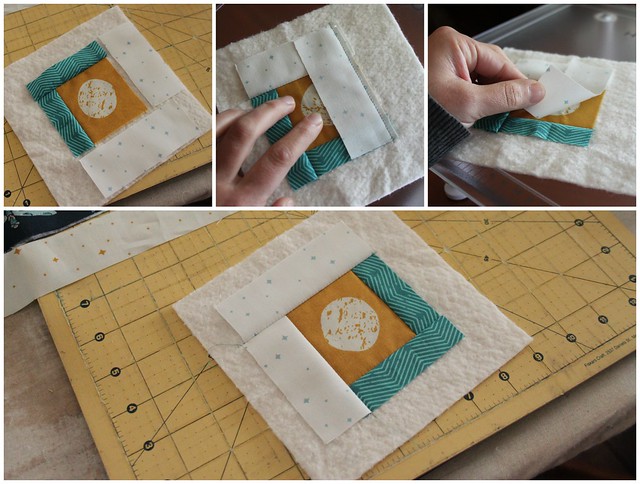
3. Begin adding the fabric strips {logs}. Cut two strips from one of the dark Nightfall prints. At the sewing machine, place one strip right sides facing the moon fabric and sew a 1/4" seam along the raw edges on the matched up side. You will be sewing through the batting, permanently attaching the fabrics in place. Once attached, open the fabrics so the right side is exposed and smooth to press with your hand.

Step 3

4. Add the next two strips exactly the same way, but this time using a low volume Luminaries star print. Attach these logs continuing with a 1/4" seam, smooth & press open as you go.

Step 4

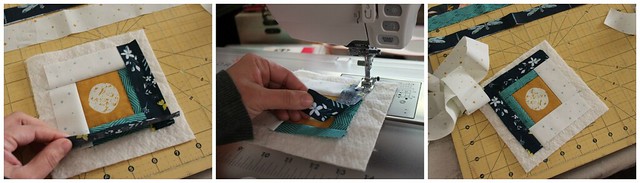
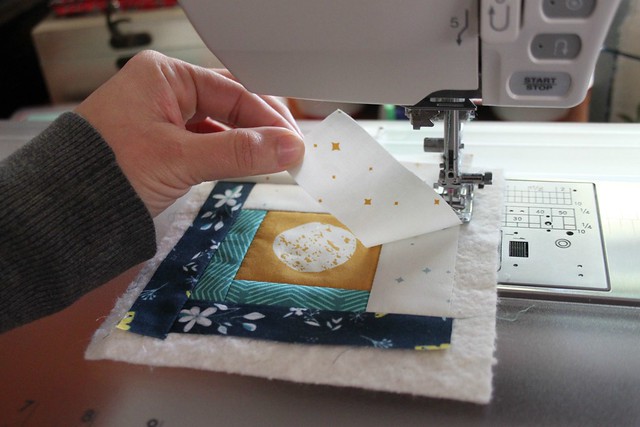
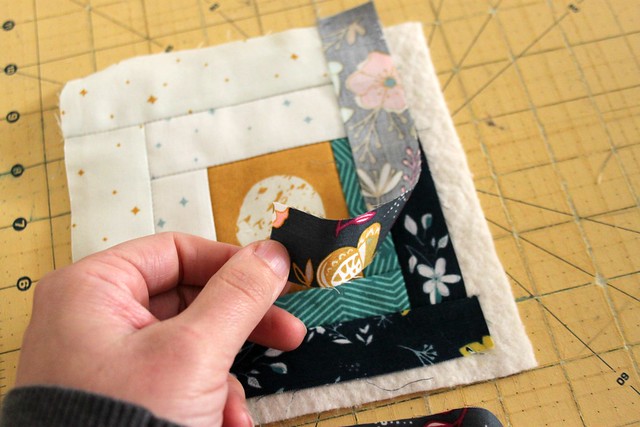
5. Work your way around the center moon, alternating the dark 1" Nightfall strips with the 1.5" Luminaries prints, adding each log, stitching, flipping, and pressing until you fill up each batting square.

Step 5

Log Cabin QAYG

Step 6

6. Once the fabrics have been added to each batting square, use a mat, ruler, and rotary cutter to trim to a 5.75" square.

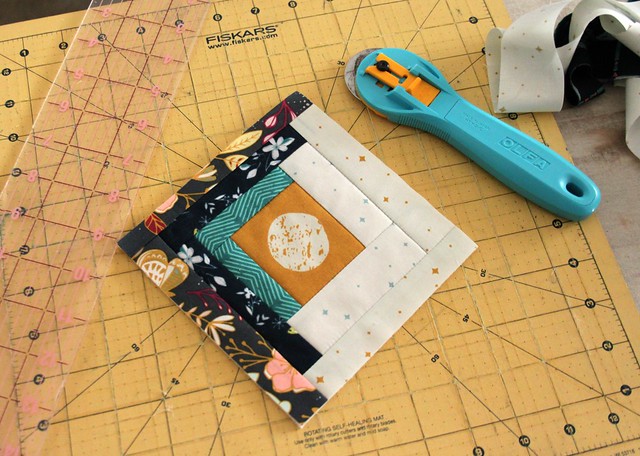
Trimming Log Cabins

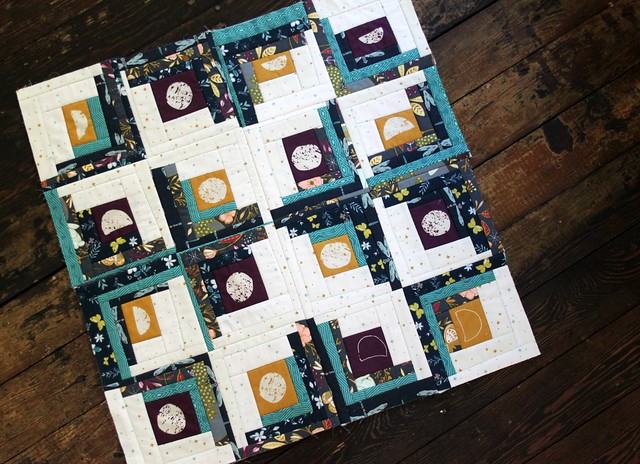
Use the diagram below to arrange the finished mini log cabins in the Moon & Stars pillow top design.

Moon & Stars Pillow Mock Up with spacing

Pillow Top Layout

Joining the QAYG Blocks : :

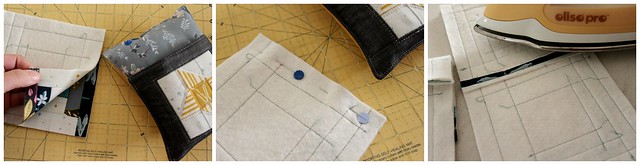
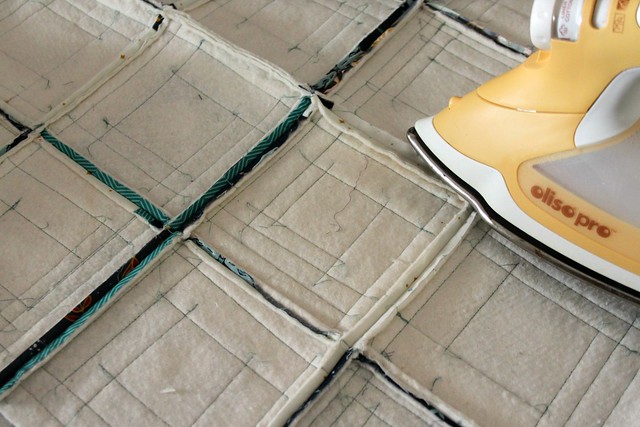
7. Begin with two blocks and place them right sides together. Use sewing pins to secure their place and sew along one side keeping a 1/4" seam allowance. Use a hot iron with steam to press the seams open as you join them.

Step 7

8. Repeat this step with the remaining blocks, sewing them together, pressing all seams open as you go.

Step 8

Press Seams Open

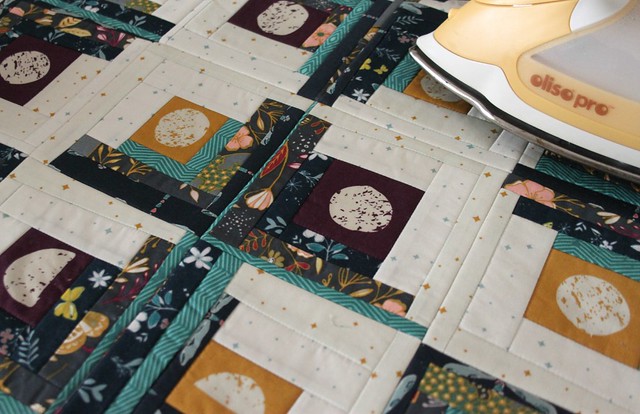
9. Press the pillow top front well once all the mini log cabins are joined together.

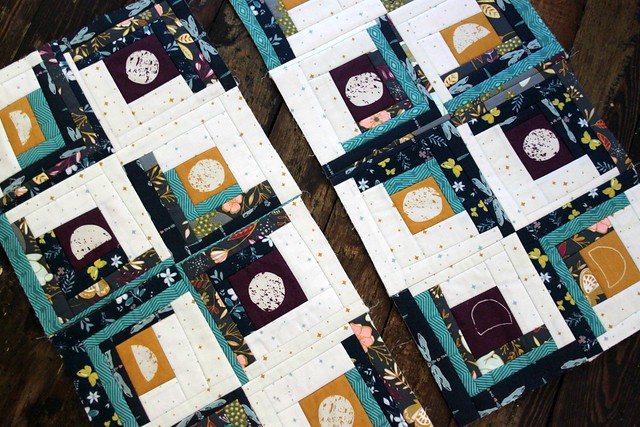
Nightfall QAYG Pillow

Finished Pillow Top

Finishing the Pillow : :

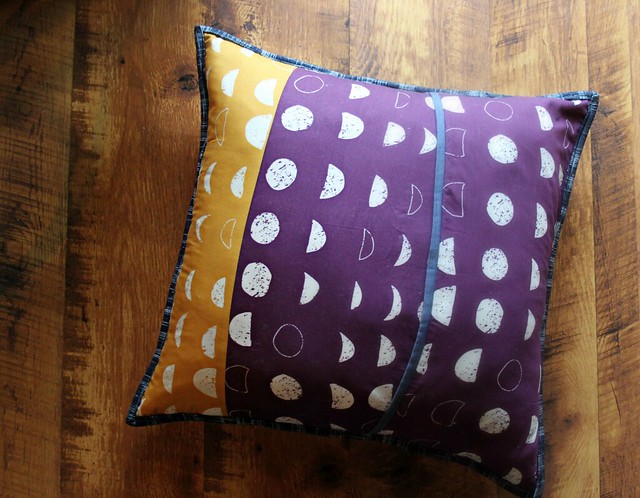
10. Prepare the backing fabrics with a double seam or bound edge to finish with an envelope style closure.

Backed in Moon Phase

11. Using your favorite quilt binding method, bind the pillow just as you would any quilt. Insert the pillow form and Viola, your pretty Moon & Stars Floor Pillow is finished!

With Tiny Stars

A Moon & Stars Floor Pillow

If you do give this tutorial a go at anytime, be sure to share on my Facebook page or on Instagram with the hashtag #NightfallFabrics & #NightfallParade -- I love seeing what you create!

Thanks so much for stopping by today!! ♡ Maureen

-------------------------------------------- 

* You can find the list of online retailers currently carrying Nightfall under my SHOP my Fabrics page -----> https://maureencracknellhandmade.blogspot.com/p/blog-page.html