Showing posts with label chevron. Show all posts

Wednesday, June 3, 2015

A Chevron Table Runner : :

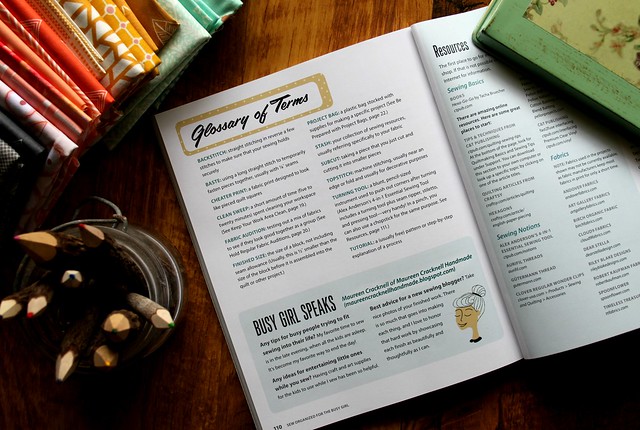
This week is my stop on my friend Heidi Staples' tour for her brand new book, Sew Organized for the Busy Girl! Heidi's book is a wonderful how-to for fitting sewing into our busy lifestyles, including practical tips that will help you stay organized and excited about finding the "you" time we all need to live happy, creative lives! This book includes 23 beautiful projects, ranging from handcrafted quilts to home decor, children's gifts, and functional storage pieces. Sew Organized includes an arsenal of time-saving tips and easy-to-implement advice, as well, you'll even find a tip from me within it's pages!

Full of tips & advice!

After a quick scan through of each Sew Organized project, I decided to make Heidi's Chevron Table Runner from her Chevron Table Set project. I've never made a runner before, so this was perfect!

Sew Organized for the Busy Girl Book Project Palns

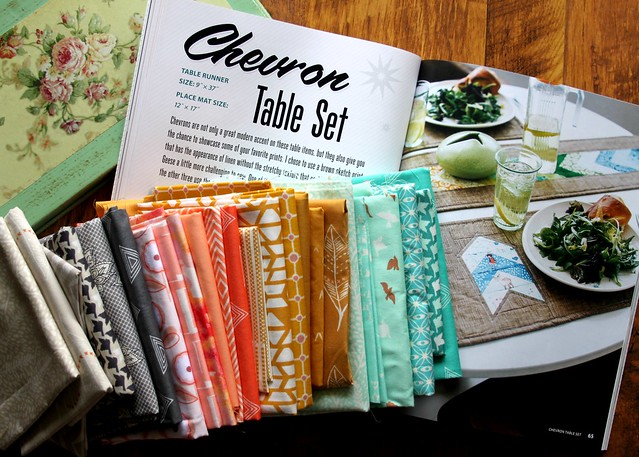
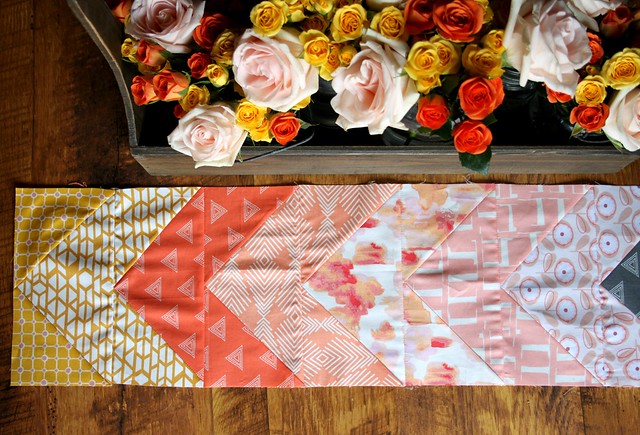
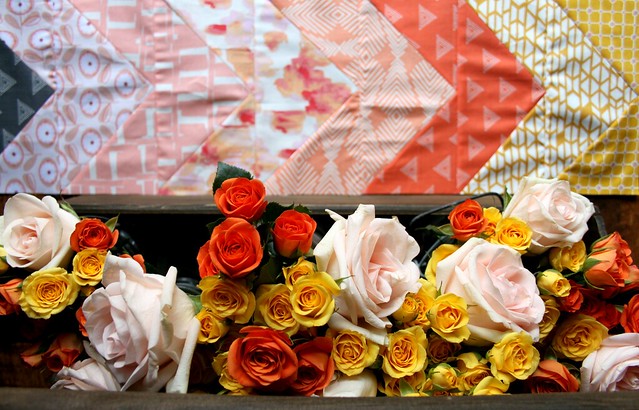
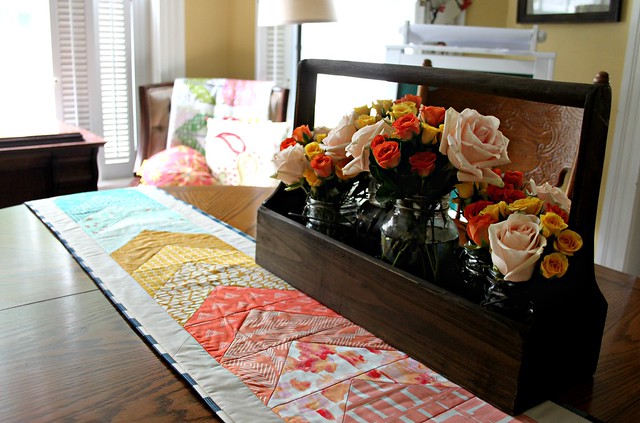
I love Heidi's use of flying geese for this pattern, their one of my favorite things to make! With her clear instructions I felt comfortable adapting the measurements to better fit our dining table. Inspired by the Ombré color technique of the Runner Heidi shares in her book, I began making my large geese with fabrics in my most favorite color palette, arranging them to the same effect!

Flying Geese

Ombré Layout

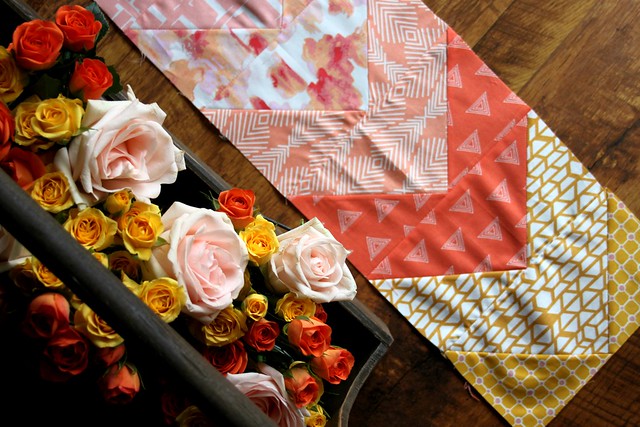
I love how these colors so perfectly match the roses I bought this past weekend!

Roses to match

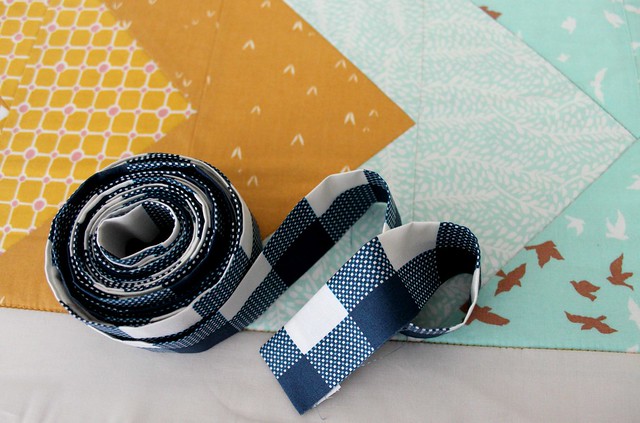
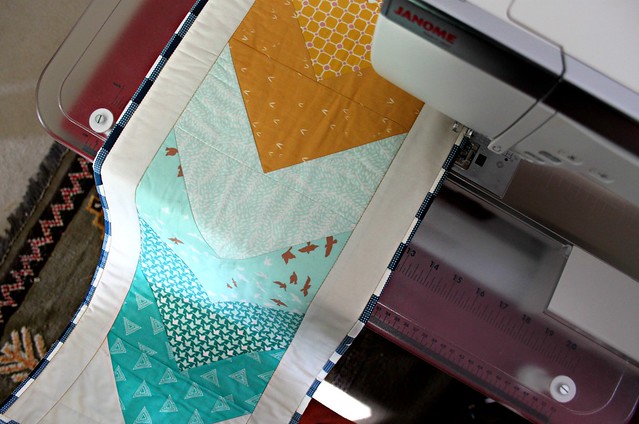
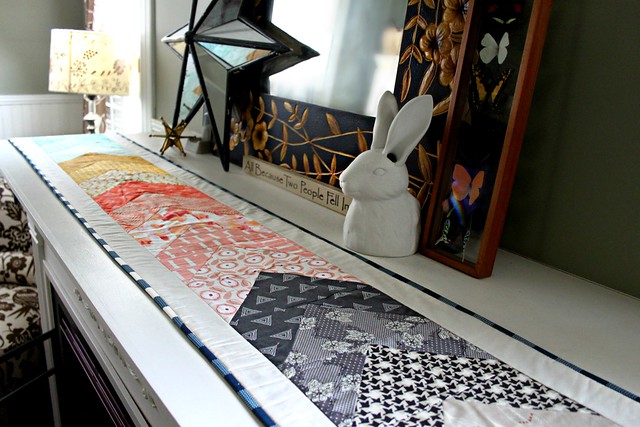
After adding my border fabrics and attaching my runner backing by stitching in the ditch with yellow Aurifil, I finished with my Folk Plaid binding. I love how this shade of denim blue coordinates so well with these pretty color!

Folk Plaid Binding

Runner Binding

Runner - Finished!

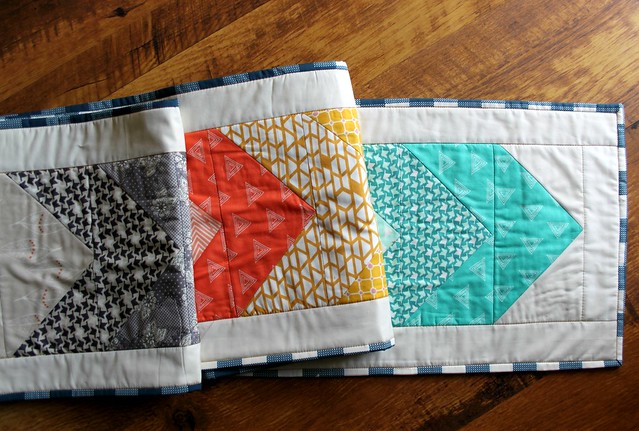
Once my Chevron Table Runner was finished I first tried it out on our dining table. The finished 12" x 80" size that I made works perfectly! I decided right away to make another, this time using the exact measurements shared in the book, to have on our kitchen island!

On my Table

Next I moved the runner to our mantel and I love it just as much!

On the Mantle

On the Mantle

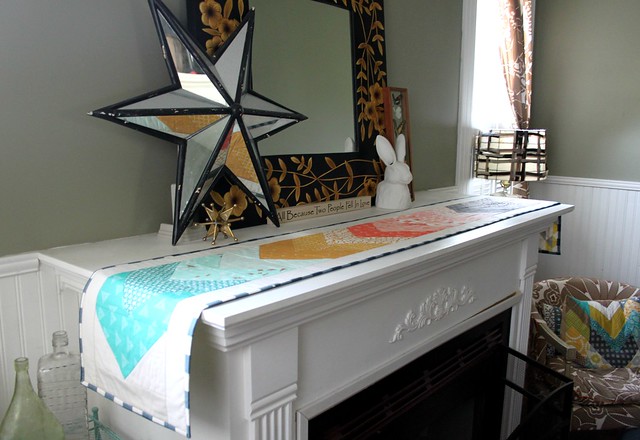
Looks like I'll be making two more!

Thank you so much stopping by today! I hope my project inspires you to check out Heidi's lovely book! Congratulations, Heidi, thank you for inspiring me and giving me this chance to try something new!

♡ Maureen

Tuesday, August 27, 2013

Indie Symmetry Quilt : :

It's the first day back to school for my kids, I can hardly believe Summer vacation is already over! I never handle these big events well so, I'm extra grateful to have saved this new quilt to share here today rather than trying to fit blogging into our busy day yesterday. I needed something exciting to blog about!

Indie Symmetry Quilt

Having this big, beautiful Indie quilt finally finished is honestly the most excitement I've felt since I began quilting! It's almost a King size quilt, measuring in at 90"x104"! It's made in all Indie fabrics, a collection by Pat Bravo for Art Gallery Fabrics, in a simple symmetrical layout of both large & small, square & rectangle cuts of fabric. When I sketched out the pattern more than a year ago, I was inspired by a few quilts I had seen at my most favorite store, Anthropologie. These Indie fabrics go so well with that colorful, bohemian style!

Indie Symmetry Quilt

Indie Symmetry Quilt -- my jewelry catcher

It's on our bed now, along with my favorite Indie pillow, and a few more cozy layers of bedding that I've been collecting to go with this quilt throughout the year. A work in progress still, but I like how our room is starting to come together.

Indie Symmetry Quilt

Indie Chevron Pillow

The quilt top was originally made about a year ago for Pat to use in her Indie promotional ads and video. Then just a few weeks ago I finally pieced together the largest quilt back I've ever seen and shipped both the top and back off to Sew Shabby Quilting, a professional long-arm machine quilting service I was recently introduced to. For this quilt, keeping with it's pattern of squares and rectangles, I chose their Square Dance .01, a perfect pattern match in my opinion! Melissa did such an amazing job!!

Indie Symmetry Quilt

The back is finished in the Indie Afro Fusion in Dusk print and the binding is Dynasty in Saffron, my two most favorite fabrics in the collection!

Indie Symmetry Quilt

Indie Symmetry Quilt -- bound in Dynasty Saffron

Because of it's large size photographing this one was such a challenge, but we still managed a few fun shots! I'm so grateful for my husband and kids for being so awesome and careful when it came to taking these last photos!

Indie Symmetry Quilt -- on the bridge

Indie Symmetry Quilt

I still have to finish up tutorials for a few of my other quilts, but I'm curious how many of you would be interested in making a quilt this size? And, if taking the time to share the pattern at some point would be a good idea? When it comes to making a quilt this big, I love the large piecing myself, and don't feel disappointed at all with the symmetrical look as opposed to making up a quilt this size block, by block. What do you think?

Wishing you all a wonderful week!    Maureen

Monday, April 29, 2013

A Quilted Chevron Tote Bag Tutorial : :

Quilted Tote Bag tutorial


Today I'm sharing my tutorial for a Quilted Chevron Tote bag, originally created for the Riley Blake Design Team, using very simple instructions, and Riley Blake's Chevron fabric collection. This step by step tutorial is for making a casual and useful tote bag, however you can take this method of tote bag making and go crazy with your own ideas, just by adding a few steps. You can see a fun example of that at the end of this post. If you have any questions please leave a comment or feel free to email me at maureencracknell@hotmail.com. Now let's get started!!  

What you'll need : :
  • 2 - pieces of chevron fabric measuring 16" x 18" for the outer bag sides
  • 2 - pieces of chevron fabric measuring 16" x 18" for the inner bag lining
  • 2 - pieces of solid fabric measuring 4" x 18" for the bottom of the outer bag sides
  • 2 - pieces of solid fabric measuring 4" x 18" for the bottom of the inner bag lining
  • 2 - pieces of solid fabric measuring 9" x 36" for the bag handles
  • 1 - piece of batting measuring at least 20" x 22"
  • coordinating thread
  • Sewing pins and basting pins
  • Sharp scissors and/or a rotary cutter/mat set  

    Riley Blake Chevrons for my next Design Team Project!

    Sewing and quilting the outer tote bag piece : :

    1. With right sides facing, place the solid fabric on the chevron print 2. Pin in place 3. Using a 1/4" seam allowance, sew fabrics together 4. Press with iron so seams are facing down 5. Lay the pieced bag front on to the piece of batting 6. Get the basting pins ready

    1-6

    7. Pin together fabric and batting, carefully so the pins are in the colored chevron stripe, leaving room for quilting on the white 8. With a straight, even stitch, sew in the center of the white chevron stripe to create your quilting 9. Use a straight edge and rotary cutter to trim away excess batting

    8-11

    The first finished quilted chevron tote bag piece should look like this. Repeat the steps above to create the second side of the tote bag.

    finished bag piece -- repeat

    10. Place both pieces of the quilted chevron tote bag right sides together 11. Pin in place 12. Using a 1/2" seam allowance, sew around the three outside edges of the tote bag pieces, leaving the top side open 13. Zig zag stitch again around the outside edges of those three sides

    13-16

    14. To form the tote bag sides and bottom, square off the corners of the pieced tote bag front. First, form a triangle at the corner edge 15. Mark a sewing line 3.5" from the corner point 16. Sew on that line, first with your straight stitch and then with a zig zag stitch 17. Trim away the corner just to the outer edge of that seam

    corner steps

    The finished outer quilted tote bag piece should look like this, after corners are squared off. Turn right side out.

    finished bag front -- leave inside out

    Sewing together the lining : :

    18. Sew together the Chevron lining fabric and solid lining fabric pieces 19. Sew the sides and bottom of the lining fabric pieces together first using a straight seam and then a zig zag stitch, (just as we did for the outer tote bag pieces) 20. Repeat steps to square off corners, to create the lining sides and bottom

    lining steps

    21. Place the outer quilted tote bag piece inside of the lining piece 22. Match up the tote bag opening edges

    Place bag front inside of the lining

    Sewing the tote bag straps : :

    23. Fold in one edge of the strap piece of fabric a 1/2", press with iron 24. Fold 1/2" again, press 25. Turn strap piece and fold in 2.5", press 26. Fold again matching up the edges, press well, and pin in place 27. Sew along both edges of the strap, removing pins as you go

    strap steps

    The finished tote bag straps should like these.

    Finished Straps

    Sewing in the straps and finishing : :

    28. Mark for the straps, 3.5" in from each side 29. Place the straps in between the outer tote bag piece and the lining piece at each mark 30. Pin in place 31. Mark a line a few inches long for an opening to leave to turn out the bag 32. Sew around the edge, attaching the straps, leaving an opening for turning the tote bag out

    sewing in straps, leave opening for turning steps

    33. Turn out the tote bag 34. Turn in the edges of the opening and pin closed 35. Sew opening closed and continue around the entire outer edge of the tote bag

    finished steps
    Voila! Your Simple Quilted Chevron Tote Bag is finished!!

    Quilted Chevron Tote Bags

    You can see here that I used more of those great Riley Blake Chevron fabrics to create a quilt block for the front of a second Quilted Chevron Tote Bag. I like the soft and easy bag this created, perfect for shopping, the beach, and for washing after much use! You can get very creative using this method of tote bag making. You can swap out the batting for interfacing, to create a sturdier bag, add pockets, appliques, magnetic closures for a fancier version.

    A Quilted Chevron Tote Bag Tutorial


    If you do give this tutorial a go at anytime, be sure to share on my Facebook page or in my Maureen Cracknell Handmade Flickr group!

    Happy Monday, everyone!!
    Maureen 

    p.s. Don't forget to enter my weekend Giveaway with Stash Fabrics right here, if you haven't already! The winner will be announced tomorrow! 

    Monday, March 11, 2013

    A Quilted Improv Chevron Pillow : :

    Improv Chevron Quilted Block

    It's been a while since I shared a new pillow here! This one is made up of an Improv Chevron block, a tutorial by Six White Horse's, in a favorite color combo of mine -- yellow, aqua, grey, navy, teal, white, and a little brown. It's for our Living Room, which I've been trying so hard to keep within this color scheme!

    Quilted Improv Chevron Pillow

    This quilt block pattern is such a favorite of mine! I made a couple several months ago for a charity bee quilt, and right away made a third, they are so much fun! And, I'm definitely not done with this block pattern yet. A quilt in this style, and even in this same color palette, would be so perfect for one of my sisters!

    Improv Chevron Block

    The back is finished in an Essex Yarn Dyed RK linen in Leather and some pretty Aurifil thread in Light Blue. The perfect combo to keep the earthy feel I'm trying to maintain in this room, which is for my husband mostly since that's his style all the way!

    Heirloom Stitch in Aurifil Light Blue

    While finishing the envelope style back, I had some fun trying out a new stitch on my Janome Horizon, one of it's many Heirloom stitch options. It's a simple diamond pattern with a heavy double stitch. I love the way it looks and I can't way to try out more on a second pillow. Next, I think I might try to make some sort of embroidered sampler pillow, in the same thread colors as this pillow, full of the Heirloom stitches.

    Heirloom Stitch. Light Blue Aurifil. Essex Yarn Dyed in Leather.

    I'm really loving it next to my favorite Anthropologie lampshade, and I'm so glad it's finally finished!!

    Improv Chevron Pillow

    Happy Monday!   Maureen

    Monday, January 14, 2013

    A Luxe In Bloom Tutorial {and GIVEAWAY} : :

    Happy Monday, friends! I'm so excited to be sharing a new Fat Quarter Gang project on the Art Gallery Fabrics Blog today! Along with an amazing fabric Giveaway right here, of course! 

    Art Gallery Fabrics Fat Quarter Gang

    HOMEPAGE_fatQuarterGANG

    This time I'm showing you how to stitch up a fun and pretty, patchwork Chevron Valance, with Sarah Watson's new collection Luxe In Bloom! We just moved into our very first home, so I am all about sewing up home decor these days! You can find the full project tutorial here or simply by clicking on the tutorial image below.

    Chevron Valance Tutorial

    Luxe In Bloom is one of my most favorite collections to recently debut, so I was super eager to get my chance to work with them! Using a Fat Quarter bundle of the Quartz colorway, I wanted to be sure to create a project that didn't leave much waste -- Just six fat quarters, made TWO valances!

    Chevron Valance Tutorial

    These were made for our kitchen windows and we love them! From morning until dusk the light gleams through like beautiful stained glass, illuminating Sarah's gorgeous designs! And, in the evening the lovely colors that make up this fabric collection really shine!

    Chevron Valance Tutorial

    Now I get the pleasure of hosting a special Fabric Giveaway to kick off the new week, for a Fat Quarter Bundle of beautiful Luxe In Bloom in the Quartz colorway!!

    You can find Luxe In Bloom newly available in several of my sponsor's shops -- 
    . . . . . . . . . . . . . . . . . . . . . . . . . 

    Luxe In Bloom Fabric Giveaway!
     . . . . . . . . . . . . . . . . . . . . . . . . . 

    Enter to win this fabric bundle! 

    Here's how,
    - Simply leave a comment right here, under this post! I'd love to know what you'd like to make with these?!
    - Followers of Maureen Cracknell Handmade get an additional entry, too! Whether you follow me here, in your reader, or on Facebook, just let me know that you do by making a separate comment here to record that entry. (one optional entry)

    For Art Gallery Fabrics : :

    Stop by the AGF Blog to let them know you,

    - Follow them on your fav social media platform (Pinterest, Facebook, Twitter)
    - Subscribe to their blog to stay up to date on all thing AGF & the Fat Quarter Gang!
    Leave a comment letting them know which platform you have chosen to follow them on and that you have subscribed to the blog :)

    Please enter now through Friday morning, January 18th. Mr. Random will pick the winner and I will announce their name at the bottom of this blog post.

    * Note * This giveaway is open to EVERYONE! If you're a "no reply" or an anonymous commenter, remember to include your email address in your comment so that I can contact you, should you win! Please check to make sure you can be contacted!


    Wishing a wonderful new week to all!

    Thank you to all who entered this past weekend's Giveaway!! 

    22754 
    *  *  *  *  *  *  *  *  *  *  *  *  *  *  *  *  *   
      From 808 entries, Mr. Random says the lucky winner is...

    Comment #589 -- RoRo, who said...
    Probably a lap quilt to use when watching tv at night - the designs would keep me awake. I follow you on Facebook...love all the pretty things you create!

    Congratulations!!! I will be in touch shortly!