Showing posts with label riley blake. Show all posts

Friday, September 26, 2014

A Fabric GIVEAWAY : :

*  *  *  *  *  *  *  *  *  *  *  *  *  *  *  *  *  *
It's Fabric Giveaway Friday!  

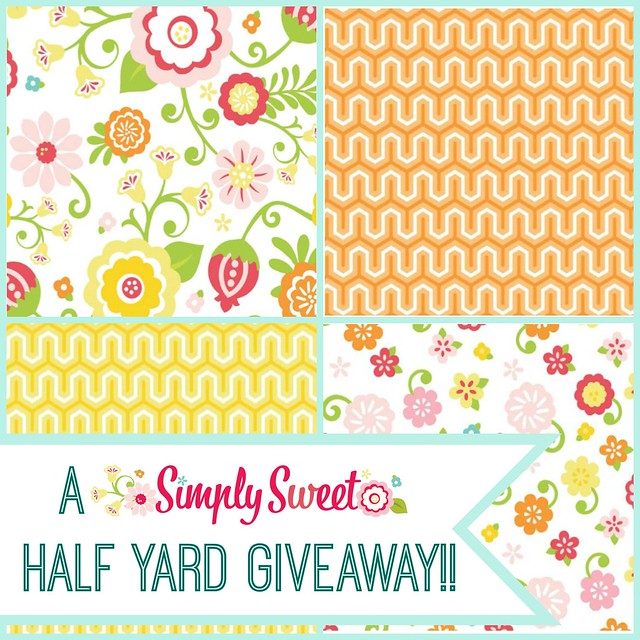
A Simply Sweet 1/2 YD GIVEAWAY!

*  *  *  *  *  *  *  *  *  *  *  *  *  *  *  *  *  *  *  * 
discover fabric

My sponsor Discover Fabric is an online fabric shop dedicated to supplying the needs of quilters, crafters, and sewing enthusiasts. Their goal is to delight customers with a large selection of colorful modern fabrics that inspire creative sewing projects. They offer designer quality fabrics, sewing patterns, sewing threads, gifts and much more! All of their fabrics are high quality quilting cottons perfect for quilts, apparel, and crafts, by companies/designers you know and love such as Camelot Fabrics, Riley Blake Designs, Clothworks, Michael Miller, Henry Glass, Anthology Fabrics, Robert Kaufman, Marcus Brothers, and more!!
  
SHOP  *  NEWSLETTER  *  FACEBOOK


*  *  *  *  *  *  *  *  *  *  *  *  *  *  *  *  *  *  *  *
We hope you enjoy visiting the Discover Fabric sites!! 

22754

For this week's Fabric Giveaway Discover Fabric is offering a 1/2 yard of each of these adorable Riley Blake prints from their Simply Sweet collection! You can find these available at the Discover Fabric shop HERE!!

A Simply Sweet 1/2 YD GIVEAWAY!

Enter to win! 

Here's how,
 
1. Simply leave a comment here under this post! (one entry)
2. Follow Discover Fabrics on Facebook or sign up to receive their Newsletter. Just let me know that you did by making a separate comment here to record that entry. (optional extra entry) 

3. My followers get a third entry! If you follow here, on Instagram, or on Facebook just let me know by making a separate comment here to record that entry. (optional extra entry)
4. Help spread the word!! I know that many of you already do, so I thought it would be nice to add that as another way to enter! Whether by instagram, tweet, facebook, pin, blog, etc... (optional extra entry) 

That’s 4 possible entries! Enter now through Monday, September 29th! The winner will be picked at Random and I will announce their name at the bottom of this post, here on the blog.


* Note * This giveaway is open to EVERYONE! If you're a "no reply" or anonymous commenter, please remember to include your email address in your comment! 

Thank you to all who entered the Giveaway!! From 751 entries, Mr. Random says the lucky winner is... 

Comment #411 --   *
 Susan Paxton  *  Congratulations, I'll be in touch shortly!   

Friday, June 27, 2014

A Fabric GIVEAWAY : :

Each week I share a Fabric Giveaway offered from one of my wonderful sponsors Friday through Monday. These Giveaway's are often times scheduled a few months in advance and are something I really look forward to, as I shared last week. I'm grateful to have such generous sponsors and this weekly opportunity to highlight these shops individually with your support.

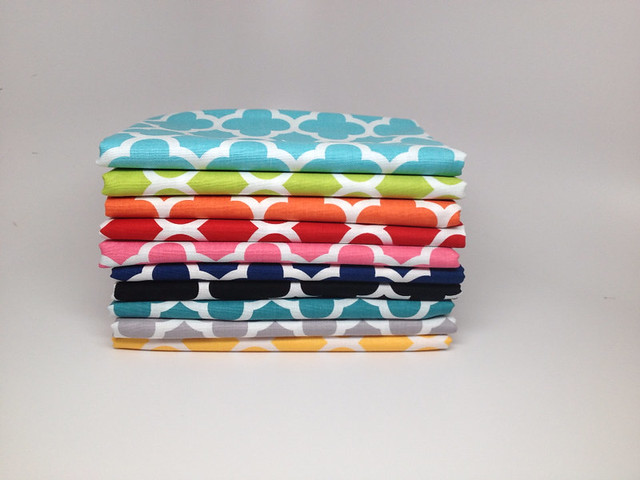
Quatrefoil FQ Stack from Fabric Fly for this week's Giveaway

*  *  *  *  *  *  *   *  *  *  *  *  *  *  *  *  *  *  *  *  *  *  *  *  *  *

Fabri Fly Logo 275

My sponsor Fabric Fly is an online fabric shop full of fresh designer fabrics! They carry a wonderful variety of quilting cottons, including yardage & pre-cuts, flannels, & scrap packs! They offer fast shipping and great customer service!!

We invite you to check out their --

*  *  *  *  *  *  *   *  *  *  *  *  *  *  *  *  *  *  *  *  *  *  *  *  *  *
We hope you enjoy visiting Fabric Fly!!
  
22754

For this week's Fabric Giveaway Fabric Fly is offering a
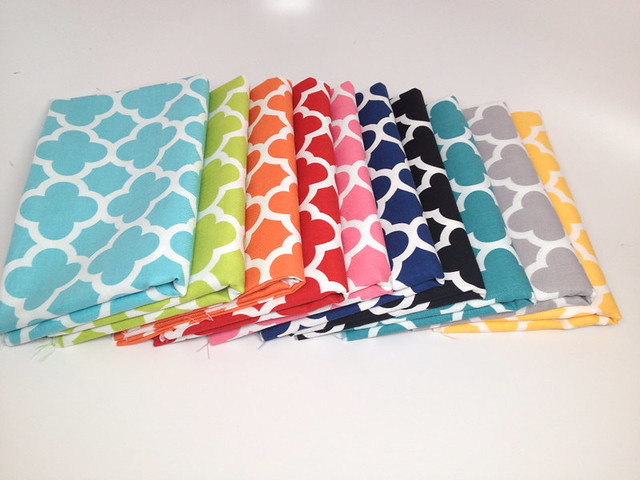
Fat Quarter bundle of Riley Blakes's Quatrefoil Basics! This bundle includes a rainbow assortment of ten colorful modern prints to one lucky reader! 

Quatrefoil FQ Stack from Fabric Fly for this week's Giveaway

Enter to win!

Here's how,   

1. Simply leave a comment here in this post! (one entry)
2. Follow Fabric Fly on Facebook, Instagram, or sign up to receive
their newsletter! Just let me know that you do by making a separate comment here to record that entry. (optional extra entry)
3. My followers get a third entry, whether you follow me here, on Facebook, or on Instagram, just let me know that you do by making a separate comment here to record that entry. (optional extra entry)
4. Help spread the word! I know that many of you already do, so I thought it would be nice to add that as another way to enter. Whether by Instagram, tweet, facebook, pin, blog, etc... (optional extra entry) 

That’s 4 possible entries! Enter now through Monday, June 30th. The winner will be chosen by Random and I will announce their name on Monday, at the bottom of this post, here on the blog! 


+ + + + + + + + + + + + + + + + +

Thank you to all who entered the Giveaway!!

From 1,093 entries, Mr. Random says the lucky winner is... 

Comment #992 --   *   Jules   *
   
Congratulations! I will be in touch shortly! 

Friday, February 28, 2014

A Fabric GIVEAWAY : :

*  *  *  *  *  *  *   *  *  *  *  *  *  *  *  *  *  *  *  *  *  *  *  *  *  *
It's Fabric Giveaway Friday!

RBD Damask Giveaway with the Fabric Fly!!

*  *  *  *  *  *  *   *  *  *  *  *  *  *  *  *  *  *  *  *  *  *  *  *  *  *

Fabri Fly Logo 275

My sponsor Fabric Fly is an online fabric shop full of fresh designer fabrics! They carry a wonderful variety of quilting cottons, including yardage & pre-cuts, flannels, & scrap packs! They offer fast shipping and great customer service!!

We invite you to check out their --

*  *  *  *  *  *  *   *  *  *  *  *  *  *  *  *  *  *  *  *  *  *  *  *  *  *
We hope you enjoy visiting Fabric Fly!!
  
22754
 
For this week's Fabric Giveaway Fabric Fly is offering a
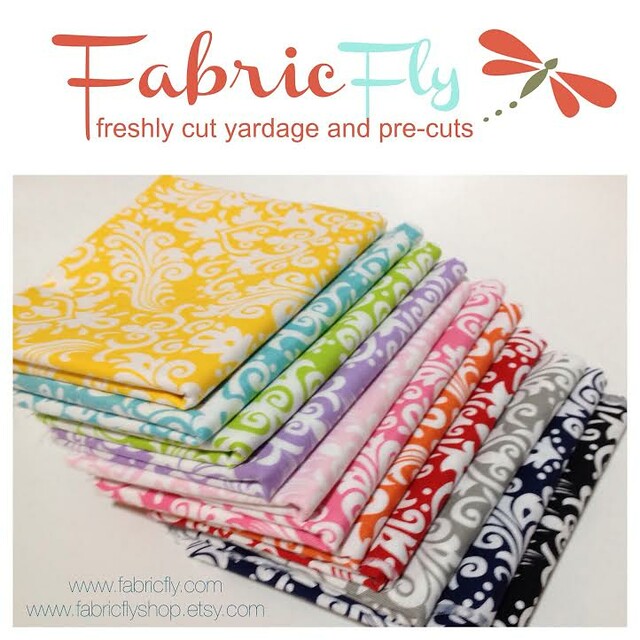
Fat Quarter bundle of Riley Blakes's new and very useful Damask Basics fabric collection! This bundle includes an assortment of eleven colorful damask prints to one lucky reader! 

RBD Damask Giveaway with the Fabric Fly!!

In addition, Fabric Fly is offering 10% off in their shops beginning today -- Friday, Feb. 28th through the duration of this Giveaway! Simply use Coupon Code: MCHandmade10 on both their website (www.FabricFly.com) and in their Etsy Shop (www.FabricFlyShop.etsy.com) to enjoy the discount!!

*  *  *  *  *  *  *  *  *  *  *  *  *  * 
Enter to win!

Here's how,   

1. Simply leave a comment here in this post! (one entry)
2. Follow Fabric Fly on Facebook, Instagram, or sign up to receive
their newsletter! Just let me know that you do by making a separate comment here to record that entry. (optional extra entry)
3. My followers get a third entry! Whether you follow me here, on Facebook, or on Instagram, just let me know that you do by making a separate comment here to record that entry. (optional extra entry)
4. Help spread the word!! I know that many of you already do, so I thought it would be nice to add that as another way to enter! Whether by Instagram, tweet, facebook, pin, blog, etc... (optional extra entry) 

That’s 4 possible entries! Enter now through Monday, March 3rd. The winner will be chosen by Random and I will announce their name on Monday, at the bottom of this post, here on the blog! 


+ + + + + + + + + + + + + + + + +

Thank you to all who entered the Giveaway!! From  1,801 entries, Mr. Random says the lucky winner is... 

Comment #845 --   *  BizyStitches  * 

Congratulations, I'll be in touch shortly! 

Monday, August 19, 2013

An Ant Farm Quilt : :

Ant Farm Quilt -- qayg
Last week, on our way out to have dinner at my parents house, we took a drive to take these photos of my finished Ant Farm Quilt, a request & gift for my Nephew Owen. Since we couldn't think of a "hill" to take these photos in front of, we decided to take them at the very top of the prettiest hill around, Dutch Hill. It was windy and the sun was just starting to set, but it was so pretty! You may have already seen the video I shared here on my Instagram, it was a beautiful evening in Potter County!

This quilt came together super quickly, once I finally decided on a pattern! It's made up of scrappy, improv log cabin blocks on both sides, separating the colorful fabrics from the lighter, white, & grays that I used. For the center of the quilt I made four courthouse step blocks, keeping that same color separation. I really love the combination of these two quilt blocks, and have a second quilt all planned out using them once again!

Ant Farm Quilt -- qayg

It's quilted using my quilt as you go method, with a gray Aurifil 50wt and straight line quilt stitches spaced about an inch or so apart. In this photo below, with the sun facing the finished quilt, you can really see all those pretty quilt stitches!

Ant Farm Quilt -- qayg

One of my favorite things about finished qayg quilts is having that contrast of a heavier, more densely quilted quilt for the front, with the softer, square grid pattern for the quilt back.

Ant Farm Quilt Back -- qayg

Since I made my blocks for this quilt rather large, at an 18" square, I added a simple tie with a pale gray cotton floss to the center of each block, as well.

Ant Farm Quilt -- qayg & center tied

For the binding I chose a Lizzy House striped fabric from her Hello Pilgrim collection. I love using a small scale striped fabric for binding! The colors in this one worked perfectly with the Backyard Baby fabrics!

Ant Farm Quilt Binding -- Lizzy House Stripe

Here's that extension table binding trick once again! 

Ant Farm Quilt -- binding

Ant Farm Quilt -- binding
Along with the Backyard Baby prints I used lots of Riley Blake Basics -- their Cotton Dots, Solids, & Ombre Dots. I really put my overflowing scrap drawer to good use on this quilt, as well. That always feels so good!!

Ant Farm Quilt -- qayg

Ant Farm Quilt -- qayg
I'm tucking this quilt away with the others I've made and are making for my children, nieces, and nephews. I'm hoping to see that pile grow by seven more between now and Christmas! I've already made lots of progress on my Butterfly Quilt -- more on that one soon!!

Happy Monday, friends!     Maureen

Thursday, July 25, 2013

A Quilted House Pillow Tutorial : :

I first have to mention that from all those helpful comments you all left yesterday and my own stubbornness to try to fix things as quickly as possible when they're just not working, I believe I solved my Shelburne Falls dilemma! And, I now have a new quilt layout that I am very happy with. Thank you! I shared a quick shot on my Instagram so you can see the simple change I made that I think did the trick!

Today, in between lots tutorial writing & computer work, I plan to piece my staggering Shelburne Falls & Pure Element strips together with hopes for a quilt finish to share next week! Speaking of tutorials, I also thought today would be the perfect day to share my Quilted House Pillow Tutorial right here. I created this as part of the Riley Blake Design Team and had shared it on their blog on a pretty busy week. It's definitely my most favorite project that I have put together for RBD! With another busy year of tutorial projects beginning in the Fall, I like to make certain I share these project once more, right here, just in case you missed any of them. Here you go, enjoy!

A Little Red Riding Hood House Pillow Tutorial

designTeamThanks for checking out my newest RBD Design Team Project! This time I'm sharing a quilted and very sweet house pillow, using prints from the Little Red Riding Hood Fabric collection and a couple RBD Basic Solids. This tutorial combines some basic quilting, simple & fun patchwork, raw-edge applique, with a few special embellishments that you can really have some fun with!


Now let's get started!!

What you'll need : :
  • 1 - 3/4 yd cut of Little Red Riding Hood Little Main print in Red
  • 4 - fat quarters prints from the Little Red Riding Hood Collection
  • 1 - Fat Quarter cut of solid fabric for the house pillow front, I used the RBD Basic Gray
  • 1 - Fat Quarter cut of white solid fabric for the windows
  • 1 - piece of batting measuring at least a 15.5" square 
  • 1 - piece of batting measuring at least 10"x16"
  • iron-on fusible interfacing, such as HeatnBond lite
  • sewing pins or basting spray
  • rotary cutter/mat/ruler
  • 1 - size 14" pillow insert
  • house pillow embellishments -- buttons, ric rac, ribbon, embroidery floss, etc.

You can still find the Little Red Riding Hood collection available in these shop!


I'm loving these Little Red Riding Hood fabrics! They are so cute!!

Cutting : :

1. Using a cutting mat, ruler, and rotary cutter, cut a piece from the fat quarter of fabric you choose for the main house pillow front measuring 12.5"x14.5"  2. from the Little Ride Hooding prints, cut 8 - measuring 3"x4". I fussy cut some of these to showoff the adorable design of the main print in this collection

1 Cut Fabrics
Pic 1

Piecing the Pillow Front : : 

3. using a 1/4" seam allowance, sew the side patchwork pieces together in the order chosen for both sides of the main house pillow solid fabric, press seams open  4. lay these patchwork panels, right sides down, along both long sides of the main house pillow solid fabric, pin in place, and sew to attach using a 1/4" seam allowance. Press these seams open, as well


pic 2
pic 3

Quilting the Pillow Front : : 

5.  Using either pins or basting spray, baste the pillow front to the piece of batting measuring at least a 15.5" square

8 Baste to batting

6. begin to add the quilting stitches, first by sewing a 1/4" on both sides of the pillow front seams where the main house solid fabric and patchwork panels were sewn together

9 sew 1.4 inch on each side of seams

7. continue adding the quilting stitches through the center of the pillow front, keeping a space of about a 1/2" between each. I simply use my presser foot as my guide

pic 4

8. use the rotary cutter/ruler/mat set to trim the quilted pillow front to be a 14.5" square

pic 5

Adding the House Appliques : : 

9. for the house door cut a piece measuring 3"x7". For the windows cut 3 - measuring 2.5"x3" from the white fabric. For the shutters cut 4 - 3"x4". Have the embellishment supplies ready for adding. I chose ric rac, a button for the door knob, threads, and floss

14 Supplies for Applique

10. follow interfacing directions and attach to door and window fabrics

14 Prepare applique piecing with interfacing

11. to create the shutter, fold each piece in half with right sides facing and sew along both side edges using a scant 1'4" seam. Clip corners, turn out, and press well. Using a contrasting thread, top stitch around each shutter

pic 6

12. layout the prepared applique pieces and embellishments onto the house pillow design. Press with hot iron to adhere the door and window pieces. If needed, use pins to set any other pieces in place

pic 7

13. using either an applique or zig zag stitch on your sewing machine, stitch around each of the windows and door to attach them permanently

20 Use your machines applique stitch or zig zag stitch to sew the windows and door in place
21 finished applique stitching

Adding the House Details : :  

14.  it's time to add those little details -- use black thread to add machine stitched details to the windows, hand sew on the button doorknob, add hand-stitching with floss, etc. This is the part where you can really have some fun and make this your own!!

pic 8

Making the House Pillow Roof : :  

15. cut from one fat quarter a piece of fabric measuring 10"x16" and layer onto a batting piece that same size  16.  again add quilting stitches about 1/2" apart. For this I start in the very center and work my way out on both sides of that first stitched line, using my presser foot again as my guide

quilted roof

17. cut roof piece to size by first triming this quilted piece to measure a 9"x15" rectangle.  Mark a point at the very top center of this piece, using your rotary cutter/ruler/mat set, set ruler from this point traveling down to 2" up from the bottom and trim away corner. Repeat for the other side, as well

 trimmed up roof

18.  cut a piece from the main Little Red Riding Hood fabric the same size as the quilted roof piece. With right sides together, sew 1/4" seam along the pointed sides of the roof and then again with a zig zag stitch

pic 9

19. Trim away the top corner of the roof, turn right side out, and press well  20. Add a top stitch staying very close to the outside edge of this roof piece

pic 10

33 finished pillow front pieces

Adding the House Pillow Roof : :  

21. place quilted roof piece right side facing, along the top of the house pillow front. Pin and sew using a 1/4" seam allowance   22. to prepare for adding the pillow back fabrics, use pins to make sure the roof sides are out of the way

pic 12

Finishing the House Pillow : :  

23. from the main Little Red Riding Hood fabric, cut 2 -- 12 x 14.5" pieces for the pillow back fabric. Hem one long side of each piece by folding edge over 1/4", press, fold 1/4" again, press again, and sew along the inner and outer edge of that fold. Repeat for both pieces. Remember that these are directional printed fabrics, so make sure you hem the right side  24. place with rights sides facing onto the house pillow front and pin in place all the way around

pic 13

25. keeping a 1/4" to a 1/2" seam, sew all the way around the pillow. Using a zig zag stitch, sew all the way around again, to reinforance the pillow sides

39 straight stitch and zig zag around pillow , be careful not to catch the roof sides

26. clip corner, turn pillow out, remove any pins used to pin the roof sides in, and press. Add two rows of top stitching to the very top of the house pillow, just below the roof, to give it a little bit of extra sturdiness

40 add two rows of top top stitching to the pillow to give the house pillow roof a little sturdiness

Fill with your pillow insert and Voila! Your Little Red Riding Hood Quilted House Pillow is finished!!!

Quilted House Pillow

I hope you enjoy this new tutorial!! If you do give this project a go, please feel free to share on the Riley Blake Facebook page, my Facebook page or in my Maureen Cracknell Handmade Flickr group, as well!

  Maureen