Showing posts with label tutorial. Show all posts

Tuesday, May 28, 2019

An Hourglass Quilted Pillow {Tutorial} & News!

Hourglass Pillow Cover

Hiya friends,

Today my intention was to simply share this new tutorial with you all, as I've finally been back to sewing for about a week now after badly injuring my knee and then my finger, but unfortunately now I'm dealing with more troubles. On Saturday evening around 7pm I was scrolling through my personal Facebook feed when I received a pop-up that read, "session has timed out." I immediately  tried to log back in and it said that my account had been disabled. I then panicked and went to my Instagram app and I was logged out of there, as well, and my login info was coming up "no user." While I restarted my phone, I opened my laptop and tried to login with no luck still, so I checked my email and at 6:46pm I had received a Login Alert Facebook email that showed a suspicious login from "near Elk Grove Village, IL" and I live in Pennsylvania. I read and followed all of the proper dispute claims for being hacked and/or mistakenly disabled through both social media platforms and I finally heard back yesterday morning that both accounts were permanently disabled. What??!! I attempted to respond to that email and I received one final email saying that "your account has been permanently disabled for not following the community standards. Unfortunately, we won't be able to reactivate it for any reason. This will be our last email regarding your account." Now if you read through what one would have to do to have their account permanently disabled, please believe that in NO WAY have I ever or would I ever do anything harmful to anyone on social media! I have simply used it as a way to stay connected to family & friends and now all those videos and photos of my growing three children are gone. I used as a way to build community through a shared love of fabric and sewing and now all 131,000+ Maureen Cracknell Handmade Facebook Page followers are gone. I used it to post pretty pictures and to share news, new fabric & projects of my own work and the work of so many wonderful makers and now all 30,200+ Maureen Cracknell Instagram followers are gone. Years of memories, friendships and hard work. Gone. It's heartbreaking to say the least. I'm trying to hold onto hope that somehow it will all be restored, but I've also decided to move forward with a new Instagram @MaureenCracknellHandmade and I hope you'll find me there! Please, please everyone add two-step verification to your social media accounts. I was not cautious and I have lost everything I've shared for the past ten years!

I don't know that I will attempt to rebuild on Facebook for several reasons, but my making and sharing will continue and it does feel pretty perfect that I just so happened to have a brand new tutorial prepared to share today!

IMG_8439

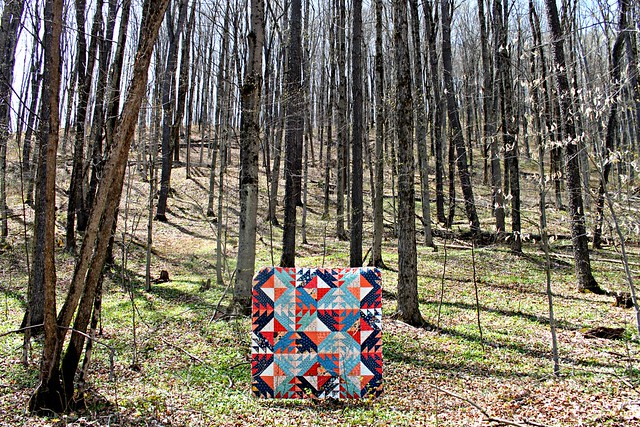
My dear friend and fellow AGF fabric designer, Sharon Holland, has a stunning new collection just hitting stores with a LookBook due out later today for, Everlasting! I'm so happy to have been back to sewing just in time to make this set of pillows to contribute and I hope you love them as much as I do!

Everlasting by Sharon Holland rolls

What you'll need:
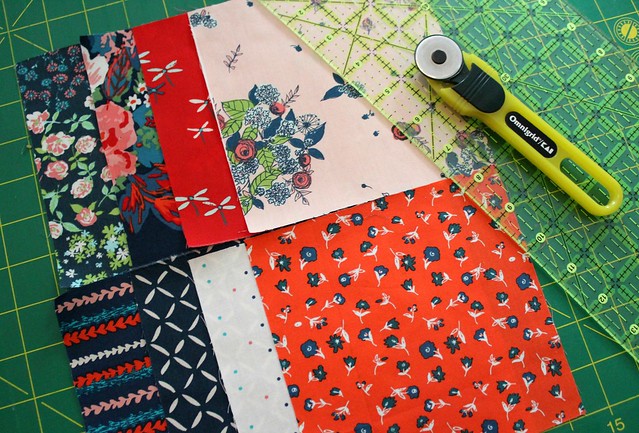
  • 8  - 6" charms of fabrics of your choosing, four blue/navy and four red/peach/cream
  • 2 - 11.5" X 15" cuts for the pillow backing fabric
  •  Hobbs Tuscany Cotton Batting for pillow front and back pieces
  • 1/4 yd of binding for finishing the pillow 
  • 1 - 14" pillow insert
  • Coordinating Thread
  • Rotary Cutter/Mat/Ruler

IMG_8381

Steps: 

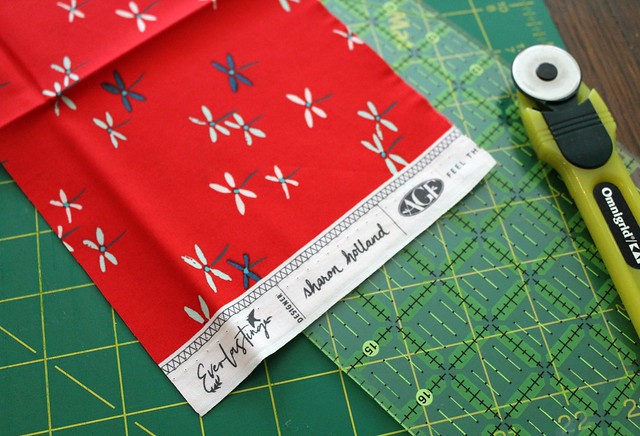
1. Cut eight 6" charm squares from the fabrics you've chosen for the pillow front
IMG_8383

IMG_8388

2. With right sides facing, pin and sew together two blue prints using a 1/4″ seam allowance. Repeat with the two remaining blue squares, pressing all seams open as you go

IMG_8394

3. Sew the two sets of two blue squares together, with rights sides facing to create a four patch block. Repeat this for the second set of four red/peach/cream 6" charm squares. When finished you'll have two, four patch blocks

IMG_8395

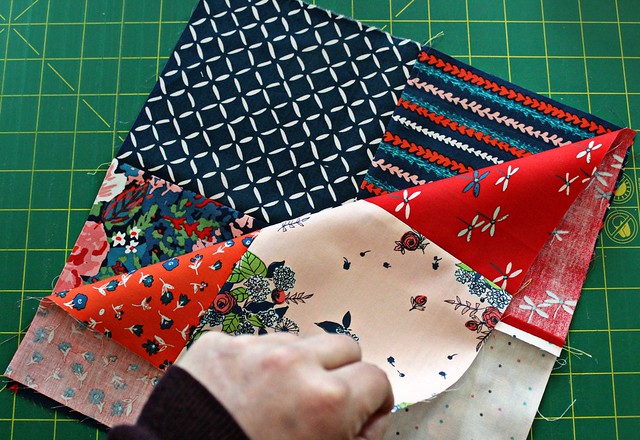
4. With right sides facing, place the two four patch blocks together, pin and sew around all four edges sewing a 1/4" from the very out edge
IMG_8398

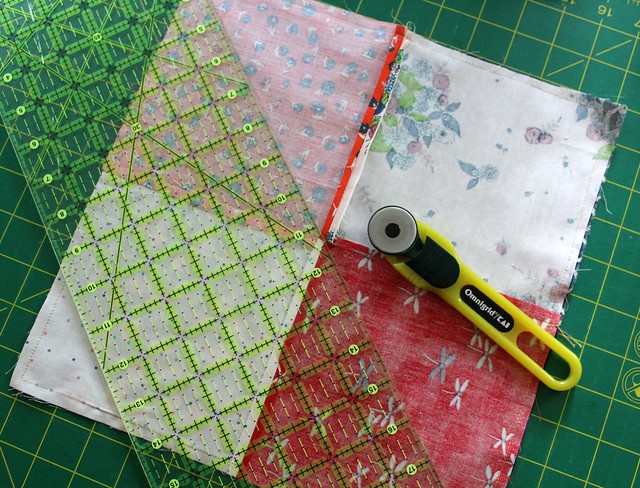
5. Use a ruler and place it across the middle of the sewn square. Be sure to position the ruler to ensure the cutting will pass through the point where the stitches meet at each opposing corner. Once the ruler is in place, make the cut using a rotary cutter. Repeat across the other direction to create four triangles
IMG_8401

IMG_8403

6. Press with seams open, trim away any exposed seam allowances, and square up each block to make four nice and neat 8" hourglass blocks

IMG_8407

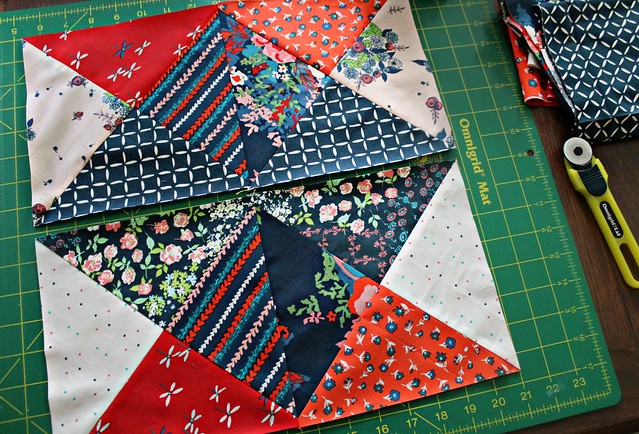
7. Arrange the four blocks in a layout keeping the blue/navy prints at the center and the red/peach/cream on the outside or visa versa. With right sides facing, pin and sew using a 1/4″ seam allowance two blocks together using a straight stitch. Repeat with the two remaining blocks, pressing all seams open as you go
IMG_8409

8. Sew the two sets of two blocks together, with rights sides facing to create the patchwork pillow front and place the pieced pillow front onto a piece of batting so the wrong side of the pillow front is facing the right side of the batting. Baste using your preference with spray or pins

IMG_8412

9. With stitches space a 1/2" a part, quilt the pillow front to the batting. Trim away excess batting to finish a pillow top that measures a 15" square

IMG_8414

10.  To prepare back pieces, using one of the pillow back fabrics measuring 11.5" x 15", baste to a piece of cotton batting measuring the same size and fold over one of the sides measuring 15" a 1/4", press, fold over again a 1/4", press. Sew along inner folded edge and along the outer edge, staying close to the fold. This will create the double seam finish. Repeat this step with the other pillow back fabric

Tallinn Pillow Back

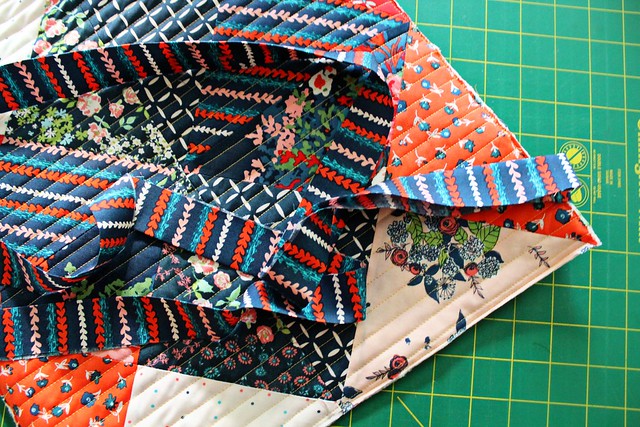
11. Place the pillow backing fabrics onto the wrong side of the quilted pillow front. Sew a basting stitch all the way around the very outer edge of the pillow layers to attach them. Finish the pillow using the 1/4 yd of binding just as you would adding binding to a quilt
IMG_8416

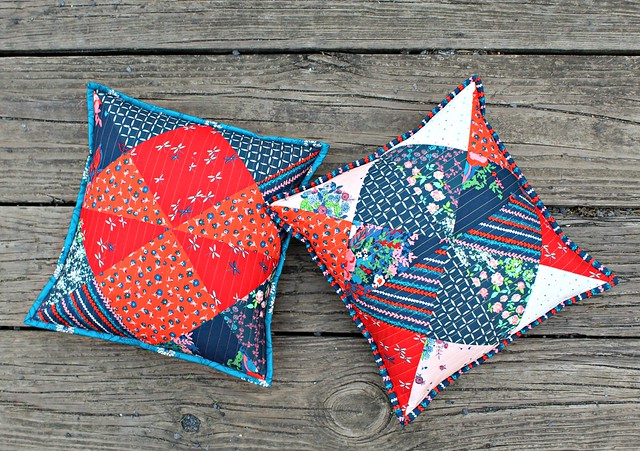
Insert your pillow form and now you have a very cute Hourglass Quilted Pillow!

IMG_8422

IMG_8424

I hope you love these hourglass quilted pillows as much as I do, but honestly with Sharon's Everlasting fabrics it's impossible not to create something you'll love! My Everlasting sewing didn't stop with this pretty pair of pillows, I'll have another project in the LookBook that I'll be back to share this week! If you give this tutorial a try and you post on your social media, don't forget to share with me on my new Instagram @MaureenCracknellHandmade!

xo, Maureen

Monday, January 23, 2017

A Winter Garden Quilt Block { Tutorial } : :

Winter Garden Quilt Block Tutorial

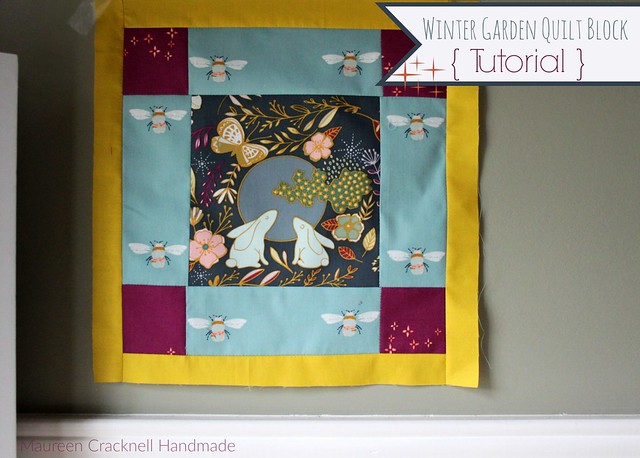
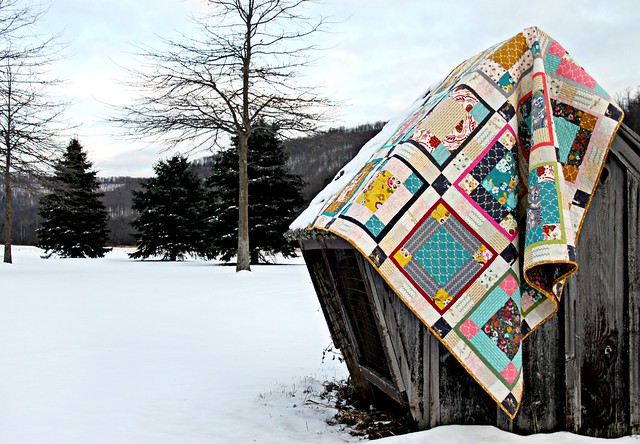
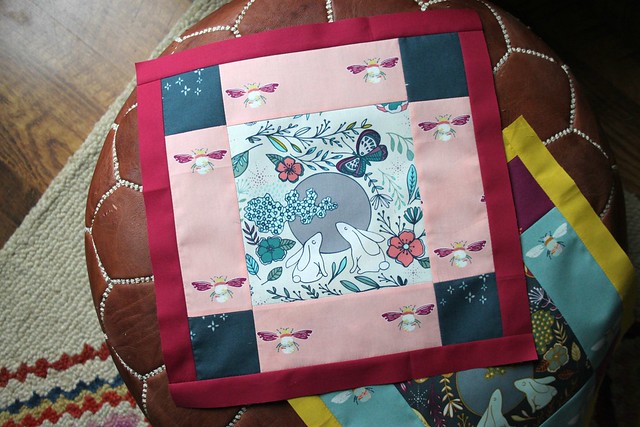
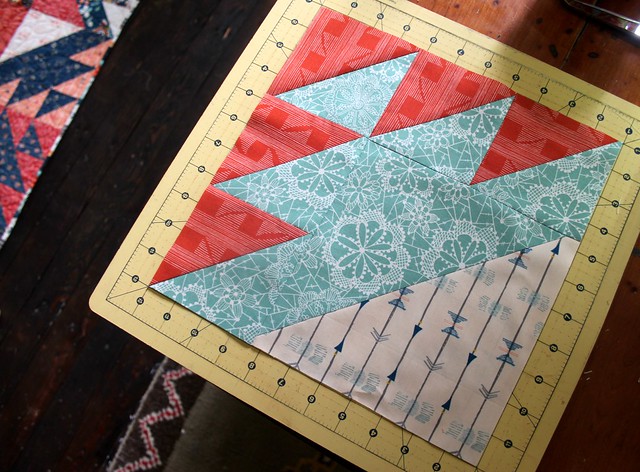
Today I'm excited to share a quick tutorial for my Winter Garden Quilt Block, a quilt I first made using Bari J.'s Emmy Grace collection for AGF that I'm currently remaking using as many of my own fabrics as possible! So many folks have asked me for this pattern over the years and I've always said that I would share one once I found the time to remake this quilt and here it is! First I'm sharing the block measurements and how-to, and once all of my blocks are finished I'll follow up with a tutorial for adding the scrappy sashing. Below is reminder of the finished quilt, it's one of my very favorites!

Winter's Garden Quilt in Emmy Grace

The block pattern begins with a large center square, perfect for showcasing those favorite prints. They're fun to make and sew up quick and I hope you'll join me in making them! If you do, feel free to tag me and to add #wintersagardenquilt and #MCHcollectionquilt or to share your photos with me on my Maureen Cracknell Handmade Facebook page!
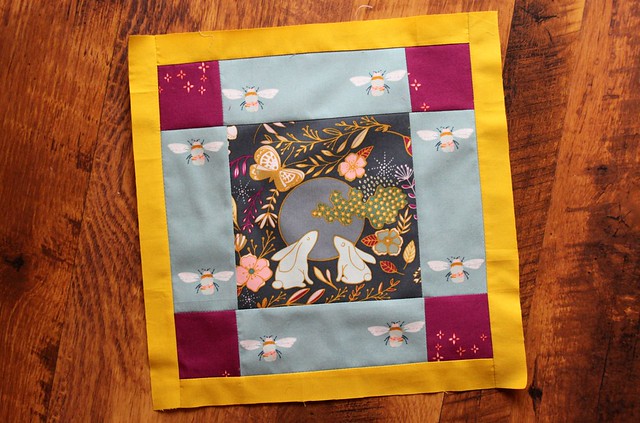
MC Collection Quilt Block

One quilt block measures approximately 12.5"square.

You'll need:
  • one piece of fabric measuring 6.5" square for the center fabric of each block (my center fabrics are fussy cut from the focal prints from each of my collections)
  • four pieces of fabric measuring 2.5" x 6.5" to be added to the sides of the center fabric
  • four pieces of fabric measuring 2.5" squares to be add to the four corners
  • two pieces of fabric measuring 1.25" x 11" to be added to the top and bottom of the center
  • two pieces of fabric measuring 1.25" x 12.5 to be added to the sides of the center

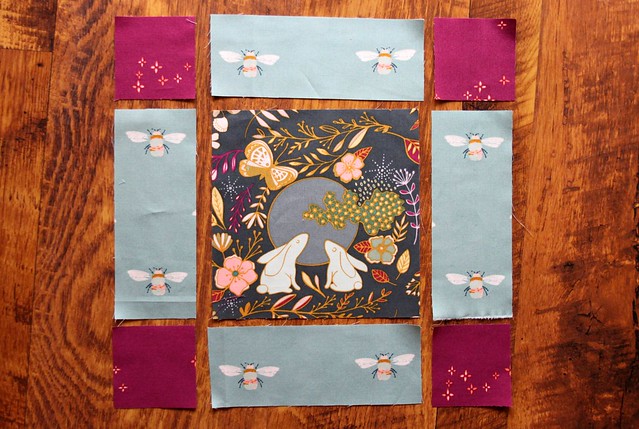
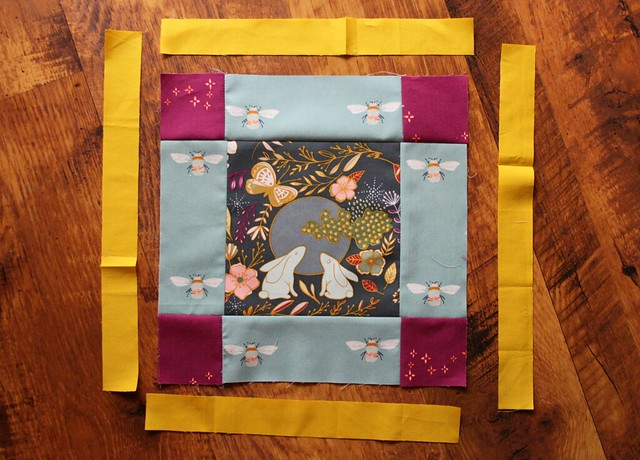
1. Cut your fabrics following the above measurements and lay them out following the image below.

Step 1

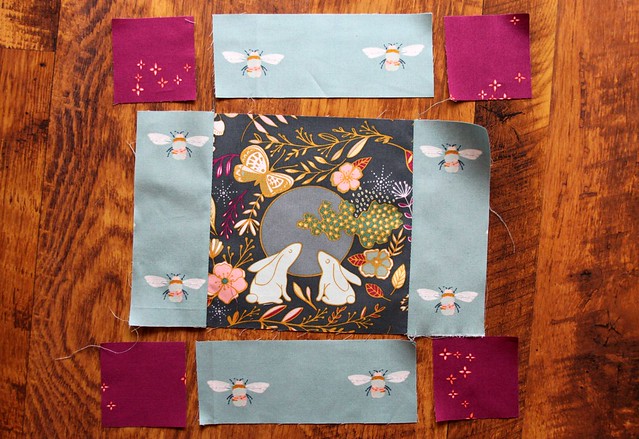
2. First sew the three center fabrics together. Place side fabrics one at a time onto the center square with right sides facing and sew along the 6.5" side using a 1/4" seam allowance. Repeat to add both side fabrics to the center fabric.

Step 2

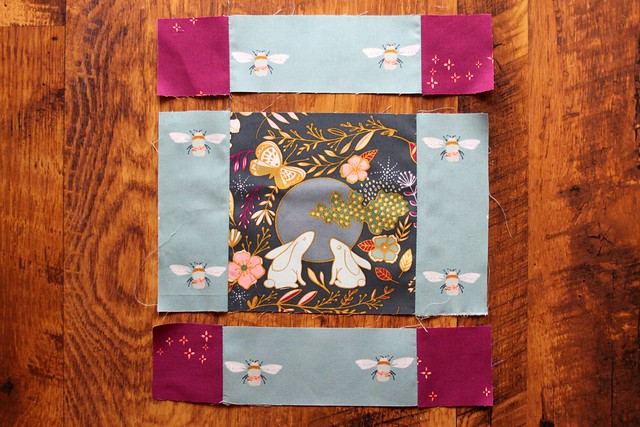
3. Sew the top and bottom row of fabrics together as shown below using a 1/4" seam allowance.

Step 3

4. Finish the center of the block by sewing the top two rows together and them sew the last row to the top two using 1/4" seams throughout. If necessary, square up the center to measure an 11" square before adding the border fabrics.

Step 4

5. Add the border fabrics one at a time beginning with the top and bottom pieces. Sew along the 11" side using a 1/4" seam allowance. Repeat to add both the top and bottom border fabrics and again to add the side border fabrics.

Step 5

It's as simple as that! Feel free to comment with any questions you might have regarding the instructions and if you have any questions about the fabrics I'm using! Each week I'll share my newly finished blocks here on the blog and on my social media pages. If you plan to join in, please do let me know! I look forward to seeing your beautiful work!!

♡ Maureen
Tuesday, October 18, 2016

The Nightfall Parade | | A Mini QAYG Log Cabin { Tutorial } : :

The Nightfall Parade

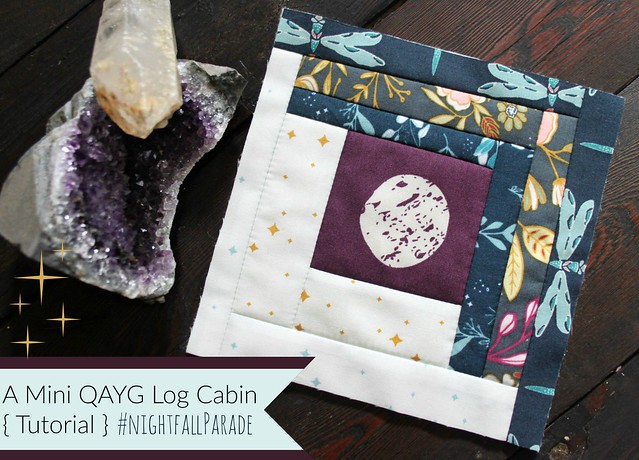
A Mini QAYG Log Cabin Tutorial

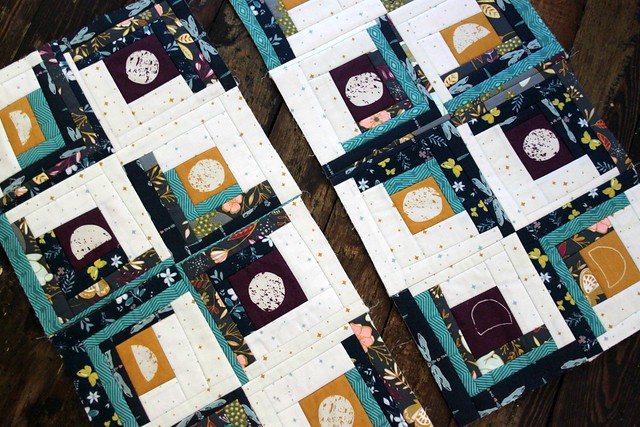
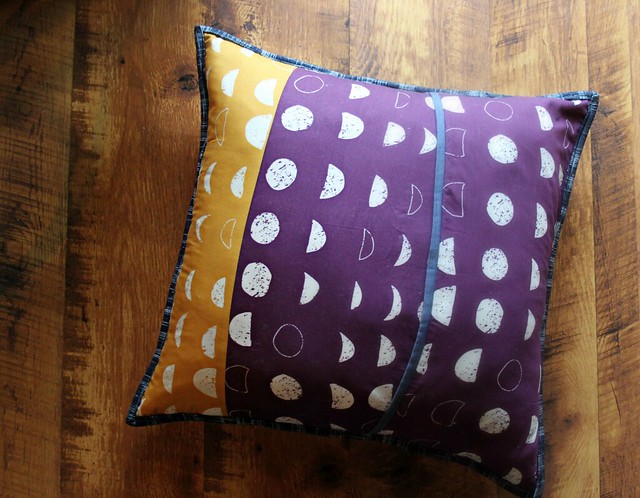
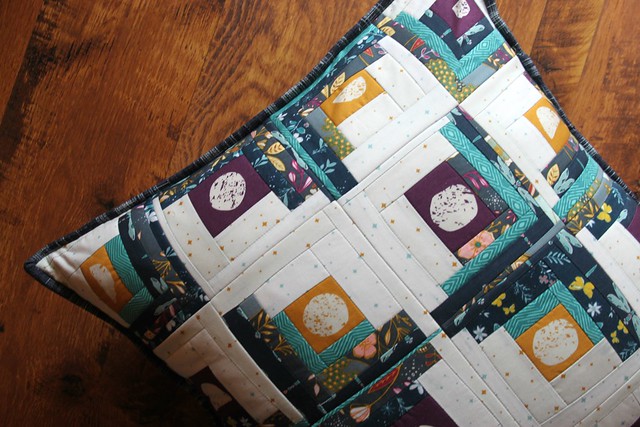
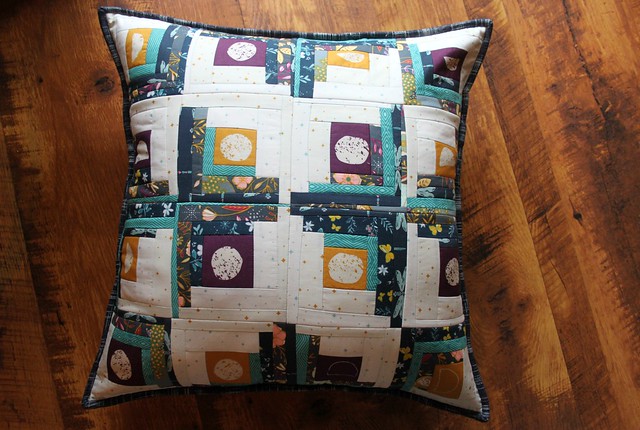
My Mini QAYG Log Cabin tutorial is a Quilt-As-You-Go style quilt block, featuring my Nightfall fabric collection, that you can use to create a beautiful Moon & Stars Floor Pillow!

Fabric and Materials Required : :
  • a variety of four different teal & blue Nightfall prints cut into 1" strips x WOF
  • several 1.5" x WOF strips of both Luminaries in Silver & Gold 
  • Sixteen fussy cut moons { eight from Lunation Light || eight from Lunation Dark } 
  • Sixteen 6" cotton batting squares
  • fabrics for the pillow backing and binding
  • 22" pillow insert
  • rotary cutter/large cutting mat/ruler set
  • sewing pins 
* Notes*
  • Synthetic batting is NOT suggested, only use a 100% cotton batting. It is important to be able to press the batting with a hot iron and steam.
  • Use a Low or standard loft batting. The #1 question I receive about QAYG is folks wanting to know if the seams are bulky. My answer is NOPE, not to a noticeable degree I promise.
  • This style of Log Cabin quilt block can be made into any size! The measurements I'm sharing makes a large floor pillow, but feel free to adjust to any size.

Now, let's get started!! 

Log Cabin Supplies

Making the Blocks : :

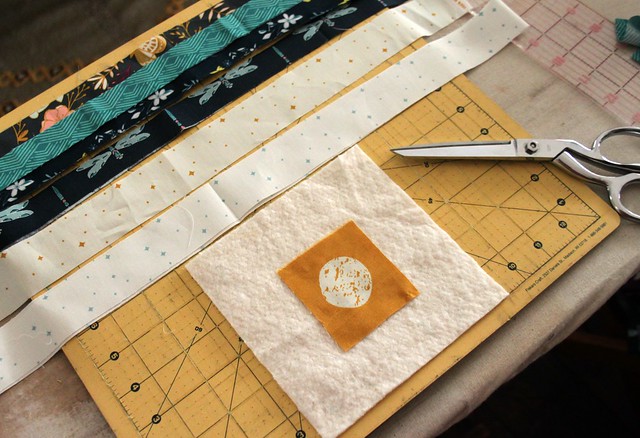
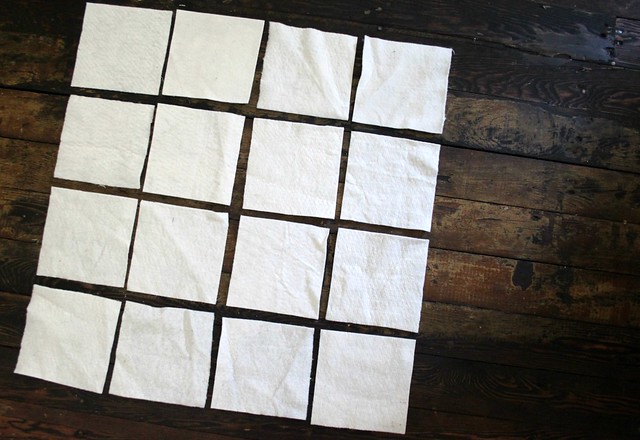
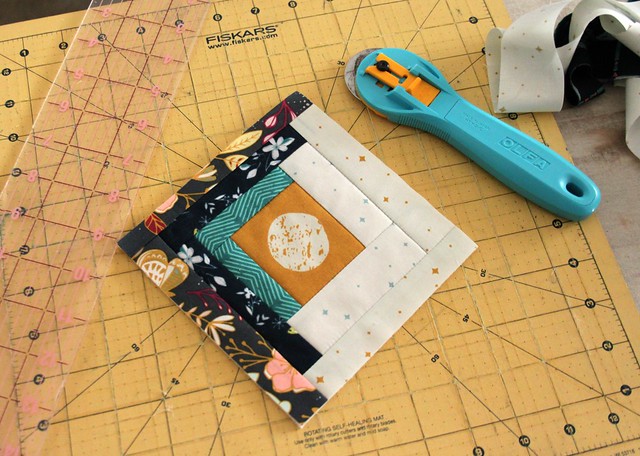
1. Begin by preparing your materials. I cut leftover cotton batting scraps into sixteen 6" batting squares.

Step 1

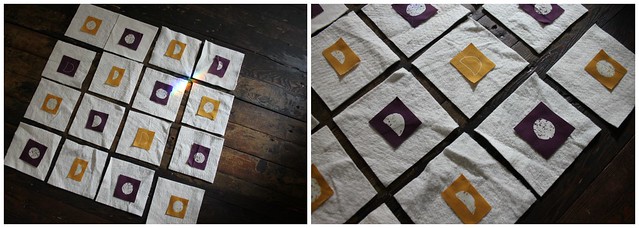
2. Place a single fussy cut moon, alternating colors, in the center of each of the sixteen batting squares.

Step 2

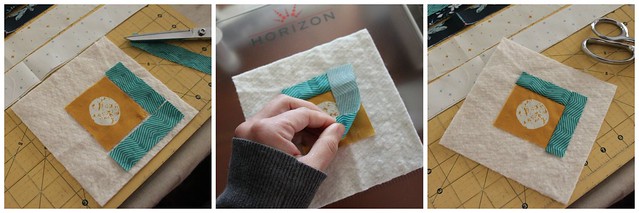
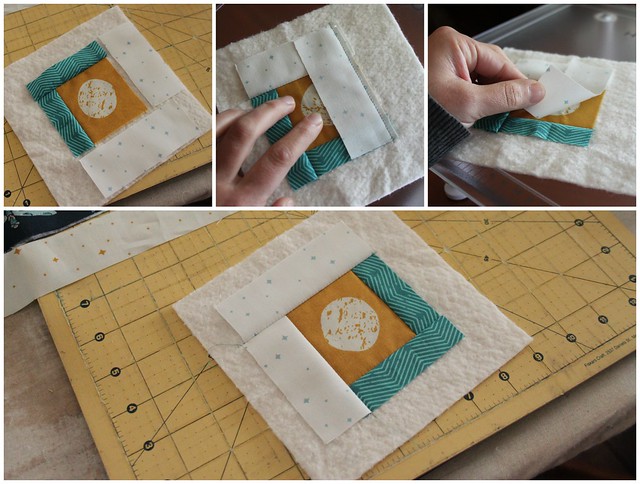
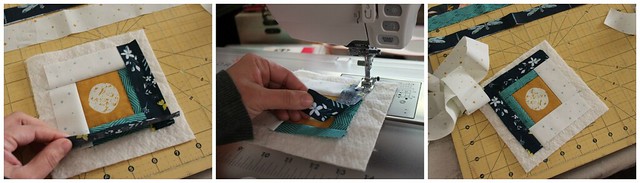
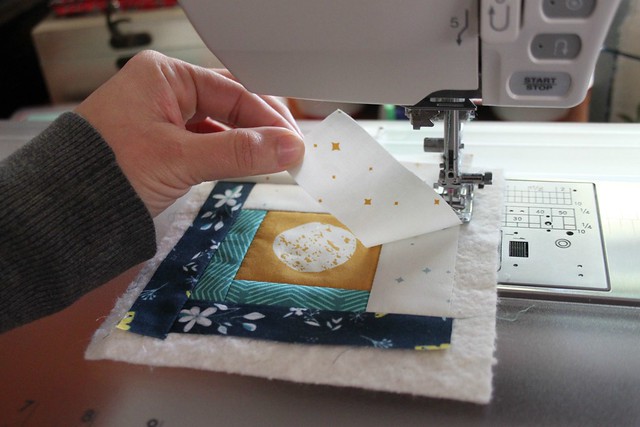
3. Begin adding the fabric strips {logs}. Cut two strips from one of the dark Nightfall prints. At the sewing machine, place one strip right sides facing the moon fabric and sew a 1/4" seam along the raw edges on the matched up side. You will be sewing through the batting, permanently attaching the fabrics in place. Once attached, open the fabrics so the right side is exposed and smooth to press with your hand.

Step 3

4. Add the next two strips exactly the same way, but this time using a low volume Luminaries star print. Attach these logs continuing with a 1/4" seam, smooth & press open as you go.

Step 4

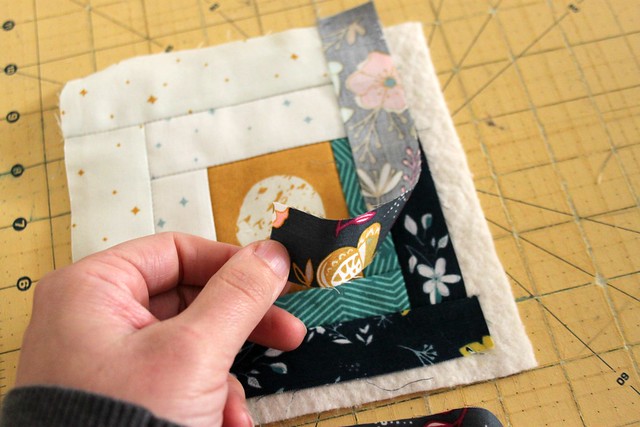
5. Work your way around the center moon, alternating the dark 1" Nightfall strips with the 1.5" Luminaries prints, adding each log, stitching, flipping, and pressing until you fill up each batting square.

Step 5

Log Cabin QAYG

Step 6

6. Once the fabrics have been added to each batting square, use a mat, ruler, and rotary cutter to trim to a 5.75" square.

Trimming Log Cabins

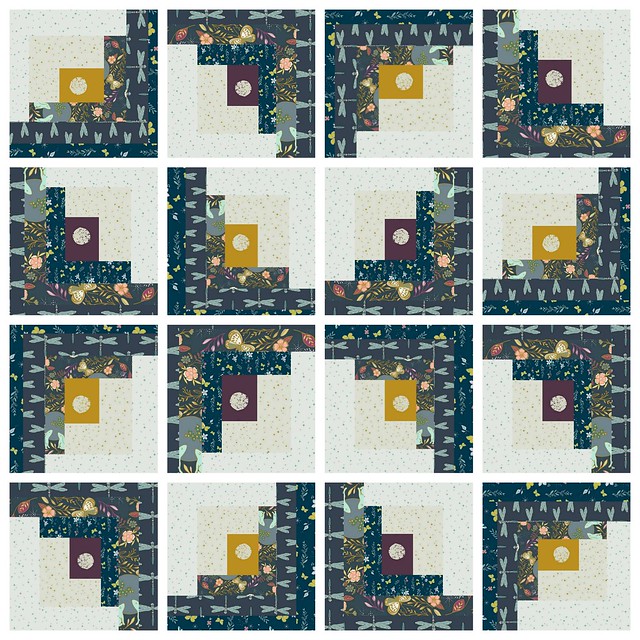
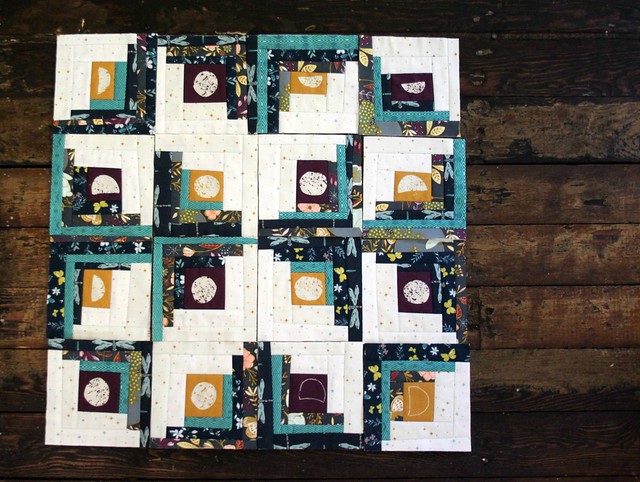
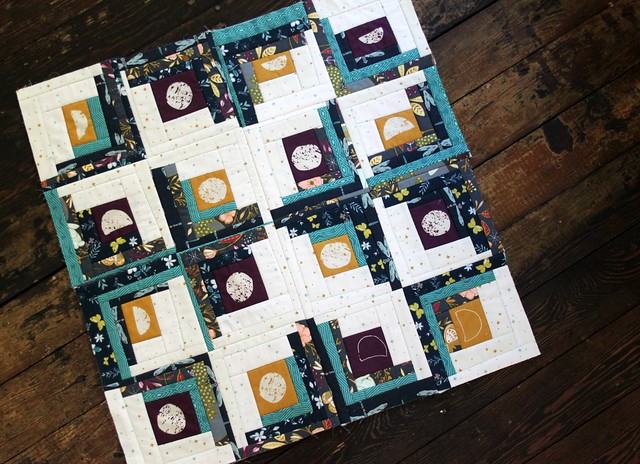
Use the diagram below to arrange the finished mini log cabins in the Moon & Stars pillow top design.

Moon & Stars Pillow Mock Up with spacing

Pillow Top Layout

Joining the QAYG Blocks : :

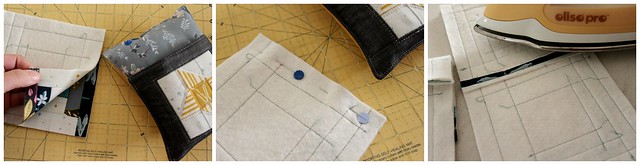
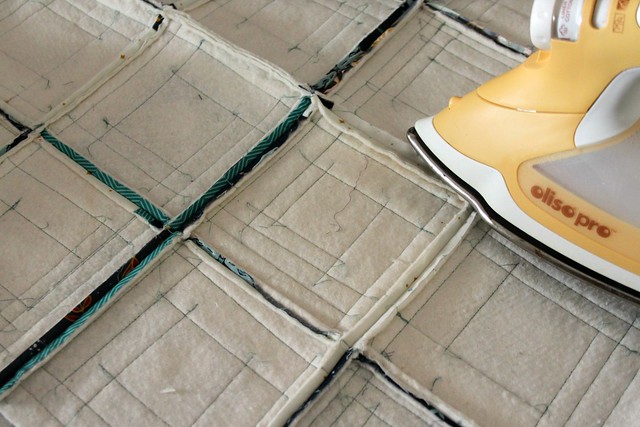
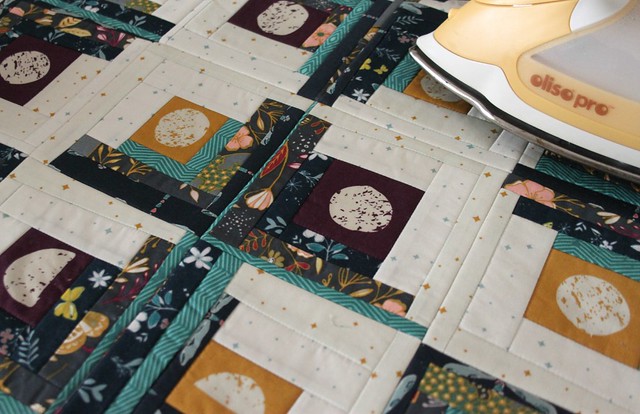
7. Begin with two blocks and place them right sides together. Use sewing pins to secure their place and sew along one side keeping a 1/4" seam allowance. Use a hot iron with steam to press the seams open as you join them.

Step 7

8. Repeat this step with the remaining blocks, sewing them together, pressing all seams open as you go.

Step 8

Press Seams Open

9. Press the pillow top front well once all the mini log cabins are joined together.

Nightfall QAYG Pillow

Finished Pillow Top

Finishing the Pillow : :

10. Prepare the backing fabrics with a double seam or bound edge to finish with an envelope style closure.

Backed in Moon Phase

11. Using your favorite quilt binding method, bind the pillow just as you would any quilt. Insert the pillow form and Viola, your pretty Moon & Stars Floor Pillow is finished!

With Tiny Stars

A Moon & Stars Floor Pillow

If you do give this tutorial a go at anytime, be sure to share on my Facebook page or on Instagram with the hashtag #NightfallFabrics & #NightfallParade -- I love seeing what you create!

Thanks so much for stopping by today!! ♡ Maureen
-------------------------------------------- 

* You can find the list of online retailers currently carrying Nightfall under my SHOP my Fabrics page -----> https://maureencracknellhandmade.blogspot.com/p/blog-page.html

Tuesday, May 3, 2016

A Diamond Weave Quilt Block { Tutorial } : :

A Diamond Weave Quilt

I'm excited to share with all of you that you can find my newest tutorial on the Janome Blog for my Diamond Weave Quilt Block!

14

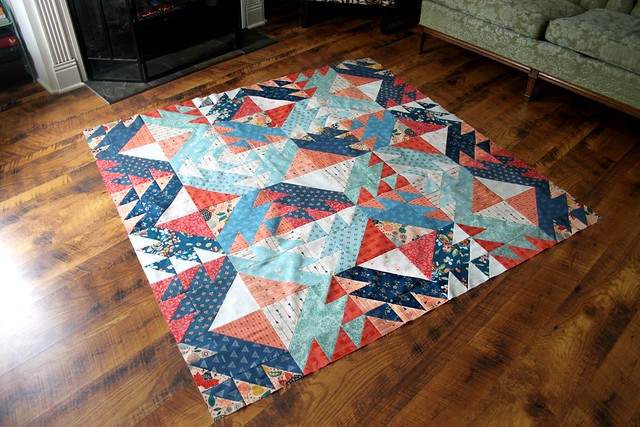
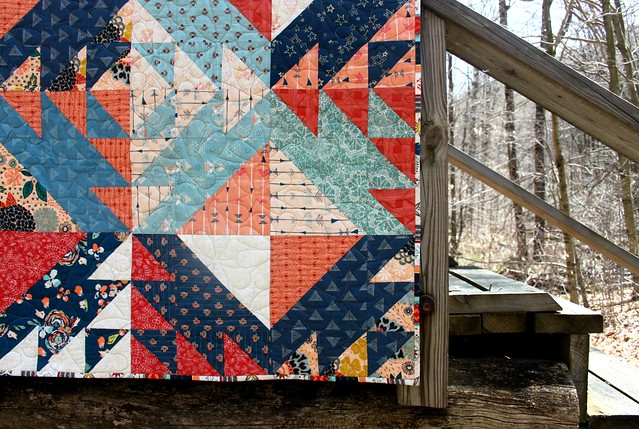
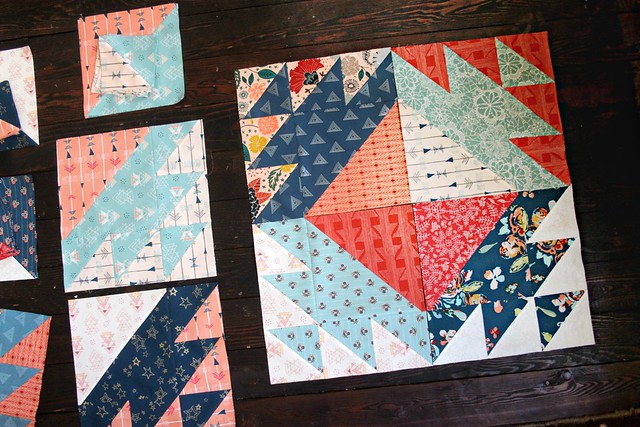
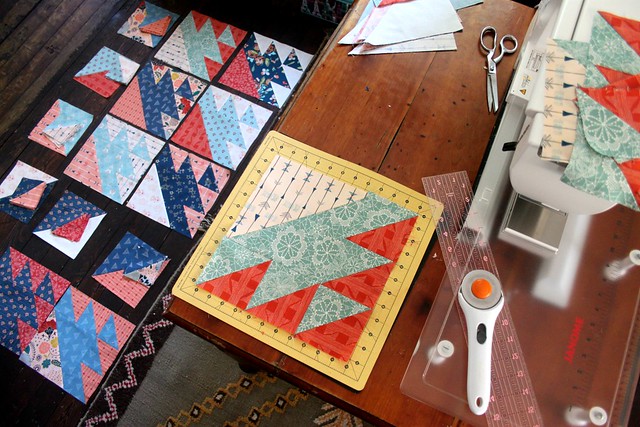
This quilt block tutorial is from my Diamond Weave Quilt that I shared just last week, made using a variety of prints from my Wild & Free and Fleet & Flourish fabric collections. Just by separating red, peach, and coral value prints from ones colored navy, aqua, and blue, a fantastic quilt design is revealed!

Layout Play

These simple quilt blocks sew up quick to an 11" unfinished square, a wonderful size for making both small and large quilts!

Lost Ships

Diamond Weave Quilt Top Finish

You can find this new tutorial on the Janome Project Center page right HERE!

A Diamond Weave Quilt

I really hope you all enjoy this quilt tutorial! As always, be sure to let me know if you give it a go! Feel free to find & tag me on Instagram, be sure to add #DiamondWeaveQuilt or you're always welcome to share the things you make using my project ideas and/or fabrics on my Facebook page Maureen Cracknell Handmade!
Happy sewing, friends!  ♡ Maureen