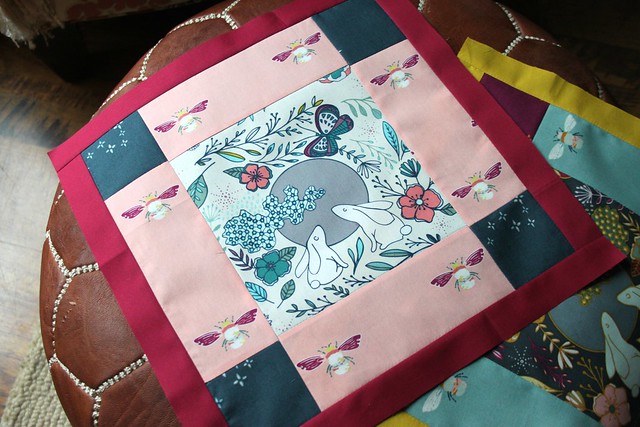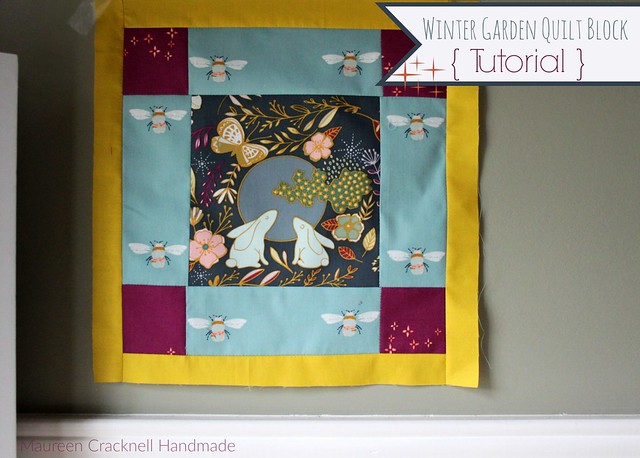
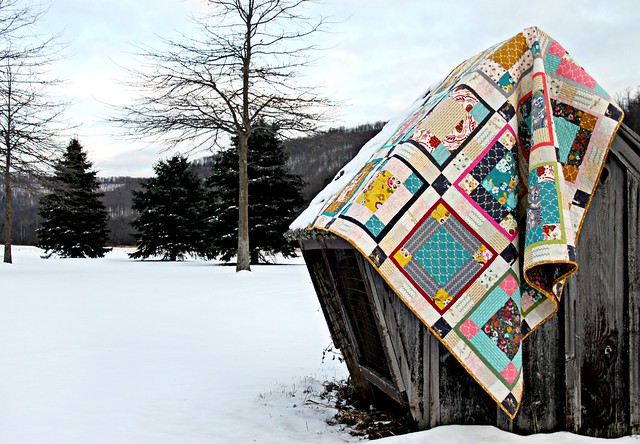
Today I'm excited to share a quick tutorial for my Winter Garden Quilt Block, a quilt I first made using Bari J.'s Emmy Grace collection for AGF that I'm currently remaking using as many of my own fabrics as possible! So many folks have asked me for this pattern over the years and I've always said that I would share one once I found the time to remake this quilt and here it is! First I'm sharing the block measurements and how-to, and once all of my blocks are finished I'll follow up with a tutorial for adding the scrappy sashing. Below is reminder of the finished quilt, it's one of my very favorites!
The block pattern begins with a large center square, perfect for showcasing those favorite prints. They're fun to make and sew up quick and I hope you'll join me in making them! If you do, feel free to tag me and to add #wintersagardenquilt and #MCHcollectionquilt or to share your photos with me on my Maureen Cracknell Handmade Facebook page!
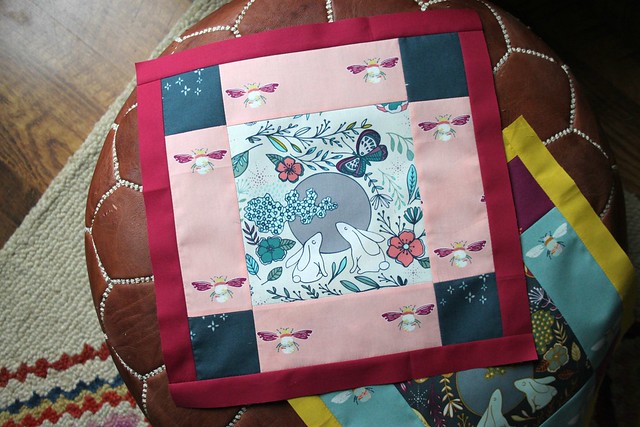
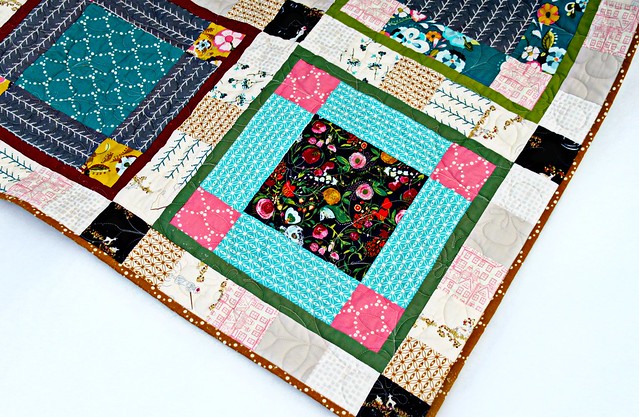
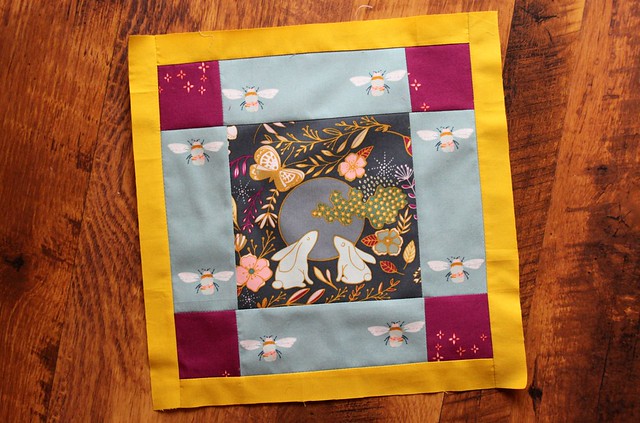
One quilt block measures approximately 12.5"square.
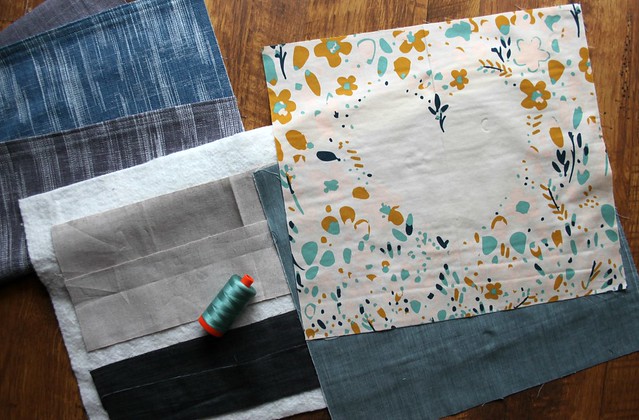
You'll need:
- one piece of fabric measuring 6.5" square for the center fabric of each block (my center fabrics are fussy cut from the focal prints from each of my collections)
- four pieces of fabric measuring 2.5" x 6.5" to be added to the sides of the center fabric
- four pieces of fabric measuring 2.5" squares to be add to the four corners
- two pieces of fabric measuring 1.25" x 11" to be added to the top and bottom of the center
- two pieces of fabric measuring 1.25" x 12.5 to be added to the sides of the center
1. Cut your fabrics following the above measurements and lay them out following the image below.
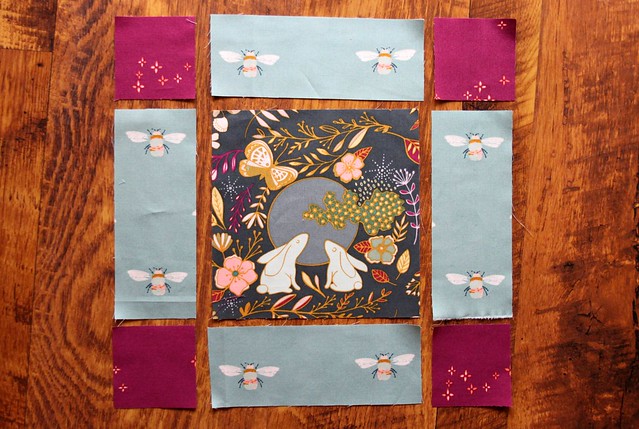
2. First sew the three center fabrics together. Place side fabrics one at a time onto the center square with right sides facing and sew along the 6.5" side using a 1/4" seam allowance. Repeat to add both side fabrics to the center fabric.
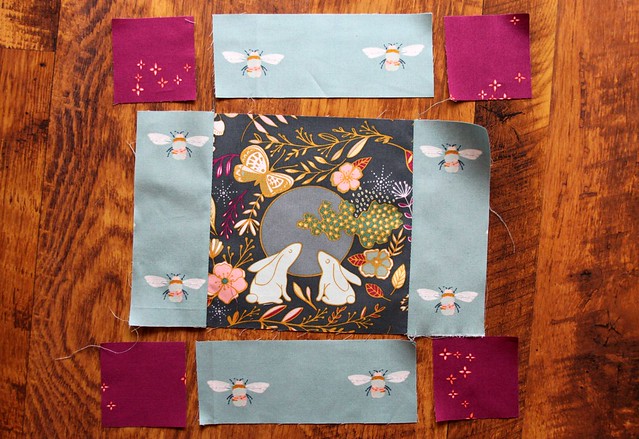
3. Sew the top and bottom row of fabrics together as shown below using a 1/4" seam allowance.
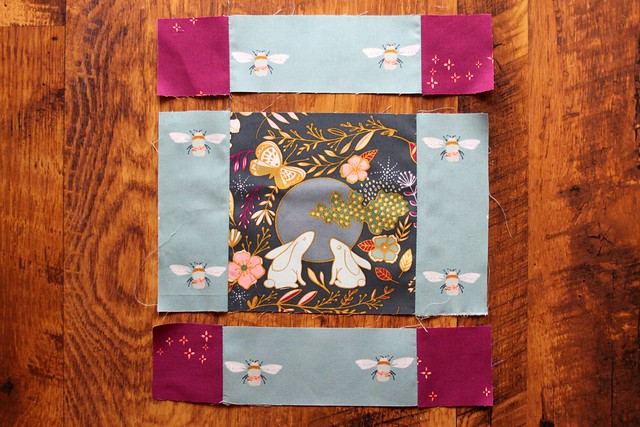
4. Finish the center of the block by sewing the top two rows together and them sew the last row to the top two using 1/4" seams throughout. If necessary, square up the center to measure an 11" square before adding the border fabrics.
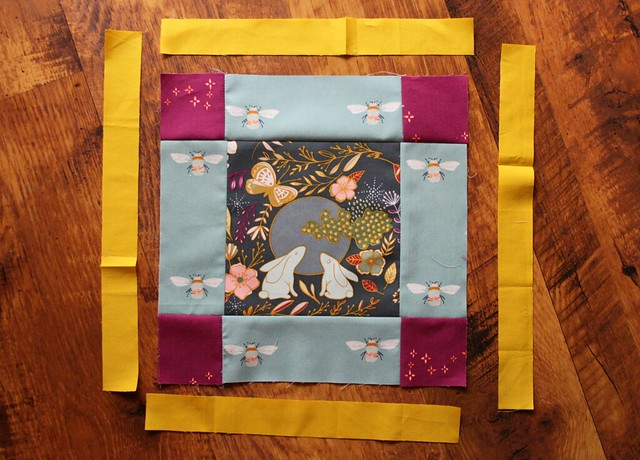
5. Add the border fabrics one at a time beginning with the top and bottom pieces. Sew along the 11" side using a 1/4" seam allowance. Repeat to add both the top and bottom border fabrics and again to add the side border fabrics.
It's as simple as that! Feel free to comment with any questions you might have regarding the instructions and if you have any questions about the fabrics I'm using! Each week I'll share my newly finished blocks here on the blog and on my social media pages. If you plan to join in, please do let me know! I look forward to seeing your beautiful work!!
♡ Maureen
♡ Maureen