Showing posts with label garland. Show all posts

Tuesday, November 15, 2016

Crafting with Acorns : :

Autumn Crafts -- Acorn Garland

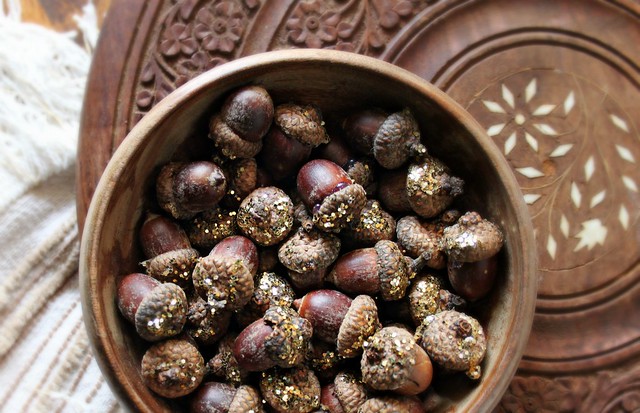
Autumn walks are our favorite and this Fall at the nearby park we regularly visit, we noticed a significant number of acorns on the ground compared to previous years. One giant oak in particular has produced a massive number of acorns. Inspired to craft, we decided to fill a bag to bring home with us and today I thought I'd share our projects!

Fall Crafting

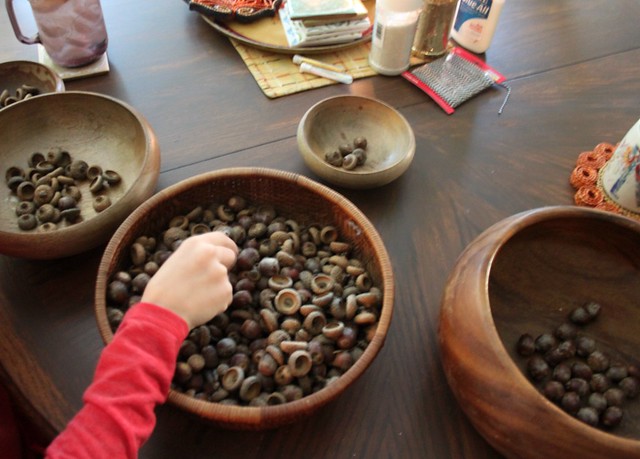
Most of the nuts had separated from the cupules, so the first thing we did was separate the parts. A bowl for those still completely intact, a bowl for nuts, one for the caps, one for the double caps - our favorites - and a garbage bowl for the cracked and holey. We washed and preserved them with a bake in the oven at 200 degrees for a of couple hours, just to remove any grubby stuff.

Acorn Project

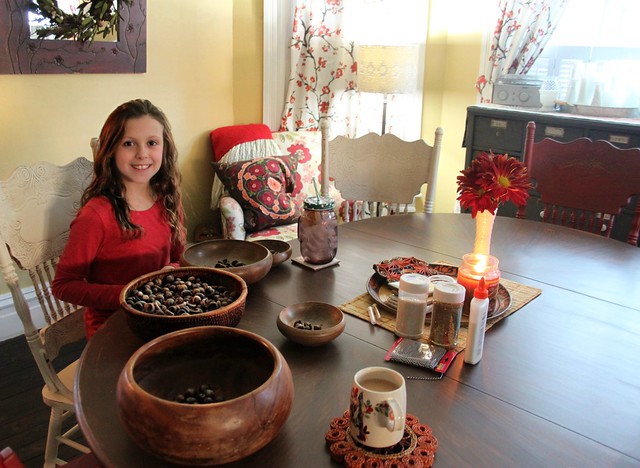
I must say I LOVE to craft, and I've missed the number of non-sewing projects the kids and I used to tackle together in years past. As they've grown older, their own imaginations and inspirations have lead them to do so much crafting on their own. While it's so fun to see what they come up with and makes me so proud to be their mama, there's nothing better than getting messy together!

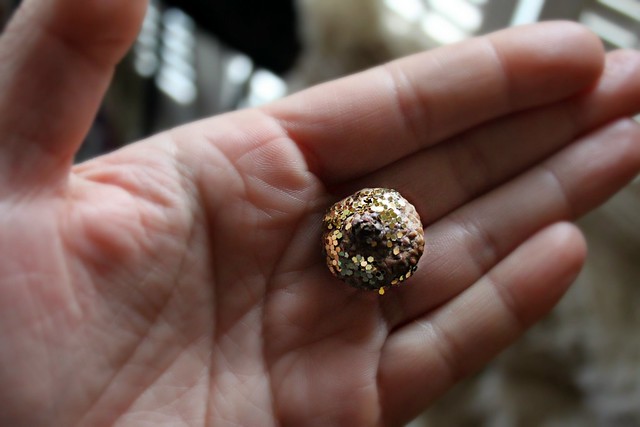
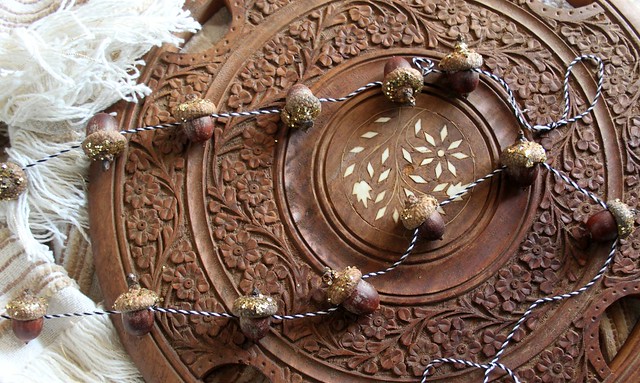
Often times, for me, crafting = garland. But first, glitter! Once our acorns were preserved, Haila and I added gold to each cap. I controlled the glue, she handled the sparkle!

Autumn Crafts -- Acorns

Autumn Crafts -- Acorns

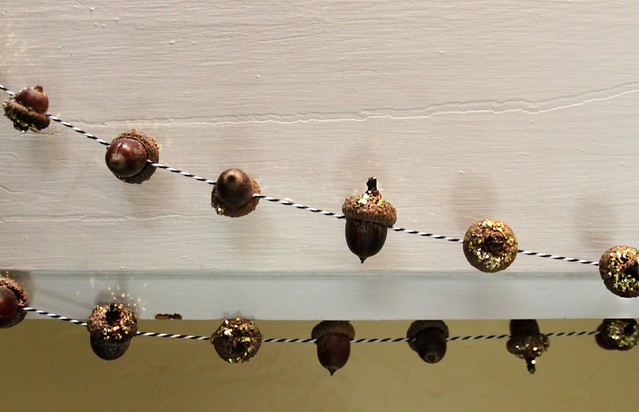
Pairing each nut with a suitable size cap become quite the matching game!

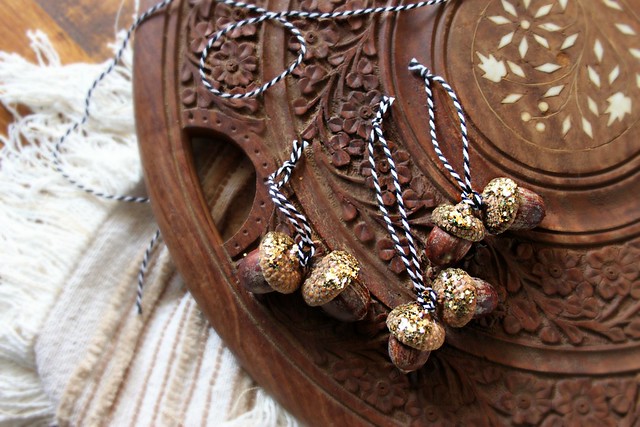
For the ornaments we used the cluster caps we found where two or sometimes three caps were still connected. Adding just a simple loop knot with twine so we can hang them!

Autumn Crafts -- Acorn Ornaments

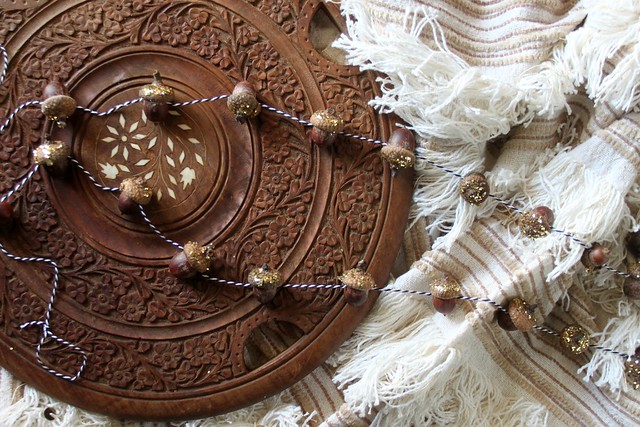
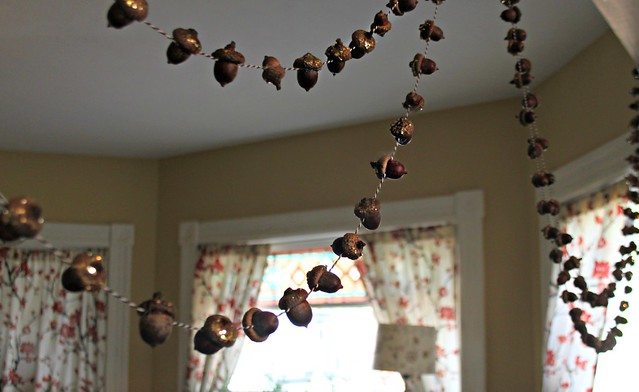
For the garland we used twenty to thirty acorns per strand, running twine between each cap and nut before I connected them with hot glue.

Autumn Crafts -- Acorn Garland

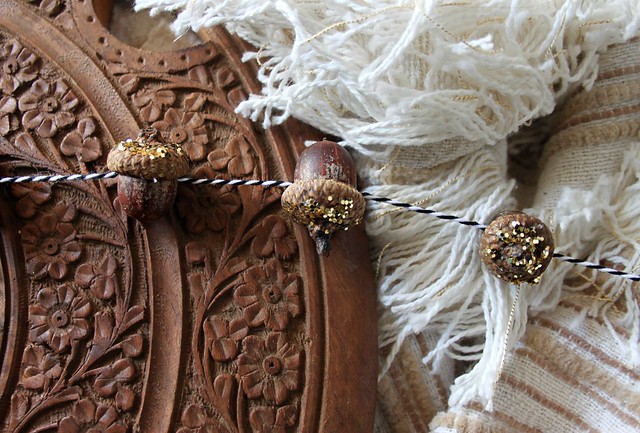
So simple and I LOVE how these turned out!

Autumn Crafts -- Acorn Garland

Autumn Crafts -- Acorn Garland

Autumn Crafts -- Acorn Garland

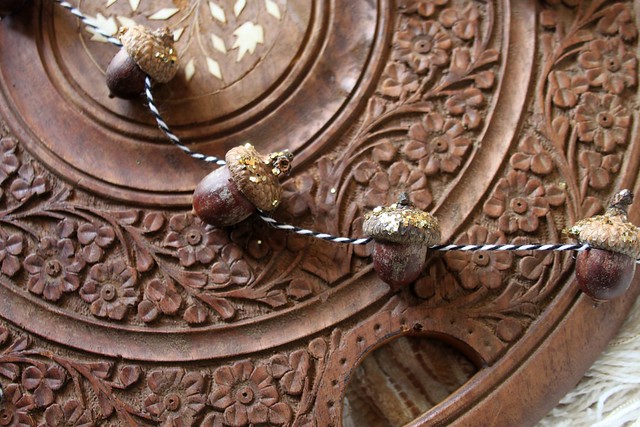
I tried my best to capture how pretty the gold glitter is in the light, but still fell short. It's seriously magical!

Autumn Crafts -- Acorn Garland

Autumn Crafts -- Acorn Garland

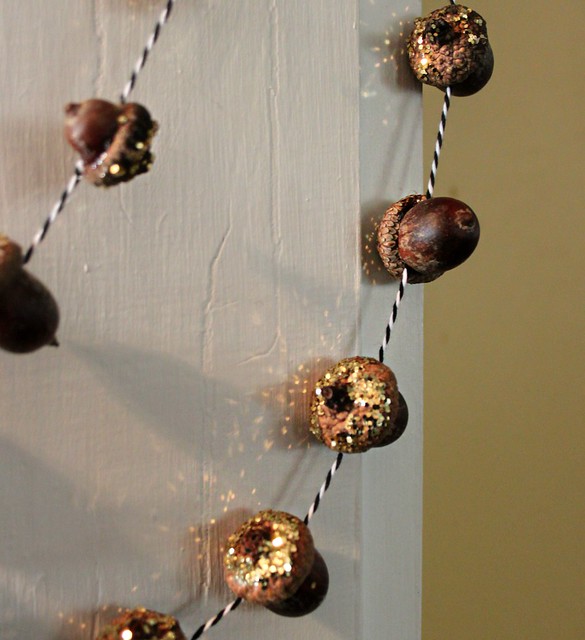
This project was so much fun, even if it means cleaning up glitter from in between the floor boards yet again. Totally worth it, I promise!

♡ Maureen

Tuesday, December 4, 2012

Handmade Holidays : :

Last year I started making Christmas presents and decorations in October, a little early for some, but it worked out perfectly for me! This year, with the timing of our moving into a new house, I haven't had a moment to make anything other than items and orders for my little etsy shop. As much as I love and rely on being busy with custom order this time of year, the fact that I haven't sewn a single thing yet for this house or holiday decorating/gift-giving is driving me crazy!! How about you?? Have you found the time to make, start, or attempt to finish up your own handmade holiday items? I'd love to hear about them!!

Today, I thought I would share some of my favorite handmade holiday makings (mostly from last year), for those of you who are new to visiting my blog, and to hopefully inspire me to get some new ideas flowing in case some free sewing time presents it's self here in the days ahead!

First up -- Last year when Betz White asked me to participate in the blog tour for her new Fab Felt Holiday workshop on Craftsy, I was thrilled! I chose to make the Scrappy Garland and was so excited to share the wonderful project I had made following the workshop.

Scrappy Christmas Garland

Scrappy Christmas Garland

My Scrappy Garland is on our mantle again this year and we LOVE it!!

Christmas-y Goodness!

Of course, there's  more garland!!

My Christmas Bunting Garland -- originally blogged HERE, made with ornaments from Target, some stitched up triangle bunting, and bias tape.

Christmas Bunting Garland

Wool-y I-cord Garland -- originally blogged HERE and made with a knitted wool I-cord and handmade & thrifted ornaments.

wooly i-cord garland

Over the last couple of years that I've been sewing, I'm made lots of holiday pillows for decorating, as well!!

My Christmas Garland Pillow -- originally blogged HERE, and you can find the tutorial for it right HERE!

Christmas Garland Pillow

My Quilted Stripes Christmas Pillow -- originally blogged HERE, a variation based on my tutorial HERE!

Quilted Stripes Christmas Pillow

My Patchwork Star Pillow Cover -- originally blogged HERE, along with my favorite color inspiration mosaic!

Patchwork Star Pillow Cover

My Red Piping Christmas Pillow -- originally blogged HERE!

Christmas Pillow with red piping

My Colorful Christmas Dresden Pillow -- originally blogged HERE!

Colorful Christmas Dresden Pillow

And, there have been Christmas Stocking, too! Originally blogged HERE -- These were for my brother and his wife. They were actually settling into their new home this time last year and these were a little gift!

Quilted Christmas Stockings

For the last few years, my one handmade Christmas dream has been to make my family a Christmas quilt, and I don't think that's possible again this year. BUT, maybe if I start with just one block the next time I get a stretch of time, something magical will happen?! We'll see....

I hope you enjoy my handmade holiday makings!! Happy Sewing to you! Maureen

Tuesday, April 3, 2012

Twine Pompom Garland Tutorial : :

I'm home from a wonderful long weekend away and I thought it would be the perfect day to share a "no sew" (well, almost) tutorial with you today, since I'm up to my ears in laundry and it just happens to make a sweet Easter decoration. There's still time, right!?

Twine Pompom Garland

What you'll need : :

  • Whisker Graphics Divine Twine in a variety of colors
  • Circle template or object to trace for pompom maker making
  • Pen/pencil for tracing
  • Sharp scissors
  • Cardboard or heavy weight card stock
  • Fabric Scraps (optional)
 *  *  *  *  *  *  *  *  *  *  *  *  *

Twine Pompom supplies

1. Trace the circle template or object onto cardboard/card stock to make your pompom maker (this is the perfect job for kiddos or you can purchase pompom makers, too)  2. Add a smaller center circle and draw a line connecting outer cicrcle to the inner circle  3. Cut out the circles, cutting the line and removing the center circle, as well. (This might be a job just for the adults, depending on how old and handy with scissors the children are.)  4. Each pompom maker will require two of the cut out circle cardboard pieces layered together

My creation

5. Slip twine end through the cut line of your "doughnut shaped" cardboard pieces and hold the end tightly  6. Continue wrapping the twine around the cardboard by slipping it through the cut line, covering up the cardboard as you go

2

7. Continue until you have covered the cardboard nicely. You can use less or more depending on how full you want your pompom to be  8. Now it's time to cut! Run the scissors up through the two cardboard pompom makers. Cut carefully to create the fringed edge all the way around  9. Keep the cardboard in place and run a length of twine measuring several inches up in between the two pieces of cardboard. Secure twine by tying a double knot rather tightly  10. Once the twine pieces are secure, remove cardboard pieces, trim away excess twine

3

Voila! You now have a cute little twine pompom!

pompom

Repeat with the other colors of twine. We played around with the fullness and size of the pompoms. Simply, wrap extra twine around the cardboard pompom makers, to make some nice and full, and/or cut out smaller pompom makers from the cardboard to make a variety of pompom sizes.

Repeat with other colors

When you're finished making the pompoms, add them to a long long length of twine
and you'll have a super cute and simple strand of garland to hang!

twine pompom garland

Twine Pompom Garland

You can also stitch on several pieces of fabric scraps in coordinating colors to create more of a banner!

Scappy Fabric & Twine Garland

I think this makes a very sweet Spring and Easter decoration. Enjoy!!

Monday, March 26, 2012

Weekend Spring Sewing : :

Yesterday I had myself the longest sewing day to date!

I worked on a tutorial for a Spring Twine Garland.

Twine Pompom Garland

I admired my lovely new stack of Summerlove.

Summerlove

Decided I needed to cut into them ever so slightly, to realize a Spring Pillow idea.

Summerlove Birdie

Mostly worked on these, plus a dozen others that didn't get finished until the wee hours.

Gold Crowns!

Made this ridiculous and smelly mistake at some point during all the making. Ack!

Oops!

Had to cash in this coupon just as soon as the kids were home.

Cashed In!

Continued to dream up a plan for my new sketch stitch girl.

hanging

Today, I'm wishing you all a wonderful Monday morning and I'm wondering, what did you make this weekend?

Thursday, December 15, 2011

Christmas Bunting Garland : :

Come on in... Yes, crafty folks live here!

Come on in! Crafty folks live here!!

Well, at least I hope this newest new bunting/garland hanging strand of colorful, Christmas-y goodness explains that well, just as you first enter this house.

Christmas Bunting Garland

To make this one, we used some adorable store bought felt, fabrics, yarn and sweater ornaments, bias tape, and Christmas fabrics.

Oh, yes -- more garland!

I recently picked up a triangle template at Joann, which made making up these triangle bunting pieces so quick and easy!

bunting pendants

I think this marks the end of garland making for me for the rest of the year! I might have to do a little re-cap, but I do believe that there is a different garland hanging in all but the kitchen, the bathrooms, and our bedroom. This last one, Haila and I made together! Sort of...

Christmas Bunting Garland -- and our crazy birthday girl!

And, now it hangs happily in our hallway.

Christmas Bunting Garland

Haila asked if this little angel could be her's or her or both? Of course, I said yes!

Christmas Bunting Garland

After all, today she turns FIVE, you know!!

Birthday Girl!!!

We're off to continue the Christmas crafting today and to celebrate our little girl, who suddenly seams much too big!

Thursday, December 8, 2011

Holiday Knitted Garland : :

Today I want to share one of my very favorites ways to make garland! I started making these a few years ago, right after I learned to make a knitted I-cord. I've given a few away as gifts and I've kept a few for our own decorating.

This is my very first. A winter themed garland full of snowflakes, winter birds, icy blue felt balls, pom poms, and wooden buttons. It fits in nicely with the snowy theme we have happening in our dining room. I have a second one in the doorway.

Winter I-cord Garland

Winter I-cord Garland

Crochet Snowflakes

This is a more recently made one, that I shared a peek of the other day. It's full of Cristmas-y colors, purchased ornaments, snowflake needle felted wool balls, clusters of wool yarn that are made up of my scraps, crochet snowflakes, even some crochet stars that I picked up a few years ago at an antique store. You can simply stitch on anything you'd love to see in a garland. I just used a matching colored thread to the knitted I-cord, spacing my little ornaments out evenly along the strand. Simple and fun!

wooly i-cord garland

Wool I-cord Garland

Wooly I-cord Garland

This is my very favorite corner in our house right now. I added some of the pillows I have for sale in there just for good picture taking sake. :) One of them I will actually be giving away tomorrow as part of Where Woman Creates 12 Days of Giveaways!! If you haven't checked this out yet, you really must! Some really great designers are offering some really great gifts!

Christmas-y corner

If you'd like to make your own I-cord garland -- this is a great video I just found for knitting an I-cord with 3 stitches. The instructor in the video is using two double pointed needles, I prefer to use my circular needles. Remember the trick is that you never turn your work! It's fun the way you knit, knit, knit, slip... you'll see!