Showing posts with label Valentine's Day. Show all posts

Monday, February 17, 2014

Project Pile Up : :

Last week I had so many projects going on at once, and to give you a good understanding of my situation, I thought I'd share a little project show and tell today! First I should remind you, I've never been one to have just one or two projects going, but after a couple weeks full of many things that kept me more running around in circles and caused much less time for sewing, things got a little busy!

Diamond Zig Zags in Minimalista!

Rapture Quilt progress!

Fox Pillows in Pale Aqua!

pillow backs!

Matching pillows to crowns!

vday

My Diamond & Zigs Zag Minimalista quilt, a new making rows quilt in Rapture, new fox pillows finished with Chromatics Pointelle, pillows to match my flower crowns (more on that this week), last minute Valentine's decorating & crafting. And, that's not all!  Each day on average I have about four Birthday Crowns orders to fill, felt to cut and organize, several new quilt projects in progress awaiting pictures, surprise gifts to make, let's leave out all the computer work, it's endless! Good thing I love sewing so, so much!

So how about you, when it comes to sewing, are you able to stick to just one or two projects at a time, working start to finish? Or, like me, do you sometimes take on too much?

Wednesday, February 5, 2014

Crowns of Flowers : :

Crown of Flowers

Felt flowers

Making all of these hand-rolled and cut flowers is definitely my new favorite non-quilty thing to do! It was a pretty rough week last week, all three of my kiddos had the flu and I've been having a tough time with some health issues of my own. Making these was the perfect curl up under a quilt on the couch project to keep me still feeling productive! Aren't they so pretty?!

Crown of Flowers

Crown of Flowers

Crown of Flowers

It's been a lot of fun, but my supplies have run out. I only have enough of the beautiful, recycled silk twine that I've been using as my tiebacks to make just two more. Any type of ribbon will work just as well, but I had professed from the beginning that once I ran out, I would be done with these for now!

If you would like to make some of your own, I'm a having a felt sale for 20% off with coupon code: FELT20OFF in my etsy shop! Many of you have asked for me to share a tutorial for the flowers I've been making, I wish I could but I just don't have the time right now. If you follow this link to Pinterest you can find so many already available!

More Crowns!

Have a great day!  ♥  Maureen

Monday, January 27, 2014

Sewing with ♥ : :


Valentine's Flower Crowns

This weekend was another busy one spent making mostly etsy orders during my sewing time, but we did find a little stint both on Saturday and Sunday for some handmade holiday sewing. Valentine's Day has always been a favorite in our house and here on my blog for crafting. My celery stamping project remains in my top ten most popular posts! But really we all just want a reason to keep the house looking festive after the Christmas tree comes down and these slow, cold winter days present lots of time for creating!

First, we made a few Valentine's Day versions of my crown of flowers. I have enough flowers made to offer a few for sale later in the week! If you happen to have a Valentine that you think might like one, feel free to put an order in!

Felt flower making! Hoping to turn these into some sweet crowns to offer before Valentines Day!

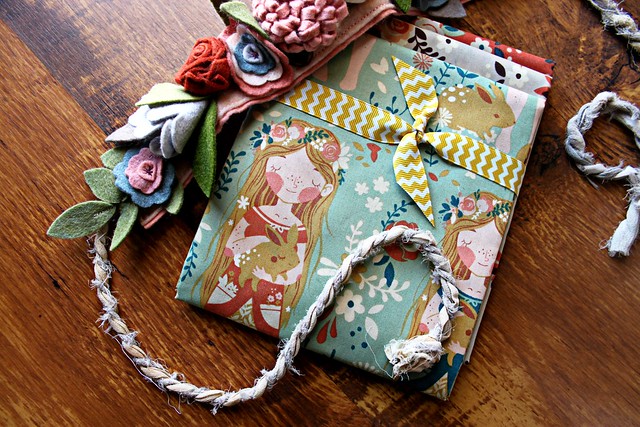
I'm very happy to have decided on a final special use for what's left of these spools of recycled rope I purchased from Anthropologie a couple of years ago. I love how it finishes off these crowns!

Valentine's Flower Crown 
Making

There were a few fox pillow orders made as well! I especially like this one with the burgundy bow and Daisy Janie's Tilly Mumsy in Dusk for the backing!

Lady Fox Pillow

Backed with Tilly

On Sunday Haila and I had a sewing session date, this time she made a quick heart felt garland! My boys and I have made this garland before, first discovered on Betz's wonderful blog two years ago, oh my! You can find her tutorial here on Craftzine, it's so quick & fun! I knew it would make the perfect decor sewing project for a newbie to tackle!

Haila making hearts!

We started with just one 9" x 12" piece of wool blend felt, a spool of red Aurifil, some red & white Divine Twine, and our cutting tools!

Heart Garland Supplies

Two quick stitches later, a little measuring & cutting, and she had made a dozen hearts!

Making hearts!

I love, LOVE this photo! We had some fun with black & white focal editing and I had to share it!

Love this photo!

In just a matter of minutes, after carefully threading her hearts onto the twine, she had made her very first strand of garland! Yes!

Heart Felt Garland

Making this for yourself or with a little one eager to start sewing, will surely start you're February off right! We highly recommend it!

Happy sewing!  ♥ Maureen

Tuesday, February 14, 2012

Happy Valentine's Day!

I thought it would be fun today to share a post dedicated to some of our most favorite Valentine's Day decorations and crafts that we've made and shared here. Here we go...

Celery Stamp Roses! I still remember the look on my kids faces when we tried this little experiment of ours. It worked so well and was SO much fun!

veggie stamping

My Quilted Heart Throw Pillow, you can find the tutorial for this project right here.

Quilted Heart Pillow

Our Heart Felt Garland. I made three of these, they were so much fun! This project was inspired by the amazing Betz White!

Valentine's Day garland

My son Jacob and I made these bakers twine pom poms together last year. A pompom first for the both of us!

pom poms

Our Warm Hearts. The tutorial for these is available right here. My kiddos still have them and occasionally will ask me to heat them up in the microwave.

warm hearts

My new Improv Valentine Mini Quilt! Thank you for all the kind comments yesterday, you made my day!!

Valentine Improv Mini

Last Year's Valentines -- project by Noodlehead, tutorial available here.

Love Mail Valentine's from 2011

My most recent tutorial -- A Valentine Appliqued Apron Set, but definitely not just for this holiday! We plan to wear ours until we wear them out!

our aprons

I hope some of these projects might inspire some of you! 
I wish you all a beautiful day filled with lots and lots of L.O.V.E!

Monday, February 13, 2012

An Improv Valentine Mini Quilt : :

Hooray, I finished up my mini quilt just in time for Valentine's day!

Valentine Improv Mini

I added some black and white binding as planned, although I did mess this part up to tell the truth. I must have been thinking of bunting making while I was cutting, piecing, and pressing my binding because when I finished I had made a double folded role of binding? The type I'd use for bunting making, not quilt binding?? I decided just to work with it and I think it turned out just fine.

Valentine Improv Mini -- black & Binding + stitched with bakers twine

I hand stitched it on using some of my very favorite red & white baker's twine. I think it adds a sweet little touch and matches the baker's twine pom pom Heart Felt Garland I made for our fireplace last year.

Valentine Improv Mini

My favorite part of this mini is definitely the pieced heart! Of course, I'll never get tired of seeing red & aqua together.

Improv Heart

The more I look at the reverse side of my mini, the more I like this side, too! It's a little dark, but I'm happy with the way it looks like a simple sketch.

mini quilt back -- gray, black, & white

This was a fun project for sure! A nice new little Valentine's Day decoration, but not too themed that I'll need to put it away right away. I think decorating with sweet, red hearts and "love" themed projects is perfectly acceptable all year round, don't you agree? I do still have plans to make this pieced heart pillow by Anna very soon!

Making these improv blocks and mini quilts is some of the most fun I have ever had sewing and making, ever!!

Valentine Mini --finished!!

Yes, I quite like these mini quilts! I actually started a new one yesterday that I can't wait to share later in the week!

Happy Monday, friends!

Thursday, February 9, 2012

A Valentine Appliqued Apron Set Tutorial : :

Valentine Appliqued Apron Set Tutorial

Today's tutorial is for a sweet apron set for an adult and child. I use sturdy ticking fabric with simple raw edge applique to add a little Valentine village, that's perfect for wearing all year long. You can use whatever fabrics you'd like with this method of applique to add any details to suit your style or those receiving these aprons. Have fun and be sure to let me know if you give these aprons or any of my tutorial projects a try!

What you'll need : :

  • 3/4 yd of ticking fabric
  • an assortment of scraps for your applique village
  • 1/2 yd piece of heatbond lite
  • 1 - piece of fabric measuring 6" x 24" for child apron waistband
  • 2 - pieces of fabric measuring 5" x 18" for child apron ties
  • 1 - piece of fabric measuring 9"x 32" for adult apron waistband
  • 2 - pieces of fabric measuring 8" x 44" for adult apron ties (I make mine extra long to tie in front)
  • threads -- black for applique stitching and an assortment of colors or white to match your apron fabrics
  • Sewing pins
  • Sharp scissors and/or a rotary cutter/mat set

Cutting and Hemming apron pieces

1. Trim selvedge ends from the fabric. 2. First, cut 14" from one side of the fabric -- this will be the fabric for the child apron. Second, cut remaining fabric to measure 18" x 30" -- this will be the adult apron 3. Hem bottom and sides of these pieces by folding over edge 1/4", press, fold again, press, and sew a double seam to hem those raw edges

Cutting and heeming apron pieces

Once finished, the apron pieces should look like this : :

hemmed bottom and sides

Cutting and piecing your scraps using Heatbond Lite

1. Cut a large square from the heat bond light 2. Cut scrap pieces out in the fabrics chosen for the village design 3. With paper side down, arrange scraps on top of the heatbond 4. Press with iron to adhere fabric pieces to heatbond

Cutting and piecing your scraps using Heatbond Lite

Cutting and adhering the Valentine village pieces

1. Using sharp scissors or a rotary cutter, cut out rectangle, triangle, and square pieces for the village and bunting design 2. Always layout the design first

Cuttting Valetine village pieces from you heatbond fabrics

3. Carefully peel off the paper backs of the pieces, use an iron to press in place. This will permanently adhere the village design to the apron. Don't forget to add the heart! 4. Once the design is adhered to the apron, use black thread to "draw" around the inner edges of each piece added

Remove paper backs and  press to adhere applique pieces
Add heart and black stitching

This is my favorite part! I love the way the black thread make the applique pieces look like a drawing!

finish stitching in black

applique tutorial wip

Choose and cut waistband & tie fabrics  -- see measurements above

Choose waistband & tie fabrics and cut

1. Fold in outside edges of the waistband fabric a 1/4" on each side, press. Do this with all four sides 2. Fold waistband in half, press well 3. Open waistband, place apron piece centered inside the waistband piece

Create waistband

4. Fold over waistband fabric, pin in place 5. Using coordinating thread, sew a seam along top and bottom edges, leaving both ends open

pin and sew waistband

6. Repeat these steps for making the apron ties, be sure to hem the ends of these as well 7. Insert tie pieces into the opening of each side of the waistband, pin in place, sew

making and adding apron ties

Add a few stitches here, this will get pulled at quite a bit when tying the apron on!

stitch in place ( I add extra stitching here since this gets pulled at quite a bit)

Repeat these steps for finishing the adult size aprons and you'll have a lovely set to wear with your little(s) or to give as a nice gift!

Valentine Appliqued Apron Set

We love ours!!

our aprons

I really hope you enjoy this project! This is my favorite so far! I know the tutorial has quite a few steps -- feel free to add a comment here if you have any questions! And, always let me know if you give it a go!! My Quilted Valentine Pillow tutorial is being shared today on Sew Can She, feel free to stop by and check that out!!

Have a lovely day, friends! ♥ Maureen