
Welcome to a new block release day of the Community Sampler sew-along! Wednesdays are quickly becoming my favorite day of the week!!
If you're just now discovering the Community Sampler, today is the release of block no. three of our quilt, so feel free to jump on in! My good friend Sharon Holland and I have teamed up once again to co-host this fun community event and we're so exited to have you sewing with us! Just a reminder that there are eleven blocks in our Community Sampler quilt and each Wednesday on our blogs we'll release a new block PDF or finishing step, share piecing techniques and tips, and provide inspirational photos as Sharon and I make our own Community Sampler quilts! You can visit my Community Sampler Page above in my tabs bar to retrieve each of the released PDF's. It's never too late to join the fun!

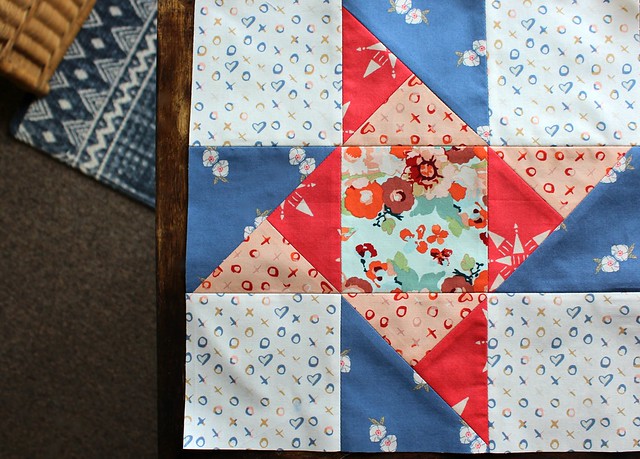
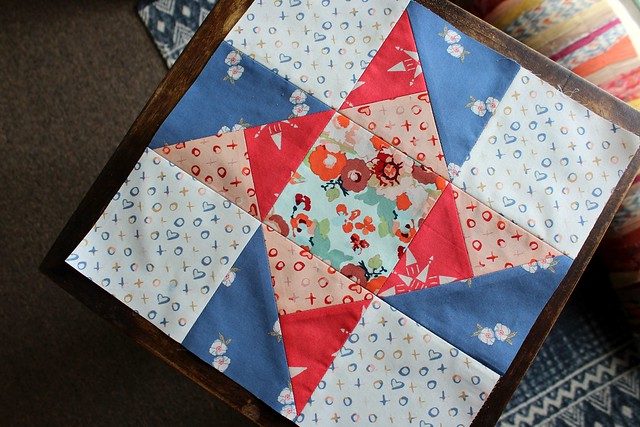
Today's PDF is for our THIRD block -- Ribbon Star. Block instructions come complete with cutting information plus step-by-step illustrations and this week we'll be making two at a time half-square triangles and triple-square triangle units. Be sure to visit Sharon's blog today for additional images and tips for this Ribbon Star Block. Sharon provides beautiful extra visuals each week to help you perfect the techniques needed for making each block, she's super wonderful like that!
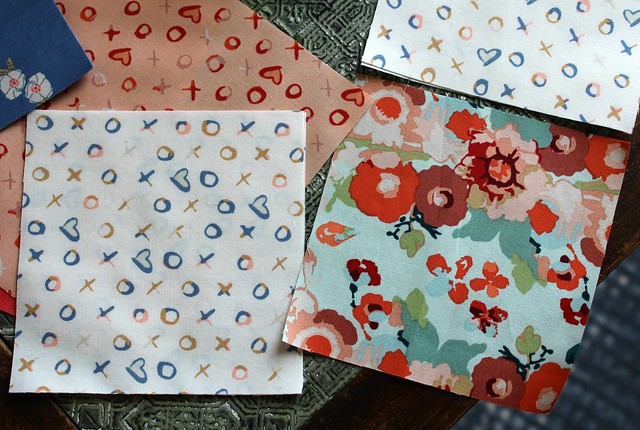
For my own Ribbon Star block I'm using five pretty prints from my Love Story collection -- Hugs & Kisses Warm Peach, Hugs & Kisses Fresh, Flower Stamp Spell Blue, Compassion Ruby Red and Reflection of Love Light. (affiliate links)
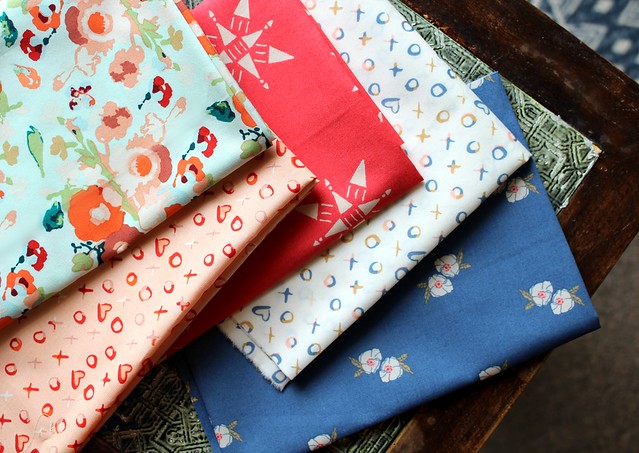
This block calls for four different prints, but I decided to bring in an additional print to add to the five 4 1/2" cuts this pattern calls for, to be the center square of my block.
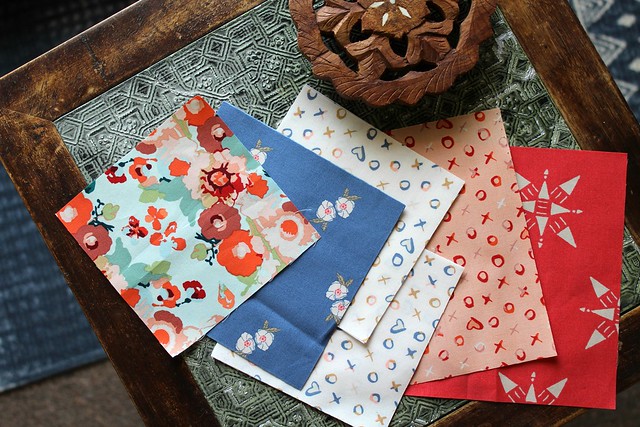
The colorful floral print I chose to be a pretty center focal print and my Hugs & Kisses the four outside squares. The hearts, x's & o's is a subtle directional print, so I was careful to place those squares with the hearts positioned in the same orientation. I won't mind at all that these will be at an angle when set on-point, but I did think it would look best to piece them all in line.
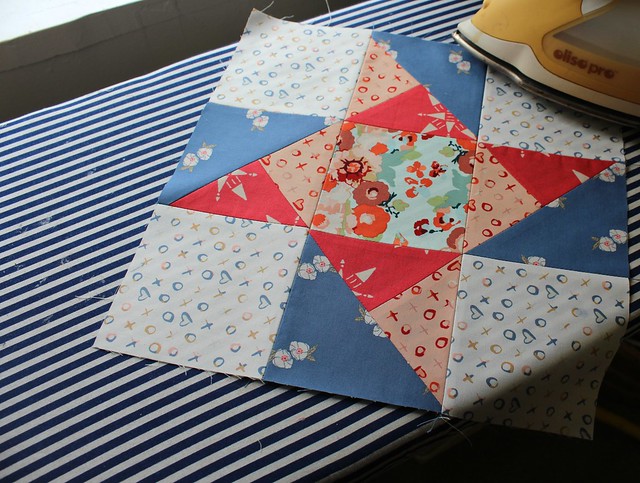
For this block first we make the two at a time HSTs that we so often use, then with those we are making new units, Triple-Square Triangles! You can find a detailed tutorial for making this in Sharon's post today, so be sure to visit her if you need a little extra help!


I was asked several times last week how I press my seams as I piece together my sampler blocks and for the most part I typically press all of my seams open whenever I'm sewing together traditionally pieced blocks. It's just the way I learned several years back when I was a member of a quilting bee. The quilt blocks lay much flatter when the seams are pressed open, and since I'll be having my Community Sampler professionally long-arm quilted, I've read that a flatter quilt top is much easier to quilt. However, I've also read that many people prefer to press their seams to the side because it's faster and is much easier to match your seam intersections. This morning I texted Sharon to ask if she has a preference and hers is to press to the side, so now I'll have to try it! How about you, do you have a preference and/or thoughts on pressing seams open vs to the side?
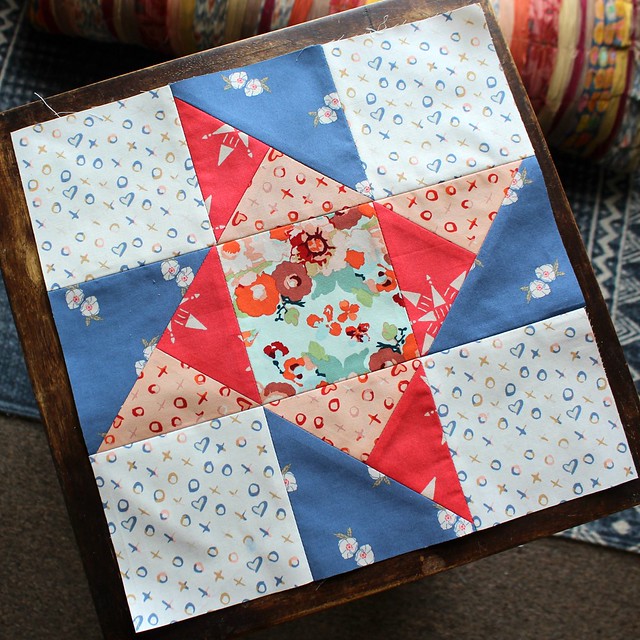
I'm pretty sure I say this every single week during our sew-alongs, at least just to myself, that after finishing each block it is always my new favorite! With this Ribbon Star block, I absolutely declared this one the leader of the three we've made so far!
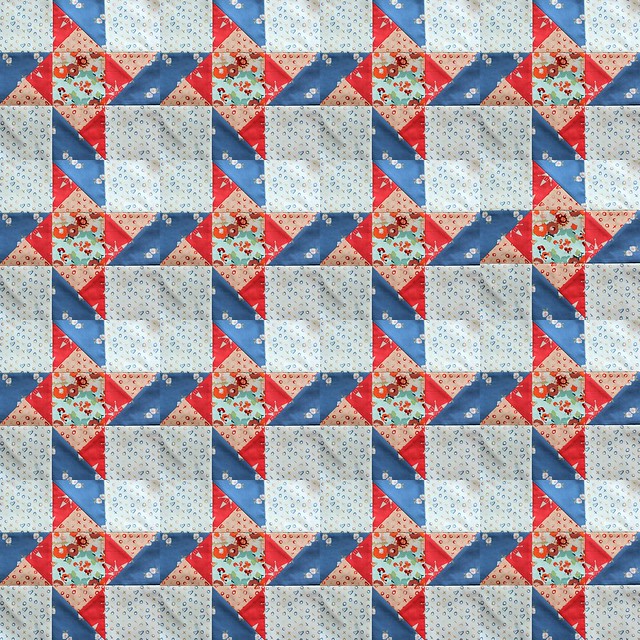
It's fun to create a quick collage of these finished blocks to see how they each would look as a full quilt and a Ribbon Star Quilt would be so pretty, don't you think?! That's just one of the many wonderful things about these sampler quilts, if you love a quilt block you can use the PDF anytime to create a full quilt of just that block. A few SBS makers did just that last year and it was wonderful to see!
I'm also excited to see that the light I've had pouring into my studio this week has greatly improved my photos. I think this week's block photographed extra pretty, as well!
I can't wait to see all of your Ribbon Star blocks! When you share on Instagram use the hashtag #CommunitySampler and be sure to tag @sharonhollanddesigns and myself @maureencracknell so we can visit and see your beautiful work!
If you're just now discovering the Community Sampler, today is the release of block no. three of our quilt, so feel free to jump on in! My good friend Sharon Holland and I have teamed up once again to co-host this fun community event and we're so exited to have you sewing with us! Just a reminder that there are eleven blocks in our Community Sampler quilt and each Wednesday on our blogs we'll release a new block PDF or finishing step, share piecing techniques and tips, and provide inspirational photos as Sharon and I make our own Community Sampler quilts! You can visit my Community Sampler Page above in my tabs bar to retrieve each of the released PDF's. It's never too late to join the fun!
Today's PDF is for our THIRD block -- Ribbon Star. Block instructions come complete with cutting information plus step-by-step illustrations and this week we'll be making two at a time half-square triangles and triple-square triangle units. Be sure to visit Sharon's blog today for additional images and tips for this Ribbon Star Block. Sharon provides beautiful extra visuals each week to help you perfect the techniques needed for making each block, she's super wonderful like that!
For my own Ribbon Star block I'm using five pretty prints from my Love Story collection -- Hugs & Kisses Warm Peach, Hugs & Kisses Fresh, Flower Stamp Spell Blue, Compassion Ruby Red and Reflection of Love Light. (affiliate links)
This block calls for four different prints, but I decided to bring in an additional print to add to the five 4 1/2" cuts this pattern calls for, to be the center square of my block.
The colorful floral print I chose to be a pretty center focal print and my Hugs & Kisses the four outside squares. The hearts, x's & o's is a subtle directional print, so I was careful to place those squares with the hearts positioned in the same orientation. I won't mind at all that these will be at an angle when set on-point, but I did think it would look best to piece them all in line.
For this block first we make the two at a time HSTs that we so often use, then with those we are making new units, Triple-Square Triangles! You can find a detailed tutorial for making this in Sharon's post today, so be sure to visit her if you need a little extra help!
I was asked several times last week how I press my seams as I piece together my sampler blocks and for the most part I typically press all of my seams open whenever I'm sewing together traditionally pieced blocks. It's just the way I learned several years back when I was a member of a quilting bee. The quilt blocks lay much flatter when the seams are pressed open, and since I'll be having my Community Sampler professionally long-arm quilted, I've read that a flatter quilt top is much easier to quilt. However, I've also read that many people prefer to press their seams to the side because it's faster and is much easier to match your seam intersections. This morning I texted Sharon to ask if she has a preference and hers is to press to the side, so now I'll have to try it! How about you, do you have a preference and/or thoughts on pressing seams open vs to the side?
I'm pretty sure I say this every single week during our sew-alongs, at least just to myself, that after finishing each block it is always my new favorite! With this Ribbon Star block, I absolutely declared this one the leader of the three we've made so far!
It's fun to create a quick collage of these finished blocks to see how they each would look as a full quilt and a Ribbon Star Quilt would be so pretty, don't you think?! That's just one of the many wonderful things about these sampler quilts, if you love a quilt block you can use the PDF anytime to create a full quilt of just that block. A few SBS makers did just that last year and it was wonderful to see!
I'm also excited to see that the light I've had pouring into my studio this week has greatly improved my photos. I think this week's block photographed extra pretty, as well!
I can't wait to see all of your Ribbon Star blocks! When you share on Instagram use the hashtag #CommunitySampler and be sure to tag @sharonhollanddesigns and myself @maureencracknell so we can visit and see your beautiful work!
Using #CommunitySampler hashtag will also automatically enter you in the weekly IG Giveaway pool! Remember that your Instagram account does need to be a public account for your post to show up in the Instagram hashtag pool. But please don't worry, if you don't have Instagram or you'd like to keep your account private, we will also be hosting the same giveaway prize, alternately between Sharon's and my blog, so you can choose how and where to enter each week!
Be sure to check back here on Friday for more info on this week's Community Sampler Giveaway with our sponsor Bloc_Loc Rulers! Thanks again for joining us!
Happy sewing, friends! xo Maureen
I didn't think I liked this ribbon star, until I saw it sewn together. It totally changed and I love it! That's the thing about block quilting. It isn't over until its over.
ReplyDeleteI agree! I do think fabric selection makes such a big difference for these traditional blocks. To me this looks happy and fun!
DeleteThanks Maureen! I was taught (by Grandma) to press seams to the side and it has seldom failed me. Pressing open those tiny seams is just not worth it. In my own sewing I will only press open seams on quilts that are for "looking at"--wall hangings and the like. For quilts that get used, I feel that pressing to the side makes stronger seams (and better points!)
ReplyDeleteI agree with you, Mari.
DeleteOooh I LOVE this one!
ReplyDeleteI am going to print this one out and get to work!
Your block is just beautific!🍄
As a longarm quilter, I prefer most seams to be pressed to one side - it makes SID much easier if I need/want to do that. The only time it really helps to have the seams pressed open is when you have more than 2 seams coming together, like with the center of a pinwheel...having at least half of the seams pressed open REALLY helps, otherwise there is a lump in the middle. My longarm doesn't usually have a problem even with those pinwheel lumps, but it CAN deflect the needle and create as long stitch on the back of the quilt. If the lump is large enough, it can break the needle, which is never a good thing. Just my two cents.
ReplyDeleteI am totally trying this,there's more to talk about… Appreciate all the information
ReplyDeleteThis comment has been removed by the author.
ReplyDelete